Table of Contents
Advertisement
Quick Links
Advertisement
Table of Contents

Related Manuals for FLYSURFER SONIC RACE


Summary of Contents for FLYSURFER SONIC RACE
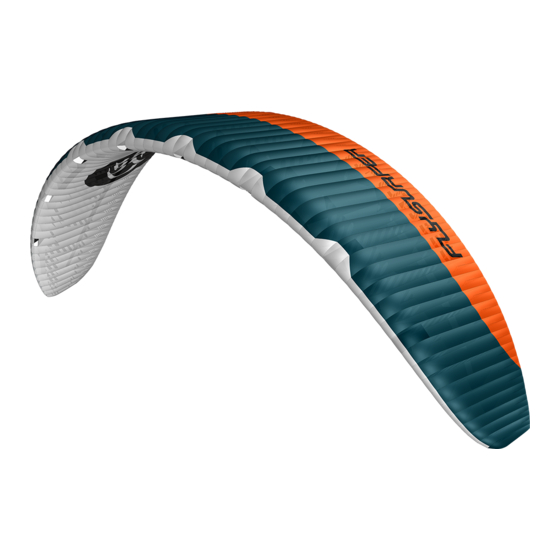
- Page 1 GEAR GUIDE...
- Page 2 Translations of this Gear Guide can be found online at the FLYSURFER website: flysurfer.com/downloads SONIC RACE Manual #01 / 04-2017 Language: English / data subject to change © FLYSURFER Kiteboarding 2017 // www.flysurfer.com...
- Page 3 ENGLISH...
- Page 4 Novak Kistler Ernst Manfred FLYSURFER Kiteboarding! First off, we would like to thank you for purchasing the SONIC RACE and are happy to welcome you to the FLYSURFER family. Hesina Schoenmaker We – the whole FLYSURFER Team – will Ramon...
-
Page 5: Table Of Contents
INHALT SONIC RACE ................7 01.01 Sizes .........................7 01.02 Bag & Accessory Kit ..................7 01.03 Features ......................8 Handling ...................10 02.01 Setting Up .....................10 02.02 Sorting out the bridle .................11 02.03 Securing the kite ..................13 Launching ................14 03.01 Power zone ....................14 03.02 Edge of the wind window with an assistant .........15 03.03 Self launching at the edge of the wind window ........16... - Page 6 Trimming ................29 13.01 Mixer test ..................... 29 13.02 Optimum trim of the flying lines............. 30 Troubleshooting ..............31 Safety Notes ................32 15.01 Do not fly with kites ................... 32 15.02 10 commandments for more safety when kiting ....... 33 Service ..................
-
Page 7: Sonic Race
The bag has been optimized to reduce weight and features many extras. Carrying straps on the outside provide a convenient way to carry your board. Additionally, the SONIC RACE comes with a compression sack. All FLYSURFER kites come with a Repair Kit and a Sandbag. -
Page 8: Features
01.03 Features... - Page 9 Triple Depower Technology IKA-Registration There are 3 ways the kite achieves ma- Your FLYSURFER SONIC Race is approved ximum depower: Reducing the angle of for every IKA race and you do not need to attack, changing the profile and redu- apply for an additional plaque ID number.
-
Page 10: Handling
02 HANDLING 02.01 Setting Up Unroll the lines from your bar whilst walking away from the kite. Unroll your kite upside down into the wind and secure it with something that has no sharp edges and is heavy enough to hold down the kite for the given wind. Check your bridle for tangles. -
Page 11: Sorting Out The Bridle
When the bridle is sorted out, lay the If the lines are still twisted, unt- front lines to the inside and the steering wist them by turning the bar. It may be lines to the outside. If not, follow the tips possible (especially after not being ca- on the “Sorting out the bridle“... - Page 12 Make sure that there are no lines Stick the bar along these lines caught or running behind the kite. through the bridle. Lightly tension up the bridle again to check it. If need be, repeat the last step till the left and right bridles are separated. Undo any loops, knots or bunches that may have formed.
-
Page 13: Securing The Kite
02.03 Securing the kite Make sure that the tips are not flapping too much. This can lead to the bridle tang- A kite needs to be secured ling. The tips can be additionally secured properly even if the wind is with a bit of sand or other suitable object. -
Page 14: Launching
During launching, always pay attention that your brilde lines do not get caught on anything or become tangled. The adjuster of the SONIC RACE should not Tension the lines a bit so that the kite will be fully pulled (depowered) during launch. -
Page 15: Edge Of The Wind Window With An Assistant
Tip: Or position your kite leeward in the soft zone. Make sure you pre inflate the SONIC RACE with enough air. Launch the kite and keep it close to the 3 or 9 o‘clock position. Sheet your bar in, keep the kite powered, pull smoothly left and right to fully inflate the wing tips. -
Page 16: Self Launching At The Edge Of The Wind Window
If the kite does not want to fly on The Kite should be positioned its own, then the assistant should walk 15-30° downwind of you when you downwind a bit, or you upwind. tension the lines for launch. Walk downwind a bit as the kite inflates. 03.03 Self launching at the edge of the wind window Lay the kite out 90°... -
Page 17: Kite Control
Tip: Be aware that the bar needs to be pulled in during your flying phase to get the maximum hangtime. Otherwise the very efficient depower of the SONIC RACE will cause you to fall faster. If you are not used to keeping the bar powered up, then the stopper-ball, a larger depower-... -
Page 18: Landing
06 LANDING 06.01 With an assistant Warning: The assistant should never grab any lines. The easiest and safest way to land your kite is with the help of an assistant. Signal an assistant who knows how to land your Walk towards the assistant and pull kite, that you want to land. -
Page 19: Self-Landing Using The Frontline Safety
Grab both leader lines above Quickly run to the kite and secure it the floaters. as described in “Securing the Kite“. Tip: When using this method it is also possible to walk your way up one of the steering lines to the kite, as long as the wind is light enough. -
Page 20: Relaunch
07.01 Reverse Launch This method works with strong and light winds and with all FLYSURFER kites. In light winds it is the superior relaunch method. Grab the leader lines above the floa- ters as high up as you can (do not grab the flying lines). -
Page 21: Drainage
When the kite is at least one wingspan above the water, let go of one of the leader lines. Make sure FLYSURFER kites feature a water/dirt you keep hold of the other one. drainage system. This ensures that water or dirt are automatically removed and do not stay trapped inside the kite. -
Page 22: Safety System
08.01 Activating the QR If the kite has too much power, wrap the endline around your har- The SONIC RACE is fitted with the Frontli- ness hook. The increased friction will ne Safety (FLS) system. After you activate make it easier to secure the endline. -
Page 23: Emergencies
The danger of getting lifted can be minimized by not fly- ing the kite at the zenith when on land. However, in normal conditions, a FLYSURFER kite will be at its most stable in the zenith. Especially in very gusty conditions the kite can overfly its pilot. -
Page 24: Self-Rescue
09.01 Self-Rescue Tip: The flagged out kite can be pulled behind you on If one is in danger of drifting away from the the safety leash when swim- shore with an un-relaunchable kite, then ming back. However, this it may be prudent to abandon the kite and needs a lot of strength and is swim back to shore if possible. -
Page 25: Packing Up
10 PACKING UP Lay the tips on top of each other, and A FLYSURFER kite can be packed into then the bar on top and roll up the kite. Be its bag very quickly. It is important careful with the bridle lines and stow them... - Page 26 Lay the bar on-top of the kite and Close the deflate valves carefully a bit of the way in from the tips. and fold the kite on both sides of the bar and put it in the kitebag. Throw the bridle lines in between the two halves of the folded kite.
-
Page 27: Care
11 CARE 12 REPAIR FLYSURFER kites are very durable and very The main parts that wear on the kites are the UV and saltwater resistant. With proper care, depower line, the safety endline, as well as your kite may last even longer. Eventual color the spare part lines and the pulleys. - Page 28 Disconnect the front and steering Make sure to attach the new spare lines on one side. Undo the short line part line in the same way as the old one. pieces at the mixer. Reattach the short line pieces and Pull the old spare part lines out of the pull the knots tight.
-
Page 29: Little Connection Lines
13 TRIMMING 12.02 Little Connection Lines As all lines change length over time, we have built in a way to correct the flying characteristics quickly and ea- sily. It is very important that the front and steering lines are setup equally. 13.01 Mixer test Lay out the kite and sort out the bridle. -
Page 30: Optimum Trim Of The Flying Lines
13.02 Optimum trim Bring the A2 / B1 / B2 loops up to the A1 of the flying lines and Z loops and tension the mixer (min. 5 kg tensile load per line). All five knots should be at the same level at standard trim. Steering (back) lines shorten over time in relation to the flying (front) lines. -
Page 31: Troubleshooting
14 TROUBLESHOOTING Should you ever experience a problem with your kite, or if you have any questions about our products, we are available per email or telephone. Competent help can also be found at our experienced dealers and kiteschools. PROBLEM CAUSE SOLUTION the kite pulls to one side when... -
Page 32: Safety Notes
The product may only be used with original spare parts, and may not be modified. Every user should be qualified by a FLYSURFER kiteschool or a FLYSURFER dealer. Read the entire Gear Guide thouroughly before using the kite, and strictly adhere to the procedures. -
Page 33: Commandments For More Safety When Kiting
3. Do not jump in too shallow water. 4. Never modify the kite or bar unless recommended by FLYSURFER. 5. Under load, lines are dangerous. Never wrap lines around any part of your body. -
Page 34: Service
With a worldwide Repairs can be done at either our work- network of dealers, importers, team riders, shop in the head office, or by a FLYSURFER opinion leaders, etc. and of course the sales partner who offers a repair service. - Page 36 FLYSURFER Kiteboarding Brand of Skywalk GmbH & Co. KG Windeckstr. 4 83250 Marquartstein, GERMANY WEBSITE: www.flysurfer.com EMAIL: info@flysurfer.com PHONE: +49 (0) 86 41 69 48 - 30...
Need help?
Do you have a question about the SONIC RACE and is the answer not in the manual?
Questions and answers