Table of Contents
Advertisement
Quick Links
Advertisement
Table of Contents

Related Manuals for Medema Mini Crosser M1 Cabin


Summary of Contents for Medema Mini Crosser M1 Cabin
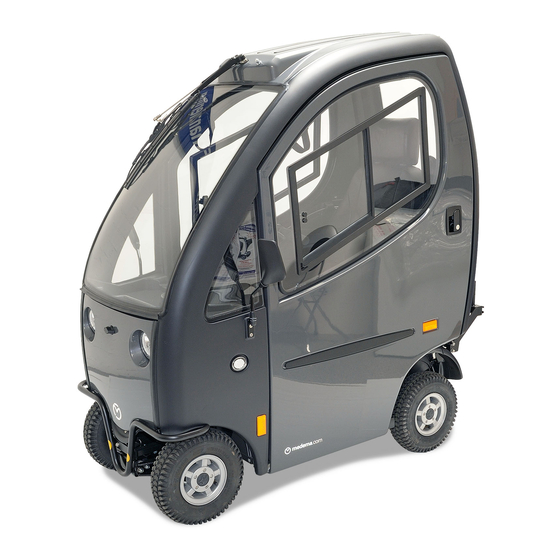
- Page 1 medemagroup P9-0151-S ver. 1.0.3 - October 2018...
- Page 2 Medema Production A/S Service manual P9-0151-S 2 of 66 Version 1.0.3/2018...
-
Page 3: Table Of Contents
Declaration of conformity ............. 10 General care and maintenance ..........11 Control panel ................. 13 Steering column ..............16 Service summary for Mini Crosser M1 Cabin ...... 17 Troubleshooting ..............23 Programming unit ..............25 Programming via PC ............. 26 Information about the vehicle via PC ........ - Page 4 Medema Production A/S Service manual P9-0151-S 4 of 66 Version 1.0.3/2018...
-
Page 5: Introduction
The Service Manual is a supplement to our Spare Parts Catalogue and User Manual. The Mini Crosser M1 Cabin is designed for safe travel for at least 10 years, up to a max. of 5,000 hours, provided it is serviced and safety-checked every year, corresponding to 500 hours of operation. -
Page 6: Symbols
The vehicle is designed for one person only. The Mini Crosser M1 Cabin has been designed for users weighing max. 175 kg. Can be supplied in a HD version as standard for a max person weight of 200 kg. -
Page 7: Safe Servicing
Medema Production A/S Safe servicing To avoid injuries to both the service engineer and the subsequent Š user of the scooter, it is important to get to know the product before servicing it. Be particularly aware of the following: Š... -
Page 8: Tool List
Medema Production A/S Tool list The following tools are needed to service the scooter: Circlip pliers Š Allen keys Š Box spanners, 7-17 mm Š Open-ended spanners, 7-17 mm Š Phillips and torx screwdrivers, 10/15/20/25 slot Š Needle-nose pliers Š... -
Page 9: Storage
0°C. The charger must also be kept dry. If the Mini Crosser M1 Cabin is not going to be used for a long time, it is advisable to protect the tyres by chocking the scooter up. -
Page 10: Declaration Of Conformity
Medema Production A/S Declaration of conformity Medema Production A/S hereby declares that: Machine: Mini Crosser Use: (Prescribed use in User Manual) Model No: M1 Cabin Complies with the Medical Device Directive 93/42/EEC The product is made in accordance with the harmonized standard EN 12184 - Electrically powered wheelchairs, scooters and their chargers. -
Page 11: General Care And Maintenance
Medema Production A/S General care and maintenance A Mini Crosser M1 Cabin does not require much maintenance. It should be kept in a generally good condition, however. The following should be checked regularly: Tyre pressure (if pneumatic tyres are fitted) Š... - Page 12 Š Annual Safety checks The Mini Crosser M1 Cabin is designed for safe travel for at least 10 years, up to a max. of 5,000 hours, provided it is serviced and safety-checked every year, corresponding to 500 hours of operation. The service must be carried out either by Medema Danmark A/S or an authorised workshop.
-
Page 13: Control Panel
Medema Production A/S Control panel Avoid subjecting the control panel to jarring and knocks. Take care when driving and avoid hitting obstacles. The manufacturer accepts no liability in respect of the unauthorised opening, adjustment or modification of the control panel. - Page 14 Medema Production A/S Air channel Windscreen wiper + washer Heat regulation Accelerator (four-finger control) Service manual P9-0151-S 14 of 66 Version 1.0.3/2018...
- Page 15 Medema Production A/S Designation Description Key switch To start the vehicle: Turn the key to driving position (1) When the Mini Crosser is turned on, the control system performs a safety check of the electrical system. The check lasts half a second. If the accelerator is operated during this time, the Mini Crosser will not be able to move until you have turned the key to 0 and back to 1.
-
Page 16: Steering Column
Medema Production A/S Steering column Can be adjusted forward/back with the release lever. Pull down on the lever and pull the handlebars closer for a good driving position. Use the lever again and push the steering column forward to make it easier to get out. -
Page 17: Service Summary For Mini Crosser M1 Cabin
Medema Production A/S Service summary for Mini Crosser M1 Cabin Area Component Check and remedy Suspension and Rear suspension Check whether the rear of the wheels scooter is drooping. The rear wheel must not rub on the mudguard with a load on the seat. Replace the shock absorbers/springs behind the batteries. - Page 18 Medema Production A/S Area Component Check and remedy Suspension and Front wheel Check that the guide rods and balls wheels (contd) suspension. are in good condition and properly tightened. Check the ball bearings in the front wheels and guide spindles for play/ wear.
- Page 19 Medema Production A/S Area Component Check and remedy Motor / gear / Wear Check: That the motor runs smoothly brake and evenly. If not, the carbon brushes (Transaxle) in the motor usually need to be replaced. The minimum length of the brushes is 10mm.
- Page 20 Medema Production A/S Area Component Check and remedy Steering column Play/wear Check the following: - Universal joint - Pins in steering shaft/front fork - That the aluminium bottom section of the steering column is firmly secured to the steering shaft. (*) Wear/rust on the bearings in the steering column.
- Page 21 Medema Production A/S Area Component Check and remedy Covers Check that the plastic covers are in good conditions. Parts with sharp or projecting edges should be replaced. The same applies to covers with an operational function, e.g. the splash guard and battery cover. (water in the...
- Page 22 Medema Production A/S Check if the carbon is okay or needs replacing. Whether it is a Schmid or Mini Crosser transaxle, the carbon must be replaced when it has been worn down to 10mm. Full length 10 mm Service manual P9-0151-S 22 of 66 Version 1.0.3/2018...
-
Page 23: Troubleshooting
Medema Production A/S Troubleshooting The following is a list of various problems that we are frequently asked about. Possible causes and solutions are given. Problem Possible causes Solution The Mini Crosser will not The key has not been Turn the key and wait 5 turned to start. - Page 24 Medema Production A/S Problem Possible causes Solution The ready lamp on the There has been a power Reconnect the charger charger does not light up cut. and repeat the charging even though the charger process. has been on for 10-12...
-
Page 25: Programming Unit
Medema Production A/S Lamps Causes Remedy 6 lamps The S180 is prevented from Stop the unit and wait 3-5 minutes driving. Inhibit 2 is active. This before restarting. Turn the key to 0 may be due to the battery and then to 1 to reset the fault. -
Page 26: Programming Via Pc
Medema Production A/S Programming via PC There are two different versions of the PC program, an OEM version and a dealer version. The OEM version gives complete access to all settings parameters. The dealer version gives limited access. Before programming can... - Page 27 Medema Production A/S Note that the programming connection in the red circle is led out of the S-180 controller via a short cable with a 4-pin Molex connector on the end. Connect the PC using the 4-pin Molex connector, PC cable and USB for serial adapter.
-
Page 28: Information About The Vehicle Via Pc
Medema Production A/S Information about the vehicle via PC Double-clicking on the S-180 program icon displays the following screen. Press Continue to continue. The red down arrow shows that the program can see that the controller is connected. Press the red arrow to load the program from the controller. - Page 29 Medema Production A/S If you do not wish to load the file from the controller but instead a program in the PC, select “Files”, “Open”. Select the desired PC P DRIVES TECHNOLOGY ROGRAMME program, and press “Open”. Having made changes to the program, use the “Program”...
- Page 30 Write Controller - Downloads ALL the program parameter information into the control system connected. Medema Production A/S Read Controller - Inputs all the program parameter information from the control system connected. Preset - Restores all program parameters to factory settings.
- Page 31 Medema Production A/S The menus at the bottom of the screen enable you to: “Copy” – copy the log to another file. “Warning” – It is important to read and understand warnings before attempting to correct any errors. “Print” – print out to a printer...
- Page 32 Write Controller - Downloads ALL the program parameter information into the control system connected. Medema Production A/S Read Controller - Inputs all the program parameter information from the control system connected. Preset - Restores all program parameters to factory settings.
-
Page 33: Fuses And Bulbs
Medema Production A/S Fuses and bulbs Fuse locations Fuse 1 1 x 20 A fuse Charging Item No. SR-00066 (40 A) Fuse 2 1 x 10 A fuse Control system Item No. SR-00066 (10 A) Main fuses, 100 A, fuse type DIN 2581 - 100 A Item No. SR-... -
Page 34: Sockets And Control Panel
Medema Production A/S Sockets and control panel MiniCrosser A/S T-127-5-002 Issue 2.0 Some of the sockets on the card are for optional extras. Some of them are connected at the factory and wired instead to the areas on the scooter where they are to be used. - Page 35 Medema Production A/S The below numbers refer to the socket on the printed circuit in the control panel. Key switch Reverse Emergency stop Headlight Cable trunk Hazard warning lights Cable trunk Indicator card R Electric seat adjustment Max. speed pot.
-
Page 36: Batteries
Used batteries must be disposed of through your supplier or at a recycling centre. Take care when handling any leaky batteries, as they contain corrosive acid. INFO! New batteries can be purchased from Medema Danmark A/S. Service manual P9-0151-S 36 of 66 Version 1.0.3/2018... -
Page 37: Charging
Medema Production A/S Charging The battery manufacturer recommends charging the batteries at temperatures between +10° and +30°C in order to achieve the charging times specified in “Technical data”. Charging takes around 60% longer at +5°C than at +20°C. This is because the battery finds it more difficult chemically to absorb the current. - Page 38 Medema Production A/S It is important to fit the batteries correctly. The battery terminals and snap locks are marked +/-. They must be fitted as shown in the sketch below. Make sure that the snap locks are properly closed. For the same reason there must not be any burrs on the terminals.
-
Page 39: Fuel For Heater
The tank for fuel is placed behind the seat, and filled from the outside. Use ONLY paraffin or diesel. In the front, right side of the Mini Crosser M1 Cabin, you find the the exhaustion from the heater. NOTE! It gets VERY hot. -
Page 40: Windscreen Wiper / Washer
Medema Production A/S IMPORTANT! The heating ribs by the window and by the legs should NOT be covered up when the heating is on. That will cause overheating of the heater Windscreen wiper / washer Start the windscreen wiper by turning this knob. -
Page 41: Replacing The Wiper Blade
Medema Production A/S Replacing the wiper blade To exchange the wiper blade, do the following: Screw this screw out. Lift carefully, so you can pull the wiper blade over the pin. Mount a new in reverse order. Replacing the bulb - headlight Open the front cover, by turning the handle 90°... - Page 42 Medema Production A/S Press down and turn counter clockwise.- and lift out. Now you have access to the bulb. take the bulb out. Mount a new in reverse order. NOTE! Be aware that drain list are not trapped when the front cover is closed.
-
Page 43: Fitting An Accelerator Switch
Medema Production A/S Fitting an accelerator switch Connecting two accelerators at the same time. Options: Standard accelerator on left and right (wig-wag). Š Twist grip accelerator on right and left (single-ended). Š Twist grip accelerator and foot pedal (single-ended). Š... - Page 44 Medema Production A/S Fit the two accelerators. Accelerator cable. Fit the switch so it points to the right Fit the control panel. Avoid trapping/ side. stretching the wires. Turn the scooter on and check that the magnetic brake clicks when the accelerator is activated.
-
Page 45: Fitting A Speedometer
Medema Production A/S Fitting a speedometer The kit contains these parts. Take the seat and cover off, then remove the left rear wheel. Screw the bolt in until it sticks 2-3 mm Plug the connector at the other end into out through the backplate. - Page 46 Medema Production A/S Fit the speedometer with the mounting Find the connector marked KM in the strap provided. rubber bellows. Plug the connector in and put the The finished result. connector and cable back in under the rubber bellows. Service manual P9-0151-S 46 of 66 Version 1.0.3/2018...
-
Page 47: Fitting Corner Speed Reduction
Medema Production A/S Fitting corner speed reduction The kit contains these parts. Take the front cover off. Attach the bracket to the body frame Mount the U-shackle with pipe fitting and using the pre-drilled holes. bolt on the steering column. Please note that the distance to the magnet should be approx. -
Page 48: Parent Potentiometer
Medema Production A/S Parent potentiometer Potentiometer with connector and Remove the seat and cover. Fit the jumper. potentiometer. Remove the speed control. Fit the forward/reverse switch. Turn the scooter on and check that the magnetic brake clicks when the accelerator is activated. -
Page 49: Fitting An Hour Counter
Medema Production A/S Fitting an hour counter Take the plastic cover off the steering Replace with a plastic cover that has an column. hour counter fitted. Plug into connector no. 6. Fit the plastic Panel with hour counter. cover. Take care not to trap any cables. -
Page 50: Fitting A Parent Key
Medema Production A/S Fitting a parent key Parent key. Remove the rubber plug in the plastic cover. Remove the plastic lever. Remove the back plastic cover by undoing the six plastic bolts. Plug the key into connector no. 3. Put the plastic cover back on. -
Page 51: Fitting A Foot Pedal
Medema Production A/S Fitting a foot pedal Complete foot pedal. Open the control panel to connect the forward/reverse switch. Cut a hole for the forward/reverse Plug the forward/reverse switch into switch. contact no. 2. The foot pedal can be located on the Forward/reverse switch mounted on the right- or left-hand side, or in the centre. - Page 52 Medema Production A/S Foot pedal for forward and reverse. It can be located on the right- or left-hand side, or in the centre. Programming must be Wig Wag with this pedal. After completing installation, turn the scooter on and check that the magnetic brake clicks when the accelerator is activated.
-
Page 53: Fitting A Twist Grip Accelerator, Right & Left
Medema Production A/S Fitting a twist grip accelerator, right & left Left-hand twist grip accelerator kit. Right-hand twist grip accelerator kit. Take the plastic cover off. Remove the rubber plug. Remove the lever. Remove the potentiometer. Service manual P9-0151-S 53 of 66... - Page 54 Medema Production A/S Fit the connector and plug in the hole. Fit the twist grip accelerator on the handlebars. Tighten the screws. Plug the twist grip accelerator into the 3-pin connecter used for the standard potentiometer. Fit the forward/reverse switch.
- Page 55 Medema Production A/S Change programming to “Single-ended” via SP1, SP2 or PC. See separate description of programming. Mount the switch and lable as shown above. Turn the scooter on and check that the magnetic brake clicks when the accelerator is activated.
-
Page 56: Securing To Vehicle Floor With Belts
Medema Production A/S Securing to vehicle floor with belts Dahl Engineering belt set for securing in motor vehicles. Item No. C2-0242 ALWAYS use four belts at the back and two at the front. The belts must always be attached to approved fittings in the vehicle and the four eyes welded to the scooter. - Page 57 Medema Production A/S Attachment point Attachment point Greater than the anchorage points on the Greater than scooter the anchorage points on the scooter Service manual P9-0151-S 57 of 66 Version 1.0.3/2018...
-
Page 58: Transporting By Plane
M1 Cabin must always be turned off and the motor brake disengaged during towing. See the section on Brakes. If the Mini Crosser M1 Cabin is to be towed, secure a rope to the tow fitting on the front - marked with a yellow “hook mark”. -
Page 59: Dimensioned Drawing, Mini Crosser M1 Cabin
Medema Production A/S Dimensioned drawing, Mini Crosser M1 Cabin 1030 mm 1610 mm Service manual P9-0151-S 59 of 66 Version 1.0.3/2018... -
Page 60: Front Wheel Alignment
Medema Production A/S Front wheel alignment Front wheel alignment (toe-in) Service manual P9-0151-S 60 of 66 Version 1.0.3/2018... -
Page 61: Technical Data
Medema Production A/S Technical data Technical data M1 Cabin General information: Transport height without seat (Steering column folded 160 cm down) Total length: 161 cm Total length incl. anti-tilt wheel: 169.5 cm Total width: 73 cm Total weight incl. batteries and Ergo Std seat. - Page 62 Medema Production A/S Technical data M1 Cabin Seats: Effective seat width: Ergo Standard without armrests 40,45,50 cm Ergo Standard wiht armrests 55 cm Spinalus 40, 45, 50 cm Mando 48 cm Ergo child / junior 35, 37 cm Effective seat depth:...
- Page 63 Medema Production A/S Technical data M1 Cabin Max. battery dimensions in cm. 26.5 x 17 x 22 28.4 x 26.7 x 23 Battery weight, 2 batteries 56 Ah 43 kg 75/80 Ah 50 kg 110/115 Ah 80 kg Energy consumption in kWh, when charging from “empty”...
- Page 64 Medema Production A/S Service manual P9-0151-S 64 of 66 Version 1.0.3/2018...
- Page 65 Medema Production A/S Service manual P9-0151-S 65 of 66 Version 1.0.3/2018...
- Page 66 medemagroup...
Need help?
Do you have a question about the Mini Crosser M1 Cabin and is the answer not in the manual?
Questions and answers