Xerox Phaser 3100MFP/S User Manual
Xerox printer/fax/scanner/copier user guide
Hide thumbs
Also See for Phaser 3100MFP/S:
- User manual (90 pages) ,
- Instructions manual (36 pages) ,
- Evaluator manual (12 pages)
Table of Contents
Advertisement
Quick Links
Advertisement
Table of Contents

Related Manuals for Xerox Phaser 3100MFP/S


Summary of Contents for Xerox Phaser 3100MFP/S
- Page 1 TELECOM XEROX Phaser 3100MFP/S User Guide...
-
Page 2: Dear Customer
For your security and comfort, we urge you to carefully read the chapter Security before attempting use. In buying this multifunction machine, you have opted for a quality XEROX product. Your device satisfies all of the different needs of a modern office automation tool. -
Page 3: Table Of Contents
Print the solution to a grid Network features Type of radio network Radio infrastructure network Radio ad-hoc network Radio networks (WLAN) Connect your WLAN adaptor Configure your network Creating or rejoining a network Referring to or changing your network parameters - I - Phaser 3100MFP/S... - Page 4 PC Features Introduction Configuration requirements Software installation Installing the full software package Installing drivers only Installing the drivers using the Xerox Companion Suite software Installing the drivers manually Connections Software Uninstallation Uninstall the software from your PC Uninstall the drivers from your PC...
-
Page 5: Security
Please read the following instructions carefully before operating the machine and refer to them as needed to ensure the continued safe operation of your machine. Your Xerox product and supplies have been designed and tested to meet strict safety requirements. These include safety agency evaluation and certification, and compliance with electromagnetic regulations and established environmental standards. -
Page 6: Declaration Of Conformity
Your Xerox equipment and supplies have been designed and tested to meet strict safety requirements. These include safety agency examination, approval, and compliance with established environmental standards. To ensure the continued safe operation of your Xerox equipment, follow these safety guidelines at all times: Do These •... -
Page 7: Electrical Safety Information
4. Plug the power cable directly into a correctly grounded electrical outlet. If you are not sure whether or not an outlet is correctly grounded, consult an electrician. 5. Do not use an adapter to connect any Xerox equipment to an electrical outlet that lacks a ground connection terminal. -
Page 8: Disconnect Device
Install the system in a well-ventilated room. If you need additional information about ozone, please request the Xerox publication Facts About Ozone (part number 610P64653) by calling 1-800-828-6571 in the United States and Canada. In other markets, please contact your local Xerox representative. -
Page 9: Regulatory Information
Xerox environmental programs, visit www.xerox.com/environment.html. If your product is not part of the Xerox program and you are managing its disposal, please note that the product may contain lead and other materials whose disposal may be regulated due to environmental considerations. For recycling and disposal information, contact your local authorities. -
Page 10: North America (Usa, Canada)
Xerox environmental programs, visit http://www.xerox.com/environment. If you are managing the disposal of your Xerox product, please note that the product may contain lead, mercury, Perchlorate, and other materials whose disposal may be regulated due to environmental considerations. The presence of these materials is fully consistent with global regulations applicable at the time that the product was placed on the market. -
Page 11: Security Directives
For installation conditions and safe use precautions, refer to chapter Installation, page 11. - The laser beam can cause irreversible eye damage. - Avoid contact with powered parts because it can lead to electrical shock with unfortunate consequences. - 7 - Phaser 3100MFP/S... -
Page 12: Positions Of Safety Labels On The Machine
Phaser 3100MFP/S Positions of Safety labels on the machine The device has warning labels at the positions shown below. For your safety, you must never touch these surfaces when you remove a paper jam or when you replace the Toner cartridge. -
Page 13: Software Use License
Phaser 3100MFP/S Software use license CAREFULLY READ ALL THE TERMS AND CONDITIONS OF THE PRESENT LICENSE BEFORE OPENING THE SEALED ENVELOPE CONTAINING THE SOFTWARE. OPENING THIS ENVELOPE INDICATES THAT YOU ACCEPT THESE TERMS AND CONDITIONS. In case you should not accept the terms of this license, the CD-ROM packaging should be returned to the retailer unopened, along with the other components of the product. -
Page 14: Applicable Law
Registered trademarks Given the technical evolution, Sagem Communications reserves the right to modify the technical specifications of this product and/or to stop its manufacturing at any time and without notice. Xerox Companion Suite is a registered trademark of Sagem Communications. -
Page 15: Installation
Such items create fire hazards or electric shock hazards. - Prevent water and any other liquid from spilling on the machine or near to it. Any contact of the machine with water Phaser 3100MFP/S - 11 -... -
Page 16: Safety Information
Phaser 3100MFP/S or liquid can cause a fire hazard or an electric shock hazard. - If liquid or metallic item gets accidentally inside the machine, turn it off immediately, unplug the power cord and contact your retailer. Otherwise, you will face a fire hazard or an electric shock hazard. -
Page 17: Power Supply
When moving the machine on a desk, it must be lifted and not dragged. Handling the print cartridge • Must not be stood on the side, or held upside down. • Must not be shaken strongly. Phaser 3100MFP/S - 13 -... -
Page 18: Rules For Use Symbols
Phaser 3100MFP/S Rules for use symbols WARNING Indicates important safety notes. Ignoring these notes could result in serious injury or death. Be sure to read these notes. They can be found in the Safety information section of this manual. CAUTION Indicates important safety notes. -
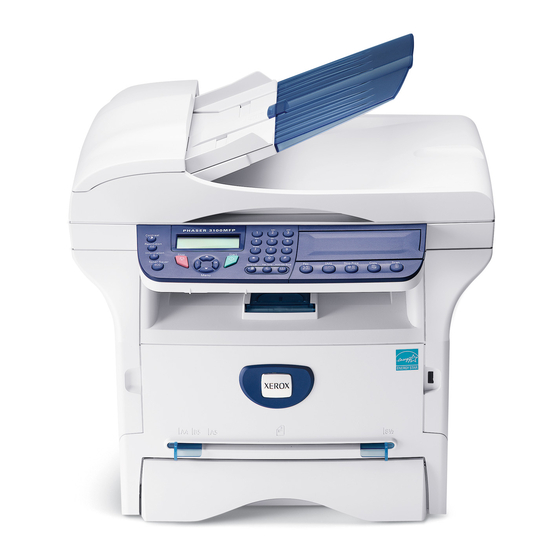
Page 19: Machine Overview
6. Master USB interface connector (USB key) 7. Manual paper feed setup guides Front and Back sides 8. Manual input tray 9. Paper tray 10. Print cartridge access cover 11. Output support 12. Paper output 13. Smart card insertion slot - 15 - Phaser 3100MFP/S... -
Page 20: Control Panel
Phaser 3100MFP/S Control panel 1. Screen. 2. Digital keypad. 3. Key : document scan to the PC or an external storage device (USB key). 4. Key : copy. 5. Key : stops the current PC print job. 6. Key : start. -
Page 21: Packaging Contents
1 Safety guide and 1 Installation guide 1 PC installation CD ROM 1 power cord 1 USB cord Phaser 3100MFP/S Device installation 1 Unpack the device. 2 Install the device adhering to the security notices stated at the beginning of this booklet. -
Page 22: Print Cartridge Installation
Phaser 3100MFP/S pushing lever (C). 4 Take a paper stack, pull the paper off and align it on a flat surface. 5 Put the paper stack in the tray (200 sheets of 80 g/ m² paper for instance). 6 Slide the tray back in its location. -
Page 23: Starting Your Device
4 Print making sure that the chosen paper size corresponds to the selected format on the printer (refer to Copy, page 21). button. A - 19 - Phaser 3100MFP/S if no APER EMPTY Before loading paper, refer to the paragraph Paper recommendations, page 13. -
Page 24: Use Of Envelopes
Phaser 3100MFP/S Use of envelopes • Feeding can be done only through the manual feed. • Recommended area should be the area which excludes 15 mm from the leading edge, 10 mm from both the left and right edges, and the rear edge. -
Page 25: Copy
2 Enter the desired number of copies and confirm with the OK button. the printing option - 21 - Phaser 3100MFP/S , confirm with the OK then confirm with the OK , then , then confirm with the OK button. -
Page 26: Special Setups For Copying
Phaser 3100MFP/S 3 Choose the paper tray AUTOMATIC or MANUAL with the buttons , then confirm with the OK button. Copying in ID Card mode is only possible on A4 (original document size < A5) or Letter (original document size < Statement) paper Important size. -
Page 27: Scanned Original Setup
2 Setup the left / right margins offsets (by 0.5 mm steps) with the buttons 3 Confirm by pressing the OK button. TYPE 4 Exit this menu by pressing the button. - 23 - Phaser 3100MFP/S Default tray Tray used for copy Selection between the AUTOMATIC main tray manual tray. -
Page 28: Top And Bottom Printing Margin Shift
Phaser 3100MFP/S Top and bottom printing margin shift If you want to, you can offset the lateral margins of the document towards the top or the bottom during printing. 856 - ADVANCED FCT/SCAN. & PRINT/TOP 1 Press , enter 856 using the keypad. -
Page 29: Parameters/Setup
Your machine is continuously being updated, new functions are regularly made available. benefit, visit Note www.xerox.com. You can also use the update function available with the Xerox Companion Suite software to download the latest online updates (see Firmware update, page 49). Language This setting enables you to choose the menu language of your choice. -
Page 30: Lock The Machine
Phaser 3100MFP/S The printing of the list of setups starts. You can also access the PRINT menu Note by pressing the Lock the machine This function prevents non-authorized people from accessing the machine. An access code will be required every time someone wants to use the device. After each use, the device will lock automatically. -
Page 31: Games
- 27 - Phaser 3100MFP/S Printing is not possible on A5 (or Statement) paper size. 522 - PRINT / SUDOKU / PRT SOLUTION , enter 5 using the keypad. Confirm You can also access the PRINT menu by pressing the button. -
Page 32: Network Features
2 Set up the parameters for your machine so that it can function in a network. 3 Having set up the parameters for your device, install the Xerox Companion Suite software onto your PC with the necessary printer drivers. Once the machine is incorporated into a WLAN network, you can from your PC: •... -
Page 33: Connect Your Wlan Adaptor
(SSID) and the encryption key). These must match the network’s specifications. 1 Plug your WLAN USB key into the USB port of your machine. Phaser 3100MFP/S Configure your network We recommend that the settings of your WLAN network should only be Note... -
Page 34: Referring To Or Changing Your Network Parameters
Phaser 3100MFP/S 8 IP CONF.: MANU or IP CONF.: AUTO appear on the screen. If you choose to set up the system manually, go to the next paragraph and enter the parameters IP ADDRESS, SUBNET MASK and GATEWAY. 9 At the end of this procedure, you return to the main menu of CONFIG. -
Page 35: An Example Of How An Ad-Hoc Network
Once the network has been set up, the LED of the WLAN USB key should be on. You must now set up the PC. - 31 - Phaser 3100MFP/S , select the menu SETUP using the keys and confirm with OK. and confirm... -
Page 36: Setting Up The Pc
Phaser 3100MFP/S Setting up the PC For this section, refer to the instructions supplied by the manufacturer of the WLAN USB key to help you to find and join the "house" network. 1 You may need to install the software for the WLAN USB key on the PC, if this has not already been done. -
Page 37: Usb Memory Key
OK. Select the printing format (for JPEG files): A4 or LETTER (depending on model), or PHOTO and confirm with OK. - 33 - Phaser 3100MFP/S 01 - MEDIA / PRINT DOC. / FILE buttons and buttons and confirm buttons and... -
Page 38: Delete Your Files Stored On The Key
Phaser 3100MFP/S Select the printing format: THICK or NORMAL and confirm with OK to start printing. 5 Exit this menu by pressing the Delete your files stored on the key You can delete files stored on your USB memory key. - Page 39 - no icon: auto resolution. • Scanning in COLOUR: icon: text resolution. - no icon: auto resolution. Pressing immediately starts the scan and sends a file to the USB memory key with the parameters defined in the scan format. Phaser 3100MFP/S - 35 -...
-
Page 40: Pc Features
Phaser 3100MFP/S PC Features Introduction The Xerox Companion Suite software allows the connection of a personal computer with a compatible machine. From the PC, you can: • manage the machine, allowing you to set it up according to your needs, •... -
Page 41: Installing Drivers Only
The following screen appears to indicate the progression of the installation. 6 Click on OK to finish the installation. Your Xerox Companion Suite kit is successfully installed on your PC. You can now connect your machine, refer to paragraph Connections, page 39. - Page 42 I 11 A screen informs you of the installation progress. 12 Click on OK to finish the installation. The Xerox Companion Suite software is now installed on your PC. You can now connect your machine, refer to paragraph Connections, page 39.
-
Page 43: Installing The Drivers Manually
PC and the machine requires a USB 2.0 shielded cable no more than 3 meters long. It is recommended to install the Xerox Companion Suite software first and then to connect the USB cable to your machine (see Installing the full software package, page 36). -
Page 44: Software Uninstallation
Turn your PC on and log in as administrator. Depending on the installation mode used, select the required uninstallation mode: • If you have installed the drivers with the Xerox Companion Suite software, see paragraph Uninstall the drivers using the Xerox Companion Suite software. •... -
Page 45: Machine Management
The Xerox C you to run the following utilities and software: • get H • run the P To run a software or utility contained in the Xerox OMPANION with the mouse. - 41 - Phaser 3100MFP/S and C IRECTOR... -
Page 46: Companion Monitor
Phaser 3100MFP/S Companion Monitor Graphical presentation Run the application by clicking on the X icon located on your desktop or from the menu ONITOR >A > X TART ROGRAMS EROX OMPANION 3100 MFP > C HASER OMPANION From this screen you can monitor the information or configure your machine from the tabs: •... -
Page 47: Removing A Device
• number of scanned pages, • number of sent and received pages. Xerox Companion Suite features in the drop- Document scanning The document analysis can be carried out in two ways: • either by the S... -
Page 48: Printing
TIFF format. Printing You have the ability to print your documents via a USB connection or a WLAN connection. During the installation of the Xerox Companion Suite software, the X 3100MFP printer driver will EROX HASER be installed automatically onto your PC. - Page 49 9 Even pages are printed on the other side of the sheets. Once all pages are printed, remove the ...: explanation sheet. If a paper jam or a paper size error Important occurs, the job is cancelled. You must then resubmit the print job. - 45 - Phaser 3100MFP/S...
-
Page 50: Maintenance
Phaser 3100MFP/S Maintenance Service General information For your safety, it is imperative to refer to the security directives CAUTION presented in chapter Security, page 1. To ensure that your machine is kept in the best conditions, it is recommended that you periodically clean the interior of the machine. -
Page 51: Issues With Smart Cards
Cleaning the machine’s exterior surfaces Clean the external part of the printer with a soft cloth dampened in mild detergent. Phaser 3100MFP/S Printer issues Error messages When the printer encounters any of the problems described below, the corresponding message is shown on the machine display. -
Page 52: Paper Jam
Phaser 3100MFP/S Paper jam When printing, a sheet of paper may get stuck in the printer or the paper tray and cause a paper jam. In case of a paper jam in the machine, the following message appears: PAPER JAM... -
Page 53: Pc Printing Via Wlan Connection
Phaser 3100MFP/S Firmware update Updating the machine firmware requires that the Xerox Companion Suite software be installed on your PC, and that the PC is connected to the machine (see PC Features, page 36). -
Page 54: May Be Set Up 31 Specifications
Phaser 3100MFP/S Specifications Physical specifications Dimensions: Weight: Electrical specifications Power supply (see rating plate): Electric consumption: Environmental specifications Operating temperature: Peripheral specifications Printer Type: Resolution: Speed: Preheating time: First page out time: a. Printing speed may vary depending on used operating systems, computer specifications, software applications, connection modes (USB or WLAN), paper sizes as well as file types and sizes. -
Page 55: Consumable Specifications
Consumable specifications Print cartridge Phaser 3100MFP Standard-Capacity Print Cartridge Phaser 3100MFP High-Capacity Print Cartridge Specifications are subject to changes for improvement without notice. Phaser 3100MFP/S 106R01378 106R01379 - 51 -... -
Page 56: Print The List Of Files Located In The Key 33 Customer Information
As part of our continuing quest for total customer satisfaction, all of our products are made with ease-of-use and reliability in mind. If you need assistance during or after product installation, please visit the Xerox website for online solutions and support: http://www.xerox.com...