Table of Contents
Advertisement
Translation of the original
operating instructions
EPAC (electrically power assisted cycles) EN 15194
Read at least pages 4-11 before your first ride!
Perform the functional check on pages 12–14 before
every ride!
Observe the chapter "Intended use", the service
schedule, the bike card and the handover report!
Advertisement
Table of Contents

Subscribe to Our Youtube Channel
Related Manuals for Centurion Backfire E 640.27

Summary of Contents for Centurion Backfire E 640.27
- Page 1 Translation of the original operating instructions EPAC (electrically power assisted cycles) EN 15194 Read at least pages 4-11 before your first ride! Perform the functional check on pages 12–14 before every ride! Observe the chapter “Intended use”, the service schedule, the bike card and the handover report!
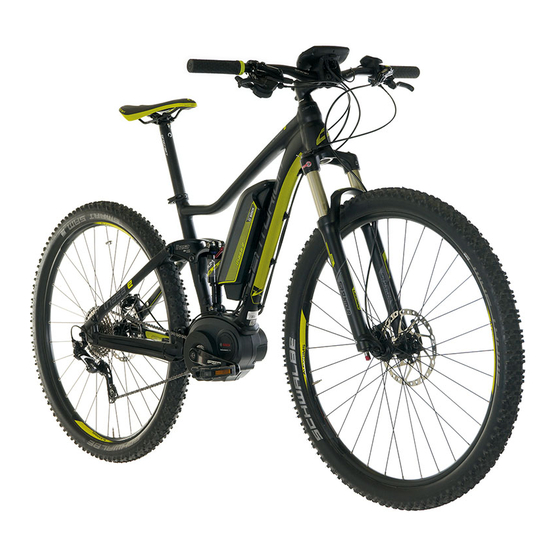
- Page 2 Frame: Suspension fork: Motor Top tube Chainstay Fork crown Stanchion tube Rechargeable battery Down tube Rear stay Lower leg Display and Seat tube Head tube command console Drop-out Stem Handlebars Shifter Saddle Brake lever Seat post Headset Seat post clamp Brake front Rotor Brake rear...
- Page 3 Frame: Suspension fork: Rear stay Fork crown Central tube Motor Stanchion tube Rechargeable battery Seat tube Head tube Lower leg Display and Chainstay Drop-out command console Handlebars Bell Stem Twist grip Brake lever Saddle Headset Suspension seat post Seat post clamp Front lamp Rear light Pannier rack...
- Page 4 Translation of the original CENTURION operating instructions The translation of these original CENTURION operat- ing instructions includes the following pedelec types: Pedelec / e-bike / EPAC Imprint: Edition 1, October 2015 It is essential to also observe the com- prehensive original CENTURION user...
-
Page 5: Table Of Contents
Adjusting saddle position and tilt Guarantee on CENTURION bikes ..... . . 52 Adjusting the brake lever reach ......28 Service schedule . -
Page 6: Some Notes On The Translation Of These Original Centurion Operating Instructions
The illustrations on the first pages of the translation The described possible consequences will not be re- of the original CENTURION operating instructions peated in this translation of the original CENTURION show typical CENTURION pedelecs (e+f). One of operating instructions every time one of the symbols these CENTURION pedelecs looks similar to the appears. -
Page 7: General Safety Instructions
CENTURION pedelec and stand- have chosen a product of high quality. Each com- ard components and provides useful information and ponent of your new CENTURION pedelec has been warnings. In addition to this, the system instructions designed, manufactured and assembled with great of your drive manufacturer give important information care and expertise. - Page 8 CENTURION pedelec. For more informa- potentially dangerous activity that requires the rider tion see chapter “Riding a CENTURION pedelec – to stay in control of his or her CENTURION pedelec Special features“. at all times. Be aware from the moment you set off that you ride at a higher speed than without motor.
-
Page 9: Intended Use
Drop-out Stem nal CENTURION operating instructions (a). Here you Handlebars Shifter for a specific use. Be sure to use your CENTURION Saddle Brake lever Seat post will find two CENTURION pedelecs showing all the Headset Seat post clamp pedelec only according to its intended use, as it may essential components. - Page 10 Most CENTURION pedelecs are designed for cy- It is essential to observe the category cling exclusively on lanes and roads with a smooth your CENTURION bike belongs to. The surface (e). Only use trails that are allowed for category indicates the ground for which bicycles.
-
Page 11: Before Your First Ride
CENTURION pedelec or CENTURION e-bike in quirements may vary in each country. The fittings the bike card. Keep the specific regulations in of your CENTURION pedelec are, therefore, not mind when riding on public roads and through necessarily complete (a). - Page 12 Be sure to first For more information see the chapter “Adjust- practice using the brakes on a level, non-slip ing the CENTURION bike to the rider” in this surface off public roads! Slowly approach higher translation of the original CENTURION operating instructions as well as in your comprehensive brake performances and speeds.
- Page 13 CENTURION user manual as well as in the stress and fail. Risk of an accident! instructions of the component manufacturers on the enclosed CENTURION CD-ROM.
- Page 14 Pulling the brake lever of the rear brake without drive assistance. A CENTURION pedelec stops the motor (e). Emergency stop! is markedly heavier than a CENTURION bike without drive assistance. For this reason park- In case you had a crash with your...
-
Page 15: Before Every Ride
However, it does tests during production and a final check has been not matter if your CENTURION pedelec is left as it carried out by your CENTURION dealer. Neverthe- is for a short time (e.g. overnight) when less than less, be sure to check the following points to exclude 50 % charged. - Page 16 For more information see the chapter “The by your CENTURION dealer immediately. wheels and the tires” in your comprehensive orig- inal CENTURION user manual as well as in the For more information see the chapter “The instructions of the component manufacturers on brake system”...
- Page 17 CENTURION CD-ROM. are riding with your hands on bar ends or on multi-position handlebars. The brake levers 11. In case you have a CENTURION pedelec with are not always within easy reach. suspension, press down on your CENTURION...
-
Page 18: After An Accident
After an accident Do not set off on your CENTURION pedelec when the drive HMI or the display shows a warn- ing. In such a case, contact your CENTURION 1. Check the rechargeable battery (e+f). If the dealer immediately. rechargeable battery is no longer properly in its... - Page 19 For more information see the chapters “Adjusting erence. If necessary, open the clamping, realign the CENTURION bike to the rider” and “The head- the saddle and retighten the clamping. set” in this translation of the original CENTURION...
- Page 20 CENTURION CD-ROM. When in doubt, it is always the better choice for your safety to have these parts replaced. Ask 8. Finally, take a good look at the whole CENTURION your CENTURION dealer for advice. pedelec to detect any deformations, color If your CENTURION pedelec is assem- changes or cracks (g).
-
Page 21: How To Use Quick-Releases And Thru Axles
Be sure to check whether all to avoid mounting the front wheel accidentally quick-releases are tight before you set off on your the wrong way round. In the case of CENTURION CENTURION pedelec. Quick-releases should be pedelecs with disc brakes and quick-releases... -
Page 22: How To Fasten Components Securely With A Quick-Release
Close the quick-release lever and check it again for tightness. For more information see the chapters “Adjusting the CENTURION bike to the rider” and “The wheels and Finally lift the pedelec a few centimeters, so that the the tires” in this translation of the original CENTURION... -
Page 23: Thru Axles
(a-d). Some systems are tightened with axles” in your comprehensive original quick-releases. Other systems may require special CENTURION user manual and in the instructions tools for assembly or disassembly. of the suspension fork, thru axle and wheel man-... -
Page 24: Adjusting The Centurion Bike To The Rider
CENTURION user manual as well as in the in- clearance between your crotch and the top tube so structions of the component manufacturers on that you do not hurt yourself when you have to get off the enclosed CENTURION CD-ROM. -
Page 25: Adjusting The Saddle To The Correct Height
Adjusting the saddle to the correct of aluminum, titanium or steel. Do not grease carbon seat posts and/or carbon seat tubes in the clamping height area! Use special carbon assembly paste instead. Align the saddle with the frame by using the saddle The correct saddle height depends on the length of nose and the bottom bracket or top tube as a refer- your legs. -
Page 26: Adjusting The Height Of The Handlebars
Once greased, carbon components may never again If your CENTURION pedelec has a Vario ensure reliable clamping! Use special carbon as- seat post (g), you can find more infor- sembly paste instead. - Page 27 CENTURION dealer! safe side, original spare parts. Your CENTURION dealer will be pleased to help you. These routines require a certain amount Make sure the handlebar/stem com- of manual skill and (special) tools.
-
Page 28: Stems For Threadless Systems, The Aheadset System
In this case riding can be unsafe. If in doubt, In the case of CENTURION pedelecs with Aheadset ® ask your CENTURION dealer. headsets the stem also serves to adjust the bearing preload. -
Page 29: Correcting The Fore-To-Aft Position And Horizontal Tilt Of The Saddle
This distance can be altered the cables – a job best left to your CENTURION slightly by changing the position of the saddle rails dealer! in the seat post clamp. - Page 30 Make sure the seat of the saddle remains horizontal Clamping with two bolts in line (f): release both as you retighten the bolt(s). Your CENTURION bolts two to three turns counterclockwise, other- pedelec should stand on level ground while you ad- wise the whole assembly can come apart.
-
Page 31: Adjusting The Brake Lever Reach
If the width of the saddle rails does not fit exactly the component manufacturers on the enclosed into the clamp grooves, do not try to force them in. CENTURION CD-ROM. The clamping mechanism or the saddle rails could break and result in an accident and/or injuries to the Poorly tightened or loosening bolts can rider. -
Page 32: Adjusting The Tilt Of The Handlebars And The Brake Levers
There are different systems. Ask Set the handlebars to a position in which your wrists your CENTURION dealer for advice or read the in- are relaxed and not turned too much outwards. structions of the component manufacturers on the enclosed CENTURION CD-ROM. - Page 33 (b). Tighten the bolts alternately or bar ends to the aluminum handlebars and in small increments with a torque wrench to of your CENTURION pedelec, inform yourself in the lower value of the recommended torque val- advance whether your CENTURION pedelec is ues.
-
Page 34: The Brake System
(right or left). If cy situation, the brakes must bring your CENTURION it is not, ask your CENTURION dealer to switch the pedelec to a halt as quickly as possible. brake levers before you set off for the first time. -
Page 35: The Gears
CENTURION pedelec serve to adjust the gear ratio to the terrain you are riding The H-Sync gear system integrates the NuVinci on and the desired speed. Modern CENTURION Harmony gear hubs into the Intuvia system of its ®... -
Page 36: Suspension Forks
Be sure to have this the frame. If your suspension fork has a lockout adjustment carried out by your CENTURION dealer mechanism (h), do not activate the lockout func- at the time of delivery. -
Page 37: Rear Shocks
Be sure to have this adjustment carried out mechanism, do not activate the lockout func- out by your CENTURION dealer at the time of delivery. tion when riding in rough terrain, but only when rid- For more information see the chapter “Rear shocks” in ing over smooth terrain (roads, field tracks). -
Page 38: Riding A Centurion Pedelec - Special Features
– Special features The system is switched on and off at the buttons of the control element on the battery or on the handle- Your CENTURION pedelec is designed to be used bars Furthermore, different assistance modes can like a conventional bicycle. The unique riding expe-... - Page 39 CENTURION bike to make your own contribution roads (due to wetness, snow, gravel etc.). This to moving forward as efficient as possible. Your ca- applies all the more when riding bends. Risk of dence should always be in a smooth flow.
-
Page 40: Range - Useful Information For A Long Ride
The charge state of your rechargeable battery can CENTURION pedelec in cooler weather, in par- be read from the display of the control element on ticular when it is cold... -
Page 41: Riding Without Drive Assistance
Riding without drive assistance You can also use your CENTURION pedelec with- out drive assistance, i.e. just like a conventional CENTURION bike. Observe the following points when riding without re- chargeable battery (a): If you want to ride without drive assistance with... -
Page 42: Useful Information For Proper Handling Of The Rechargeable Battery
Remove the rechargeable battery (e+f), if you do not big, non-inflammable plate made of ceramics use your CENTURION pedelec for a longer period or glass! Unplug the battery once it has been of time (e.g. during the winter season). Store the re- charged up. - Page 43 CENTURION pedelec or them with a dry rag. CENTURION e-bike, if you do not use your CENTURION pedelec for a longer period of time and keep it clean and dry.
-
Page 44: Transporting The Centurion Pedelec
Keep in mind that the weight of a CENTURION pedelec is high- Transporting the CENTURION er than the weight of a bike without drive. Maybe... -
Page 45: By Train / By Public Transport
There are e.g. some places where you are only allowed for travel with your CENTURION pedelec during off-peak hours and with an additional bicycle ticket. Inform yourself in time about the reg-... -
Page 46: Service And Maintenance
Nevertheless, your intervals. The off-season during the winter months is CENTURION pedelec needs regular servicing (e). a very good time to take your CENTURION pedelec Have your local CENTURION dealer do the sched- to your CENTURION dealer for the annual inspection, uled maintenance work. - Page 47 Servicing and repairs are jobs best left Keep in mind that the auxiliary drive may to your CENTURION dealer. If you do lead to partly higher wear than you are not have your CENTURION pedelec ser- used to. This applies in particular to the...
-
Page 48: Drive Maintenance And Care
Once this is done, turn the cranks a few more times; then let the CENTURION pedelec rest for a few minutes so that the lubricant can disperse. Finally wipe off excess lubricant with a rag so that it does not... -
Page 49: Service And Maintenance Schedule
Service and maintenance schedule It is advisable to have your CENTURION pedelec serviced regularly after the bedding-in phase. The schedule given in the table below is a rough guide for cyclists who ride their pedelec between 1,000 and 2,000 km or 50 to 100 hours of use a year. - Page 50 Jobs marked • are best left to your CENTURION dealer. For your own safety, bring your CENTURION pedelec to your CENTURION dealer for its first inspection after 100 to 300 kilome- ters, 5 to 15 hours of initial use or four to six weeks, and at the very latest after three months.
-
Page 51: Recommended Torque Settings
All bolted connections of the pedelec components have to be tightened carefully and checked regularly to ensure the safe and reliable operation of the CENTURION pedelec. This is best done with a torque wrench that disengages at the desired torque value or a click-type torque wrench. Tighten carefully by approaching the prescribed maximum torque value in small steps (0.5 Nm increments) and check in between the proper fit of the com-... -
Page 52: Recommended Torque Settings For Disc Brakes And Hydraulic Rim Brakes
Component Bolted connections Shimano (Nm) SRAM/Avid (Nm) Tektro (Nm) Pedal Pedal axle Shoe Cleat 5 - 6 Spike Brake (V-brake) Cable clamp 6 - 8 6 - 8 6 - 8 Brake shoe mount 6 - 8 6 - 8 6 - 8 Brake pad fixing 1 - 2... - Page 53 These values do not apply to the components of other manufacturers. Due to the unmanageable number of components on the market, CENTURION is not in a position to foresee every product that will be replaced or newly assembled by third parties. Therefore CENTURION denies any liability for such kind of additions or mod- ifications with regard to compatibility, torque values etc.
-
Page 54: Warranty And Guarantee
CENTURION pedelec (mileage, your receipt, your bike card and the handover report. Therefore, be sure riding in the rain, dirt, salt etc.). CENTURION pedelecs that are often to keep these documents in a safe place. -
Page 55: Guarantee On Centurion Bikes
This additional guarantee is also valid when reselling a CENTURION bike. Prerequisite for that is the full traceability from the initial buyer to the In purchasing this CENTURION bike you will receive a warranty covering last buyer. This is exclusively the case, if purchase contracts in written far more than stipulated by the legal regulations (as of date of purchase form can be presented in addition to the above-mentioned documents. - Page 56 In case of any inquiries, please contact your national distributor; visit www.centurion.de/en_int to find his address. These provisions of the guarantee are applicable as of model year 2016. Merida & Centurion Germany GmbH Blumenstraße 49-51 D-71106 Magstadt Germany Phone +49(0)7159 9459-600...
-
Page 57: Service Schedule
Replaced or repaired parts: Stamp and signature Stamp and signature of the CENTURION dealer: of the CENTURION dealer: 2nd service – After 2,000 kilometers or 100 hours of use at the latest 4th service – After 6,000 kilometers or 300 hours of use at the latest or... - Page 58 Replaced or repaired parts: Stamp and signature Stamp and signature of the CENTURION dealer: of the CENTURION dealer: 6th service – After 10,000 kilometers or 500 hours of use at the latest 8th service – After 14,000 kilometers or 700 hours of use at the latest...
- Page 59 Replaced or repaired parts: Stamp and signature Stamp and signature of the CENTURION dealer: of the CENTURION dealer: 10th service – After 18,000 kilometers or 900 hours of use at the latest 12th service – After 22,000 kilometers or 1,100 hours of use at the...
-
Page 60: Bike Card
Size of wheels and tires Special features Stamp and signature of the CENTURION dealer (Tip for the CENTURION dealer: Copy the bike card and the handover report and keep one copy in your customer file. Send another copy to the bike manufacturer) -
Page 61: Handover Report
(additionally required routines in parentheses). Handover date, stamp and signature of the CENTURION dealer £ Lighting £ Brakes front and rear The customer confirms with his signature that he received the £... -
Page 62: Ec Declarations Of Conformity
EC declarations of conformity... - Page 63 EC declarations of conformity...
- Page 64 EC declarations of conformity...
- Page 66 MERIDA & CENTURION GERMANY GMBH Blumenstraße 49 – 51 D-71106 Magstadt Phone +49 (0) 71 59 / 94 59 - 600 Fax +49 (0) 71 59 / 94 59 - 500 vertrieb@merida-centurion.com www.centurion.de...
Need help?
Do you have a question about the Backfire E 640.27 and is the answer not in the manual?
Questions and answers