
Related Manuals for Blue Wave SA2400


Summary of Contents for Blue Wave SA2400
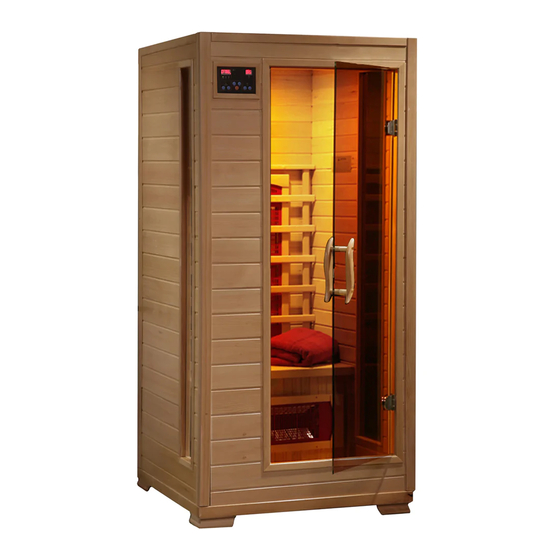
- Page 1 OWNER’S MANUAL ONE-PERSON & TWO-PERSON SAUNAS WITH CERAMIC OR CARBON HEATERS SA2400/SA2402/SA2406/SA2409/SA1309...
-
Page 2: Table Of Contents
TABLE OF CONTENTS ASSEMBLY TIPS & WARNINGS PARTS IDENTIFIER ASSEMBLY INSTRUCTIONS 5-10 OPERATION INSTRUCTIONS ENJOYING YOUR SAUNA HEALTH & SAFETY WARNINGS CLEANING & MAINTANENCE TROUBLESHOOTING GUIDE 14-15 16-25 REPLACEMENT PARTS WARRANTY INFORMATION The information contained in this manual is subject to change without notice. -
Page 3: Assembly Tips & Warnings
ASSEMBLY TIPS & WARNINGS • Before you begin, read all assembly instructions and safety warnings carefully. • This sauna requires at least 2 adults to complete assembly. • Remove all of the contents from boxes and verify that you have all of the parts shown on the Parts Identifier before you begin assembly. -
Page 4: Parts Identifier
PARTS IDENTIFIER (NOT TO SCALE) * Refer to REPLACEMENT PARTS (PAGE 16-25) to determine the correct part number when ordering replacements. -
Page 5: Assembly Instructions
ASSEMBLY INSTRUCTIONS 1. Begin assembly by determining an appropriate location for your sauna – see ASSEMBLY TIPS & WARNINGS for details. Attach the BACK PANEL to the FLOOR by lining up the BACK PANEL with the groove in the back of the FLOOR. 2. - Page 6 ASSEMBLY INSTRUCTIONS (CONT.) 4. Carbon Heater Models Only: Attach the FLOOR HEATER to the FLOOR with 1-1/2” SCREWS. Connect the heater plug. 5. Slide the BENCH HEATER PANEL into place between the LEFT and RIGHT PANELS. Connect the heater plug. Note: For Carbon Heater Models, make sure the FLOOR HEATER cable is placed through the groove in the bottom of the BENCH HEATER PANEL.
- Page 7 ASSEMBLY INSTRUCTIONS (CONT.) 7. Ceramic Heater Models Only: Attach BACK PANEL HEATER COVER to BACK PANEL with 2” SCREWS and to BENCH SEAT with 3/4” SCREWS. 8. Attach the FRONT PANEL to the FLOOR. Buckle the FRONT PANEL to the LEFT and RIGHT PANELS.
- Page 8 ASSEMBLY INSTRUCTIONS (CONT.) 10. Feed the main power cable through hole in ROOF COVER. Secure the ROOF COVER with 3/4” SCREWS. 11. Attach the DOOR HANDLE to the GLASS DOOR. 12. Gently pull the cables for the AM/FM CD PLAYER through the opening in the front of the STEREO SHELF.
- Page 9 ASSEMBLY INSTRUCTIONS (CONT.) 13. Plug the controller and antenna into the back of the AM/FM CD PLAYER. Note: The red and white cables are used for an optional video player and can be tucked out of the way. Slide and lock the AM/FM CD PLAYER into the STEREO SHELF. Note: Use “keys” with to remove the CD player for maintenance.
- Page 10 ASSEMBLY INSTRUCTIONS (CONT.) 18. Two-Person Models Only: Remove the back cover of the OXYGEN IONIZER by turning is as indicated. Unwrap and install the fragrance patch, then reattach the back cover. Attach the OXYGEN IONIZER in the designated position with 3/4” SCREWS. Plug the power cable into the OXYGEN IONIZER.
-
Page 11: Operation Instructions
OPERATION INSTRUCTIONS SAUNA CONTROL PANEL Note: The sauna controls are the same for both the interior and exterior Control Panels. 1. Press POWER to turn ON the sauna. 2. Set the desired TEMPERATURE with the (+) and (-) buttons. 3. Press and hold both (+) and (-) to switch between °F (Fahrenheit) and °C (Celsius). 4. -
Page 12: Enjoying Your Sauna
ENJOYING YOUR SAUNA 1. Prior to initial use, wipe down all interior surfaces of the sauna with a damp cloth. 2. Turn on the sauna and set temperature to 104° F for one hour to burn off any factory dust. 3. -
Page 13: Health & Safety Warnings
HEALTH & SAFETY WARNINGS 1. Review all instructions and warnings before operating your sauna. A sauna is not a toy. Seri- ous injury may result from negligence, intentional misuse and failure to follow safety instruc- tions. 2. Hyperthermia Danger: Hyperthermia occurs when the body absorbs more heat than it can dissipate. -
Page 14: Cleaning & Maintanence
CLEANING & MAINTENANCE 1. Always unplug the sauna and allow it to cool down before performing any cleaning or maintenance. 2. Use furniture polish or furniture oil when cleaning the sauna exterior. 3. The sauna interior surfaces should only be wiped down with a damp cloth. Do NOT use chemicals, abrasive cleaners or solvents on the unfinished interior wood. - Page 15 TROUBLESHOOTING GUIDE (CONT.) Problem THE CONTROL PANEL DOES NOT WORK 1. Check that all the connections are tight. 2. If the numbers are scrambled or the buttons are unresponsive, replace the Control Panel. Solution 3. If the temperature indicator does not work or reads “--” or “EP”, replace the Control Panel with Tempera- ture Sensor.
-
Page 16: Replacement Parts
It is important to use only the replacement parts specified by the manufacturer. The use of unauthorized substitutes may damage your sauna or cause electrical hazards resulting in injury or fire. SA2400 ONE-PERSON HEMLOCK SAUNA WITH CERAMIC HEATERS DESCRIPTION... - Page 17 SA2400...
- Page 18 REPLACEMENT PARTS (CONT.) SA2402 ONE-PERSON HEMLOCK SAUNA WITH CARBON HEATERS DESCRIPTION PART NUMBER 2 FRONT PANEL with GLASS DOOR SAP2621 5 LEFT PANEL SAP2622 7 RIGHT PANEL SAP2623 3 BACK PANEL SAP2624 8 ROOF SAP2625 9 ROOF COVER SAP2608 12 FLOOR SAP2626 20 FLOOR HEATER SAP2627...
- Page 19 SA2402...
- Page 20 REPLACEMENT PARTS (CONT.) SA2406 TWO-PERSON HEMLOCK SAUNA WITH CERAMIC HEATERS DESCRIPTION PART NUMBER 2 FRONT PANEL with GLASS DOOR SAP2629 5 LEFT PANEL SAP2630 7 RIGHT PANEL SAP2631 3 BACK PANEL SAP2632 8 ROOF SAP2633 9 ROOF COVER SAP2609 12 FLOOR SAP2634 11 BENCH SEAT SAP2667...
- Page 21 SA2406...
- Page 22 REPLACEMENT PARTS (CONT.) SA2409 TWO-PERSON HEMLOCK SAUNA WITH CARBON HEATERS DESCRIPTION PART NUMBER 2 FRONT PANEL with GLASS DOOR SAP2636 5 LEFT PANEL SAP2637 7 RIGHT PANEL SAP2638 3 BACK PANEL SAP2639 8 ROOF SAP2640 9 ROOF COVER SAP2611 12 FLOOR SAP2641 31 FLOOR HEATER SAP2642...
- Page 23 SA2409...
- Page 24 REPLACEMENT PARTS (CONT.) SA1309 TWO-PERSON CEDAR SAUNA WITH CARBON HEATERS DESCRIPTION PART NUMBER 2 FRONT PANEL with GLASS DOOR SAP3000 5 LEFT PANEL SAP3001 7 RIGHT PANEL SAP3002 3 BACK PANEL SAP3003 8 ROOF SAP3004 9 ROOF COVER SAP3005 12 FLOOR SAP3006 31 FLOOR HEATER SAP3007...
- Page 25 SA1309...
-
Page 26: Warranty Information
This 5-Year Warranty covers the sauna. The radio in your sauna is covered by a limited 1-Year Warranty. 2. Please notify Blue Wave Products in advance of any sauna warranty claim prior to shipping the sauna back. Contact our warranty claim department at warranty@splashnetxpress.com.
Need help?
Do you have a question about the SA2400 and is the answer not in the manual?
Questions and answers