
Related Manuals for Clark Synthesis Prosound429


Summary of Contents for Clark Synthesis Prosound429
-
Page 1: Table Of Contents
Installation Guide Prosound429 Table of Contents Important Product Information Product Overview Mounting Bracket Installation CAUTION: THIS PRODUCT CONTAINS AN Drum Throne Installation EXTREMELY POWERFUL MAGNET. DO NOT Stage/Platform Installation PLACE IN CLOSE PROXIMITY TO TUBE TV Troubleshooting/Contact Information MONITORS, TUBE VIDEO MONITORS, AND Warranty MAGNETIC MEDIA. -
Page 2: Important Product Information
10. USE PROPER AMPLIFICATION- Insure the Prosound429 is being powered by an amplifier that is stable at 4 ohms and delivers at least 125 to 150 watts into 4 ohms into each Prosound429. If the lights inside the TC- 101 Amplifier Interface are flashing brightly, turn down the gain on the amplifier and volume of the input signal going to the Prosound429. -
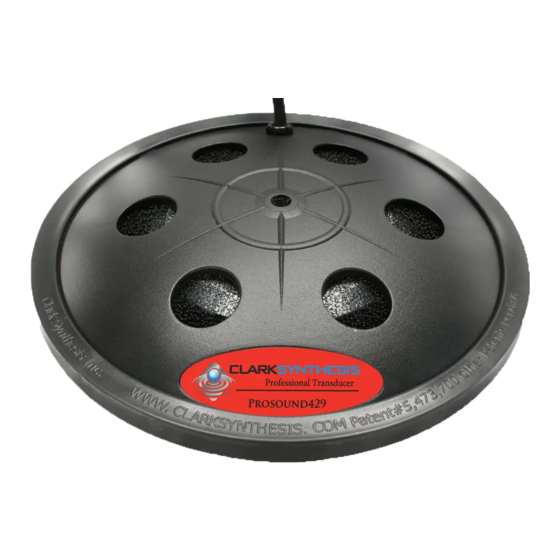
Page 3: Product Overview
Prosound429, all while adding an additional layer of protection for the Prosound429. To simplify the connections to and from the TC-101 Amplifier Interface, two speakon connectors come with the TC-101. These connectors provide a quick way to connect the amplifier and Prosound429 to the TC-101. -
Page 4: Mounting Bracket Installation
The Prosound429 is most-commonly mounted using the mounting bracket assembly (see diagram below). This assembly, which comes with the Prosound429, is easily installed on a variety of surfaces. 1. To install this assembly, determine the location for the mounting bracket (insure the placement of the bracket allows for adequate spacing for the Prosound429. -
Page 5: Drum Throne Installation
Round seats have two T-nuts, bicycle seats have three (one in the back and one on each side). Since round seats can be rotated to place the Prosound429 in the desired location under the musician (front, back, or side), the selection of the T-nut to use is not critical. -
Page 6: Stage/Platform Installation
STAGE/PLATFORM INSTALLATION There are at least two ways to mount a Prosound429 to a stage or platform. For wooden stages, you can install a bridge between support joists of the staging. For metal frame staging or freestanding wooden platforms you can install the mounting bracket directly to the staging surface. Either of these types of installation are effective for activating the stage’s/platform’s surface. - Page 7 2 of the Mounting Bracket Installation section (reduce the revolutions to 5 or 6, not 8 or 9). If possible, place the Prosound429 in the center of the area you are trying to activate (see the example diagram below). The Prosound429 can be mounted above or below the platform, as long as the Prosound429 is mounted horizontally (see diagrams in previous section).
-
Page 8: Troubleshooting/Contact Information
The Prosound429 stopped working: • If the Prosound429 stops playing, it is likely that the built-in protection circuit has activated. In the event this happens, turn the amplifier off for approximately 60 seconds to allow the circuit to reset. Turn down the volume on the audio system and amplifier. -
Page 9: Warranty
WARRANTY Clark Synthesis, Inc. warranties the Prosound429 to be free from defects and workmanship under normal use for a period of two (2) years from date of original purchase. For industrial or commercial use, the warranty period is six (6) months.
Need help?
Do you have a question about the Prosound429 and is the answer not in the manual?
Questions and answers