NAVITAS TAC 2 Installation & Service Manual
440a and 600a 48v-72v controllers for ac induction motors
Hide thumbs
Also See for TAC 2:
- Error code and troubleshooting manual (8 pages) ,
- Installation and service manual (23 pages)
Table of Contents
Advertisement
Navitas Vehicle Systems Ltd.
NAVITAS TAC 2
440A and 600A 48V-72V CONTROLLERS
for
AC INDUCTION MOTORS
Installation/Service Manual
:
INSTALLATION INSTRUCTIONS FOR
E-Z-GO®RXV® 48V (CURTIS®)
E-Z-GO® RXV® 23 48V (DANAHER®)
E-Z-GO® TXT® 48V Conversion
CLUB CAR® Precedent® Conversion
YAMAHA® YDRE2® TOYOTA® (NEOS®)
YAMAHA ® G29 ® Conversion (MORIC®)
NavitasVS.com
04/19
Advertisement
Table of Contents

Related Manuals for NAVITAS TAC 2


Summary of Contents for NAVITAS TAC 2
- Page 1 Navitas Vehicle Systems Ltd. NAVITAS TAC 2 440A and 600A 48V-72V CONTROLLERS AC INDUCTION MOTORS Installation/Service Manual INSTALLATION INSTRUCTIONS FOR E-Z-GO®RXV® 48V (CURTIS®) E-Z-GO® RXV® 23 48V (DANAHER®) E-Z-GO® TXT® 48V Conversion CLUB CAR® Precedent® Conversion YAMAHA® YDRE2® TOYOTA® (NEOS®) YAMAHA ®...
- Page 2 INSTALLATION/ SERVICE MANUAL TABLE OF CONTENTS Copyright © 2019 Navitas Vehicle Systems Ltd. All Rights Reserved. Patents Pending. E-Z-GO®, TXT®, and RXV® are registered trademarks of Textron Innovations, Inc. (“Textron”). Club Car®, Precedent®, and DS® are registered trademarks of Ingersoll Rand, Inc., Yamaha®, the tuning fork logo, G-14®, G-19®, G-22®, G-24®, G-29®, and...
-
Page 3: Table Of Contents
INSTALLATION/ SERVICE MANUAL TABLE OF CONTENTS Contents Best Practices.....................3 Introduction TAC 2 (RXV, RXV23, TXT, IQ, YDRE2, G29).........4 Vehicle Safety Warnings................5 Controller Parts List..................7 Installation Instructions (Warning/Tools Required)...........9 RXV (with Curtis Connection)...............11 RXV23 (with Danaher Connection)...............14 TXT 48 AC Conversion................17 Club Car IQ Precedent AC Conversion............20... -
Page 4: Best Practices
INSTALLATION/ SERVICE MANUAL BEST PRACTICES Speed Control • To maximize your vehicle’s driving range only use the speed you need if using the OTF. • Use the speed knob to control your maximum cruising speed, turn the speed down to the minimum practical speed necessary for the application. -
Page 5: Introduction Tac 2 (Rxv, Rxv23, Txt, Iq, Ydre2, G29)
If it is lost or damaged please contact your local dealer. • Navitas Vehicle Systems Ltd. reserves the right to make changes to the controller, parts of the controller, accessories, labelling or instructions without obligation to make these changes on units previously sold. -
Page 6: Vehicle Safety Warnings
18 inch diameter tires, non-performance motor & up to 25 MPH limit with vehicle speed sensor installed. • Operators/Users of Navitas golf car and LSV equipped products must follow published golf car & LSV federal, state, county & municipal bylaws & regulations issued for your “use area”. - Page 7 INSTALLATION/ SERVICE MANUAL SAFETY WARNINGS, cont’d • Never exceed the towing capacity rating as specified by the vehicle manufacturer. • Never re-wire, by-pass or change the wires, switches, or controller. Contact your dealer if vehicle is not operating correctly. • Keep the controller and the area around it clean and free of debris. Keep electrical components dry and DO NOT wash with direct stream or power washer •...
-
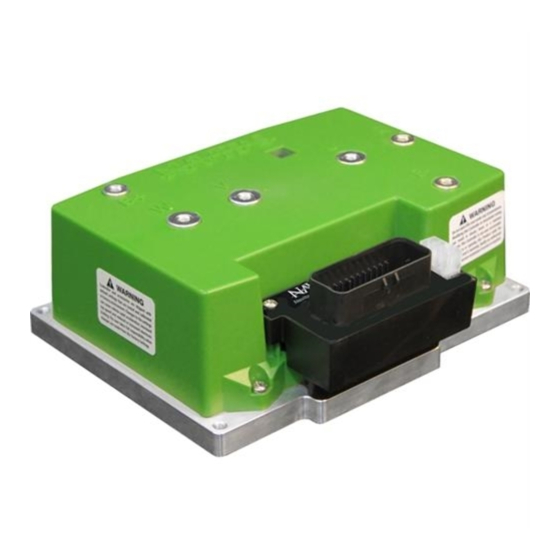
Page 8: Controller Parts List
Confirm that all parts listed below are with your kit before starting installation. If you are missing parts please contact your local dealer. AC Induction Kit-Curtis 1206AC E-Z-GO RXV 10-000879-01 (440A) / 10-000881-01 (600A) PART DESCRIPTION PART NUMBER TAC 2 Controller 440A 10-000878-01 TAC 2 Controller 600A 10-000881-01 TAC 2 Module... - Page 9 TAC 2 Module 40-000627 Mounting Plate Kit 20-001843 Battery Cable 40-000583 Hardware Mounting Kit 10-000833 TAC 2 - YAMAHA G29 10-000889-09 (440A) / 10-000891-09 (600A) PART DESCRIPTION PART NUMBER TAC 2 Controller 440A 10-000888-09 TAC 2 Controller 600A 10-000891-09 TAC 2 Module...
-
Page 10: Installation Instructions (Warning/Tools Required)
FAILURE to follow the WARNINGS below can damage the Vehicle and/or cause SERIOUS INJURY OR DEATH! Installation or Servicing of the NAVITAS 440A / 600A 48-72V Controller must be done by a trained golf car technician. Before installing or servicing of the NAVITAS Controller: •... - Page 11 INSTALLATION/ SERVICE MANUAL INSTALLATION INSTRUCTIONS REQUIRED TOOLS & PARTS REQUIRED TOOLS • #3 Phillips screwdriver • 10, 11, & 13mm wrench • Socket driver w/ extension • Wire cutters • Assorted socket set • Safety glasses • Flashlight (optional) PURCHASED PARTS •...
-
Page 12: Rxv (With Curtis Connection)
3. Install Navitas TAC 2 Controller • Route motor cables to new controller around outside of controller mount • Remove bolts, washer, lock washer from top of new controller. • Fasten TAC 2 Controller to existing mounting bracket using original hardware Fig. 2) Fig. 2... - Page 13 • Feed cable back through the channel to the floor and chase back following wiring harness to the Navitas adaptor module and connect it. Zip tie cable to the factory wiring harness • Connect OTF programming end into the adaptor module, and connect original controller harness into adaptor module;...
- Page 14 INSTALLATION/ SERVICE MANUAL INSTALLATION INSTRUCTIONS RXV Installation cont’d Pinout for Controller Diagrams and other updates available at: NavitasVS.com/support...
-
Page 15: Rxv23 (With Danaher Connection)
CAUTION If the car has a run/tow switch, you must place the switch in the TOW position first! Parts: • AC Navitas controller with Bluetooth • On-The-Fly programmer (optional) • Mounting plate and hardware • Resistor wire (longer for replacement) - Page 16 7. Install On-The-Fly Programmer (optional) • Install OTF (optional) (see install description in RXV INSTALL instructions, p12) Fig. 5 • Connect OTF to Navitas adaptor module • Zip Tie loose cables 8. TESTING INSTALLATION • Lift drive wheels off ground •...
- Page 17 INSTALLATION/ SERVICE MANUAL INSTALLATION INSTRUCTIONS RXV 23 (Danaher) Installation cont’d Pinout for Controller Diagrams and other updates available at: NavitasVS.com/support...
-
Page 18: Txt 48 Ac Conversion
INSTALLATION/ SERVICE MANUAL INSTALLATION INSTRUCTIONS E-Z-GO DC to AC Conversion Disconnect all batteries before beginning installation. CAUTION If the car has a run/tow switch, you must place the switch in the TOW position first! PARTS INCLUDED • AC Controller • AC 4 kW motor •... - Page 19 INSTALLATION/ SERVICE MANUAL INSTALLATION INSTRUCTIONS E-Z-GO DC to AC Conversion cont’d 5. Mount Controller • Install Navitas AC controller (Fig. 3) • Attach Run/Tow switch mount and fasten Run/Tow switch to mount. • Connect B- from battery, B+ from solenoid and motor phase cables to U, V, W (use new cable provided as ‘W’...
- Page 20 INSTALLATION/ SERVICE MANUAL INSTALLATION INSTRUCTIONS E-Z-GO DC to AC Conversion cont’d Pinout for Controller Diagrams and other updates available at: NavitasVS.com/support...
-
Page 21: Club Car Iq Precedent Ac Conversion
If the car has a run/tow switch, you must place the switch in the TOW position first! PARTS • AC 4 kW motor • AC Navitas controller • Mounting plate w/ hardware • Motor phase cable (4AWG) • Speed sensor/motor temperature harness •... - Page 22 INSTALLATION/ SERVICE MANUAL INSTALLATION INSTRUCTIONS ub Car IQ (Precedent) DC to AC Conversion cont’d 4. Install Navitas TAC 2 Controller • Install NEW Club Car Precedent mounting plate using supplied hardware • Connect motor phase cables A1=U A2 =V and NEW Motor...
- Page 23 INSTALLATION/ SERVICE MANUAL INSTALLATION INSTRUCTIONS Club Car IQ (Precedent) DC to AC Conversion cont’d Pinout for Controller Diagrams and other updates available at: NavitasVS.com/support...
-
Page 24: Yamaha Ydre2 - Toyota (With Neos Connection)
INSTALLATION/ SERVICE MANUAL INSTALLATION INSTRUCTIONS YAMAHA YDRE2 - TOYOTA (NEOS) Installation Disconnect all batteries before beginning installation. CAUTION If the car has a run/tow switch, you must place the switch in the TOW position first! PARTS • AC Controller • Mounting plate with hardware •... - Page 25 INSTALLATION/ SERVICE MANUAL INSTALLATION INSTRUCTIONS YAMAHA YDRE2 - TOYOTA (NEOS) Installation cont’d 5. Mount Controller • Install Navitas AC controller (Fig. 3) • Connect B- from battery, B+ from solenoid using supplied battery cable, and motor phase cables to the controller:...
- Page 26 INSTALLATION/ SERVICE MANUAL INSTALLATION INSTRUCTIONS YAMAHA YDRE2 - TOYOTA (NEOS) Installation cont’d Pinout for Controller Diagrams and other updates available at: NavitasVS.com/support...
-
Page 27: Yamaha G29 Ac Conversion (With Moric Connection)
INSTALLATION/ SERVICE MANUAL INSTALLATION INSTRUCTIONS YAMAHA G29 DC to AC Conversion Disconnect all batteries before beginning installation. CAUTION If the car has a run/tow switch, you must place the switch in the TOW position first! PARTS INCLUDED • AC Controller •... - Page 28 • Align plate with existing holes (where OEM controller was fastened) and fasten with screws (Fig. 4) 5. Mount Controller • Install Navitas AC controller (Fig. 5). • Connect B- from battery, B+ from solenoid and motor phase cables to U, V, W (use new cable provided as ‘W’...
- Page 29 INSTALLATION/ SERVICE MANUAL INSTALLATION INSTRUCTIONS YAMAHA G29 DC to AC Conversion cont’d Pinout for Controller Diagrams and other updates available at: NavitasVS.com/support...
-
Page 30: Troubleshooting
INSTALLATION/ SERVICE MANUAL TROUBLESHOOTING * Check the ‘Caution’ icon on app first for fault descriptions or refer to the chart below FLASH FLASH CODE DESCRIPTION SOLUTION HOW TO CHECK CODES MESSAGE Throttle Fault The foot switch is • Check wiring •... - Page 31 INSTALLATION/ SERVICE MANUAL TROUBLESHOOTING cont’d FLASH FLASH CODE DESCRIPTION SOLUTION HOW TO CHECK CODES MESSAGE 1 - 6 Solenoid High Voltage across • Replace solenoid • Test the solenoid by measuring ohms Resistance solenoid (battery across the large terminals. side (logic power) •...
- Page 32 INSTALLATION/ SERVICE MANUAL TROUBLESHOOTNG cont’d FLASH FLASH CODE DESCRIPTION SOLUTION HOW TO CHECK CODES MESSAGE 2 - 3 Controller not Abnormally • Clean and dry off the • The dashboard page of the App will give pre-charging low voltage on controller you readings for the battery voltage.
- Page 33 INSTALLATION/ SERVICE MANUAL TROUBLESHOOTING cont’d FLASH FLASH CODE DESCRIPTION SOLUTION HOW TO CHECK CODES MESSAGE 3 - 1 Battery Under Batteries are • Recharge batteries • Use a battery load tester to verify Voltage empty or too low. battery condition after charging. •...
- Page 34 INSTALLATION/ SERVICE MANUAL TROUBLESHOOTING cont’d NON-FLASH CODE ERRORS. Note: The list below shows some possible issues when the Controller does not show a Flash Code Error. These issues are mainly related to the Vehicle. Always check the Manufacturers Service Manual. ISSUE CAUSE HOW TO CHECK...
-
Page 35: Accessories
• Troubleshoot on site with diagnositc reporting using any iOS or Android enabled device • Technicians can also diagnose cars remotely via email • Emails can also be forwarded to NAVITAS engineering department for additional support • Upgrade Firmware with ease. -
Page 36: Appendix A - 4 Kw And 5 Kw Ac Motor Techsheets
INSTALLATION/ SERVICE MANUAL APPENDIX A MAC Performance Motor 10-000815 for CLUB CAR PRECEDENT MAC-A High Performance AC Golf Car Motor (10-000815) MOTOR DATA MOTOR FEATURES Type of Motor AC Induction Hi Quality AC Induction motor Rated power 4 KW ... - Page 37 INSTALLATION/ SERVICE MANUAL APPENDIX A cont’d MAC Performance Motor 10-000816 For EZ-GO, YAMAHA, STAR EV, and COLUMBIA CAR PAR MAC-A High Performance AC Golf Car Motor (10-000816) MOTOR DATA MOTOR FEATURES Type of Motor AC Induction Hi Quality AC Induction motor Rated power 4 KW ...
- Page 38 INSTALLATION/ SERVICE MANUAL APPENDIX A cont’d MAC Performance Motor 10-000822 for CLUB CAR PRECEDENT MAC822 ...
- Page 39 INSTALLATION/ SERVICE MANUAL APPENDIX A cont’d MAC Performance Motor 10-000823 For EZ-GO, YAMAHA, STAR EV, and COLUMBIA CAR PAR MAC823 ...
-
Page 40: Warranty
3. MAC AC Motor ¬ 12 months If, during the applicable warranty period, (i) Navitas is advised in writing as to a defect in a Navitas product; (ii) such product is returned to a receiving point designated by Navitas; and (iii) an examination of such product discloses to Navitas’... - Page 41 INSTALLATION/ SERVICE MANUAL...
Need help?
Do you have a question about the TAC 2 and is the answer not in the manual?
Questions and answers