Digital Watchdog spot DW-HDSPOTMOD16 User Manual
Hide thumbs
Also See for spot DW-HDSPOTMOD16:
- Quick start manual (2 pages) ,
- Quick start manual (2 pages) ,
- Quick start manual (2 pages)
Table of Contents
Advertisement
Quick Links
Advertisement
Table of Contents

Subscribe to Our Youtube Channel
Related Manuals for Digital Watchdog spot DW-HDSPOTMOD16


Summary of Contents for Digital Watchdog spot DW-HDSPOTMOD16
- Page 1 USER MANUAL Before operating the system, please read this user manual and retain it for future reference. The picture might differ according to the specification and model. Copyright © DW. All rights reserved. Specifications and pricing are subject to change without notice. Rev: 07/20...
- Page 2 DW Spot™ Monitoring Module WARNING TO REDUCE FIRE OR SHOCK HAZARD, DO NOT EXPOSE THE UNIT TO RAIN OR MOISTURE. The installation should be made by a qualified service person and conformed to all local codes.
- Page 3 Cautions Read Before System Operation Follow these details to prevent material damage or personal injury. Signs of Caution and Warning Warning: This sign indicates that the user could die or be seriously wounded if not used or installed properly. Caution: This sign indicates that the user could be wounded or could expect property damage if not used or installed properly.
-
Page 4: Table Of Contents
User Manual Table of Contents GETTING STARTED ..........................5 Checking Supplied Items ............................ 5 System Startup ............................... 6 System Shutdown ..............................6 System Overview ..............................7 STARTUP WIZARD ..........................9 Language ................................. 9 Network ..................................9 Camera Management ............................11 Finish.................................. -
Page 5: Getting Started
Spot™ Monitoring Module Getting Started Checking Supplied Items Make sure that you have the following items supplied with your module. If any of these items are missing or damaged, notify your vendor immediately. Keep the packing utilities for moving or storage purposes. Items Photo Quantity... -
Page 6: System Startup
User Manual System Startup After connecting peripheral devices such as monitors and a mouse to the module, power up the module by connecting DC12V adaptor/ power cable to the power jack on the rear panel. The boot logo will display. Please wait until the boot process completes. When the system is up, the password change window is displayed. -
Page 7: System Overview
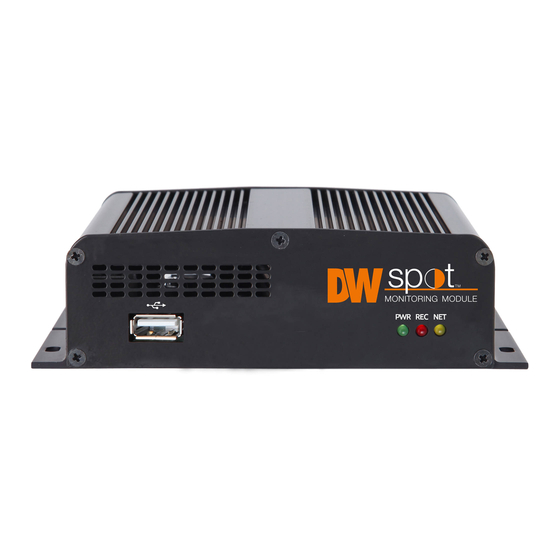
Spot™ Monitoring Module System Overview Front Panel USB Port: for USB mouse, import, and export settings and firmware upgrade. LED Indicator: Indicates system status. (Power, Record and Network status) Back Panel VGA out: connect a VGA monitor to the unit (cables not included). HD out: Connect a true HD monitor to the unit (cables not included). - Page 8 User Manual Tool Bar In live view, move the mouse cursor to the bottom of the screen to show the menu bar. Menu Click on the menu button to access the module’s main menu screen. See “4. Setting” for details. Display Mode Select the display split mode from the available options.
-
Page 9: Startup Wizard
Spot™ Monitoring Module Startup Wizard When the module is launched for the first time, the STARTUP WIZARD will appear. This wizard helps you setup the module’s most basic settings for proper functioning. You can access the Startup Wizard screen at any time by clicking the Startup Wizard button under the MENU>SYSTEM>SETTINGS menu. (See “4.1.5 SETTINGS”). - Page 10 User Manual Administrator for more information. IP Address If DHCP is selected, the IP address will automatically adjust to match the network’s requirements. You may manually change the IP address as needed (Network Type must be set to Static). Subnet Mask Subnet Mask address classifies the subnet that the system belongs to.
-
Page 11: Camera Management
Spot™ Monitoring Module Camera Management The Camera Management menu allows you to search, register and manage your IP cameras, DVRs and NVRs. See “3.2 Camera Registration” for more information. Search (DVR/NVR) The module will scan the network for all supported DVR/NVR. Select the devices you wish to register from the search results and press the ‘GET INFO’... -
Page 12: Finish
User Manual Finish Complete the setup of your module by registering your product. When the setup wizard is completed, click the FINISH button to close the setup wizard. Operation User Log-in Enter the user ID and password. Use the hint button to check for your password hint if needed. -
Page 13: Dvr/Nvr/Cam Registration
Spot™ Monitoring Module DVR/NVR/CAM Registration Recorder Connection through the Network The module will scan the network for all supported DVR/NVR automatically. Select the DVR/NVR you wish to register from the search results and press the ‘GET INFO’ button to obtain the device’s streaming profile. - Page 14 User Manual Select channel number to register. Input necessary information with button and click the GET INFO button to get streams information. Select the channel to register. Click the APPLY button to register DVR/NVR. Manually add Cameras If a user wants to connect to an IP camera in a different network, the cameras can be added manually using the ADD CAMERAS MANUALLY button.
-
Page 15: Deleting Devices
Spot™ Monitoring Module Deleting Devices Click the delete ( ) button for deleting each DVR/NVR or camera. Click the DELETE PAGE for deleting devices on the same page and click the DELETE ALL for deleting all devices. Live Display Mode Channel Selection The live image can be seen by easy button operation after power-up. - Page 16 User Manual Icons The Spot Monitoring Module shows the channel’s current status based on the settings in the DVR or NVR. Icons at the right-upper corner on each Icons at the right-bottom corner on fullscreen channel screen Continuous Recording No HDD detected Motion Detection Recording Emergency Recording is in use Sensor Activated Recording...
- Page 17 Spot™ Monitoring Module • To exit from the zoom mode, click the right and select “ZOOM EXIT’ on the menu. Enable PTZ mode. (Please refer to “3.6 PTZ Operation” for detail.) The available PTZ options depend on the camera’s ONVIF integration. See the camera’s manual for more information. Freeze Freeze the current live view.
- Page 18 User Manual Network: Set the camera network setting. System Status See the system status, including information on the network condition, the number of clients currently connected to the module, etc. A green line means the connection is live and working. Menu Open the main menu setup screen.
-
Page 19: Setting
Spot™ Monitoring Module Setting The general setting structure consists of “System”, “Monitoring”, and “Network”. Each Setup menu consists of sub-menus and additional categories. Main Classification Sub Classification INFORMATION USER SYSTEM DISPLAY SETTINGS MONITORING REGISTRATION NETWORK NETWORK DDNS To access the setup menu, click the button in the menu bar or right-click anywhere on the screen and select the Setup Menu. -
Page 20: System
User Manual System Information Site Name Enter a site name to differentiate the module from other sites. Date/Time Using the available options, manually adjust the date and time, select the display mode for the time and the date, and select the appropriate time zone. If applicable, check the ‘USE DST’ box. There are four types of time sync modes: •... - Page 21 Once the system detects the USB drive, it will display the firmware file under ‘CURRENT VER’ and the ‘NEW VER’. Click START to begin the upgrade process. Upgrading system using Digital Watchdog’s Automatic Firmware Upgrade via FTP server: Select FTP in the drop-down options under ‘Method’. Enter the FTP’s address: ftp.dwcc.tv...
- Page 22 User Manual To setup the module to check for new firmware automatically: Select FT from the METHOD drop-down options. Make sure the FTP information is entered correctly (see the section above). Enter your convenient time at CHECK TIME and then click the SAVE button. ...
- Page 23 Spot™ Monitoring Module User The ADMIN user has full authority for system settings and can change the system password or add/delete users and assign a different permission level to them. Note The maximum number of users including administrator is 16. User Management Admin users can control authorization for each function.
- Page 24 User Manual Display Sequence Set the dwell time for the sequence channel display. Display Resolution The system supports the following resolutions: 1024x768, 1280x720, 1280x1024, 1920x1080, 2560x1600 (true HD output only) and 3840x2160 (true HD output only). Select what information will appear over the display by checking the corresponding boxes. Screen Saver Protect the screen and data by turning off the display after a set time of inactivity.
- Page 25 Spot™ Monitoring Module Settings Product Registration Register your product with DW to enhance your technical support experience, if needed, and stay informed of the latest updates and product information. Startup Wizard Manually start the startup wizard. Factory Default Reset the system to its factory default settings. All settings will be deleted, including the network settings.
-
Page 26: Monitoring
User Manual Monitoring Registration Users can register/delete devices by letting the module scan and register devices automatically or manually search and add devices. The module will scan the network for all supported DVR/NVR automatically. Select the DVR/NVR you wish to register from the search results and press the ‘GET INFO’ button to obtain the device’s streaming profile. -
Page 27: Network
Spot™ Monitoring Module Network The module can be connected to the network or internet through either fixed IP or dynamic IP by proper setting of the module and router. Network Network Type DHCP: The module will acquire all the network settings automatically according to the current network requirements. - Page 28 User Manual your network for all supported devices. The first five characters of the file name of a detected module represent the model number, followed by the module’s IP address Once the PC discovered the module, double click on the icon to open the module’s web client. Enter your User ID and Password to login and click ‘Connect’...
- Page 29 Spot™ Monitoring Module HTTPS/Certificates Register self-signed certification for the HTTPS connection. Register a new certificate by clicking ‘Generate’ or register an external certificate by clicking ‘Import’. To register a new certificate: • Enter the certificate’s basic information. Enter all fields marked with (*).
- Page 30 Digital Watchdog® offers free and reliable DDNS service support. This allows you to assign the module a URL address rather than a long, complicated IP Address. This simplified the connection process to the module. The DDNS service is supported by Digital Watchdog® and is free of charge for our customers. To setup DDNS Input necessary information based on your network environment.
-
Page 31: Web Surveillance Through Internet Explorer
Spot™ Monitoring Module Web Surveillance through Internet Explorer The Spot Monitoring Module has a built-in web server by itself. This allows you to access the system by ordinary web-browser via a network for live monitoring, playback, or remote configuration without installing any additional software. -
Page 32: Web Setup
User Manual Web Setup Setup Menu Main Classification Sub Classification INFORMATION USER SYSTEM DISPLAY UPGRADE CONFIGURATION CAMERA MANAGEMENT MONITORING REGISTRATION NETWORK NETWORK DDNS System Setup Users can setup the module’s system settings through the web browser. [32]... - Page 33 Spot™ Monitoring Module Monitoring Users can check the information and snapshot of the currently connected device and register a new device. Network Users can setup network settings and DDNS settings. Note This module system has its built-in web server. Therefore, this web CGI screen is directly supported by the built-in web server of modules regardless of Internet connection.
- Page 34 2) Check the true HD / VGA cable connection with the module. Remove all the cable connections, except for the monitor cable, and then apply power to the module again. 3) In case that the display screen is stopped at the logo screen, please contact Digital Watchdog’s technical support for additional information.
-
Page 35: Product Specifications
Spot™ Monitoring Module Product Specifications DW-HDSPOTMOD DW-HDSPOTMOD16 OPERATIONAL Operating system Embedded Linux® Input 4 channels 16 channels IP camera Protocol ONVIF Speed Up to 120fps Up to 480fps Max. throughput 80 Mbps Display Single-channel, quad view Single-channel, 16-Ch view Screen mode mode, sequence mode, sequence IP cameras (up to 5MP, 2592 x 1944 resolution), Universal... -
Page 36: Warranty Information
User Manual Warranty Information Digital Watchdog (referred to as “the Warrantor”) warrants the Camera against defects in materials or workmanship as follows: Labor: For the initial five (5) years from the date of the original purchase if the product is determined to be defective, the Warrantor will repair or replace the unit with the new or refurbished product at its option, at no charge. -
Page 37: Limits And Exclusions
This warranty gives you specific legal rights, and you may also have other rights from vary from state to state. If the problem is not handled to your satisfaction, then write to the following address: Digital Watchdog, Inc. ATTN: RMA Department 16220 Bloomfield Ave... - Page 38 DW® East Coast office and warehouse: 5436 W Crenshaw St, Tampa, FL USA 33634 DW® West Coast office and warehouse: 16220 Bloomfield Ave, Cerritos, CA USA 90703 PH: 866-446-3595 | FAX: 813-888-9262 www.Digital-Watchdog.com technicalsupport@dwcc.tv Technical Support PH: USA & Canada 1+ 866-446-3595 International 1+ 813-888-9555 French Canadian: + 1-904-999-1309 Technical Support hours: Monday-Friday 9 a.m.
Need help?
Do you have a question about the spot DW-HDSPOTMOD16 and is the answer not in the manual?
Questions and answers