Table of Contents
Advertisement
Quick Links
Advertisement
Table of Contents

Subscribe to Our Youtube Channel
Related Manuals for Fiery ZX-40

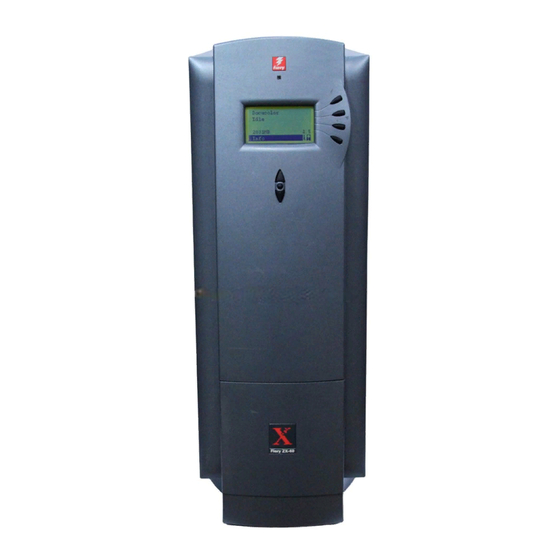
Summary of Contents for Fiery ZX-40
- Page 1 P r i n t i n g G u i d e F I E R Y Z X - 4 0...
- Page 2 Trademarks EFI, the EFI logo, Fiery, the Fiery logo, EFICOLOR, and Rip-While-Print are trademarks registered in the U.S. Patent and Trademark Office. Fiery ZX, Fiery LX, Fiery Driven, the Fiery Driven logo, Command WorkStation, AutoCal, Starr Compression, Memory Multiplier, ColorWise, NetWise, and VisualCal are trademarks of Electronics for Imaging, Inc.
- Page 3 CE Mark The CE marking applied to this product symbolises Rank Xerox’s declaration of conformity with the following applicable directives of the European Union as of the dates indicated. January 1, 1996—Council Directive 70/80/CCO amended by Council Directive 93/68/EEO. Approximation of the laws of the member states related to low voltage equipment.
- Page 4 Electronics for Imaging to identify the Coded Font Programs and Typefaces reproduced therefrom (“Trademarks”); and d. assign your rights under this Agreement to a transferee of all of your right, title and interest in and to Fiery ZX provided the transferee agrees to be bound by all of the terms and conditions of this Agreement.
- Page 5 Electronics for Imaging’s entire liability and your exclusive remedy under this warranty (which is subject to you returning Fiery ZX to Electronics for Imaging or an authorized dealer) will be, at Electronics for Imaging’s option, to use reasonable commercial efforts to attempt to correct or work around errors, to replace the Software with functionally equivalent software, or to refund the purchase price and terminate this Agreement.
-
Page 6: Table Of Contents
Using the Fiery Downloader to print 1-13 Chapter 2: Printing from Mac OS Computers Printing from applications Selecting the Fiery ZX in the Chooser Setting print options and printing from Mac OS computers Using the Fiery Downloader to print Chapter 3: Printing from UNIX Workstations... - Page 7 Printing with the Fiery Downloader Downloading and managing printer fonts Chapter 6: Tracking and Managing Print Jobs Fiery WebTools Checking Fiery ZX status with the Status WebTool Accessing information with the WebLink WebTool Appendix A: Print Options Where to set print options...
- Page 8 Contents Appendix C: Troubleshooting General printing problems Problems with Fiery Downloader Index...
-
Page 9: About This Manual
You can use the Fiery ZX to print final documents or to proof jobs you will later print on an offset press. You send a print job to the Fiery ZX as you would to any other printer—you select it from the Windows Printers dialog box or Mac OS Chooser, and then print from within any application. -
Page 10: About The Documentation
Preface About the documentation This manual is part of a set of Fiery ZX documentation that includes the following manuals for users and system administrators: • The Configuration Guide explains basic configuration and administration of the Fiery ZX for the supported platforms and network environments. It also includes guidelines for setting up UNIX, Windows NT, and NetWare servers to provide PostScript printing services to clients. -
Page 11: About Postscript Printer Drivers And Ppds
Print dialog box. The PPD for the Fiery ZX includes information about the features of both the copier and the Fiery ZX-40 Color Server. For information on the PPD options for your Fiery ZX, see Appendix A, "Print Options." Supported paper sizes and resolutions You can print all page sizes supported by the DocuColor 40 in Contone mode at 400 dpi in Full Color or Grayscale. - Page 12 If your site has an operator who controls all printing, you may have access to the Hold queue only. In this case, all jobs you send are spooled to the Fiery ZX and held until the operator sends them to their next stage of processing.
-
Page 13: Chapter 1: Printing From Windows Computers
Windows (WINS) printing, or from a Windows computer connected to the parallel port on the Fiery ZX. If you plan to print files at another location, follow the procedures described in “Saving files to print at a remote location” on page 1-12. - Page 14 Printer Description file (PPD), you can specify print settings. You can also change some of these settings for a particular job from within your application when you send it to the Fiery ZX. Before printing, make sure that the correct print options are set. O SET PRINT OPTIONS AND PRINT WITH THE...
- Page 15 1-3 Printing from applications To specify a , click More Options. Choose from the Paper type pop-up Media Type menu and then click OK. See Appendix A for information on the Paper Source and Media Type print options. 6. To use a standard paper size, make your selection and skip to step 11. To define a custom paper size, scroll the Paper size bar to the right and select one of the three Custom p+ paper sizes.
- Page 16 Fiery ZX and the DocuColor 40. They override settings in Fiery ZX Printer Setup; the settings can also be changed in the Properties dialog box with the Command WorkStation, or in the Override Print Settings dialog box with the Fiery WebSpooler.
- Page 17 The notes you enter in these areas can be viewed from the Command WorkStation and the Fiery WebSpooler, and also appear in the Job Log. They cannot be edited or erased by the operator.
-
Page 18: Setting Options And Printing From Windows 3.1X
Setting options and printing from Windows 3.1x To print from Windows 3.1x, use the Adobe PostScript Printer Driver version 3.0.1. The driver is included with the Fiery ZX user software, and uses all features of the Fiery ZX. Once you have installed the Adobe PostScript printer driver and Fiery ZX PostScript Printer Description file (PPD), you can specify print settings. - Page 19 INDOWS 1. In the Main window, double-click the Control Panel icon. 2. Double-click the Printers icon. 3. In the Printers window, select the Fiery ZX in the Installed Printers box and click the Setup button. 4. Click the Paper tab.
- Page 20 6. Click the Features tab. 7. Specify the appropriate settings for your job and click OK. These print options are specific to the Fiery ZX and the DocuColor 40 (you must scroll to see all the pop-up menus). They override settings in Fiery ZX Printer Setup; the settings can also be changed in the Properties dialog box with the Command WorkStation, or in the Override Print Settings dialog box with the Fiery WebSpooler.
- Page 21 The notes you enter in these areas can be viewed from the Command WorkStation and the Fiery WebSpooler, and also appear in the Job Log. They cannot be edited or erased by the operator.
-
Page 22: Setting Options And Printing From Windows Nt 4.0
PRINTER DRIVER FROM INDOWS 1. Click the Windows NT Start button and choose Settings>Printers. 2. Right-click to select the Fiery ZX and choose Document Defaults. 3. Click the Page Setup tab. 4. Specify the appropriate settings for your print job. - Page 23 6. Under Document Options, select Printer Features and then select print options in the list. The print options in the Printer Features list are specific to the Fiery ZX and the DocuColor 40. They override settings in Fiery ZX Printer Setup; the settings can also be changed in the Properties dialog box with the Command WorkStation, or in the Override Print Settings dialog box with the Fiery WebSpooler.
-
Page 24: Printing To The Parallel Port
Saving files to print at a remote location If you do not have a Fiery ZX and are preparing files to take to a service bureau or other location, print your final files to the File port (as opposed to one of the local ports). -
Page 25: Using The Fiery Downloader To Print
1. Create a PostScript, EPS, or PDF file. Specify the appropriate print options and include (embed) any necessary fonts that are not resident on the Fiery ZX. For information on the fonts resident on the Fiery ZX, check with the operator. Also see Appendix B, “Font List.”... -
Page 26: Chapter 2: Printing From Mac Os Computers
2-1 Printing from applications You can print to the Fiery ZX just as you would print to any other printer from your Chapter 2: application software. First, select the Fiery ZX as the current printer in the Chooser, Printing from and then print the file from within your application. - Page 27 2-2 Printing from Mac OS Computers 4. If your network is divided into zones, select the zone in which the Fiery ZX is located. 5. Select the Fiery ZX in the list of printers that appears. The names of all supported printers in the zone appear in the scroll list on the right.
- Page 28 PPD. Printer icon If the Chooser cannot find the correct PPD for the Fiery ZX, you are prompted to find and select the correct PPD. If you installed the AdobePS printer driver as described in Getting Started, the Fiery ZX PPD is located in the System Folder:Extensions:Printer...
-
Page 29: Setting Print Options And Printing From Mac Os Computers
7. In the Chooser window, make sure that AppleTalk is set to Active and then close the Chooser window. The Fiery ZX remains selected as the current printer until you choose a new printer in the Chooser. You can choose a different printer (or printer connection) from the Chooser or from the AdobePS print dialog box when you print (as shown below). - Page 30 2-5 Printing from applications PS 8.5.1 O SPECIFY PRINT OPTIONS AND PRINT WITH THE DOBE PRINTER DRIVER 1. Open the file you want to print and choose Page Setup from the application’s File menu. 2. In the Page Setup>Page Attributes dialog box, specify settings for your print job. If you choose Custom as the paper size, you must also specify settings in the Page Setup>Custom Page Default dialog box.
- Page 31 Specify settings for the print options displayed. 6. Using the pop-up menu shown below, specify print options for your job. Appropriate options for printing to the Fiery ZX are described in the following steps. Print dialog boxes vary across applications.
- Page 32 2-7 Printing from applications 7. In the Print>Notes dialog box, enter job notes and instructions to the operator. In the areas, enter user and job identification information for Notes 1 Notes 2 accounting purposes, or whatever information is required at your site. These notes appear in the Job Log;...
- Page 33 9. In the Print>Printer Specific Options dialog box, specify the appropriate settings for your print job. These print options are specific to the Fiery ZX and the DocuColor 40 (you may need to scroll to see all the options). They override settings in Fiery ZX Setup; the settings can also be changed in the Properties dialog box from the Command WorkStation, or in the Override Print Settings dialog box from the Fiery WebSpooler.
-
Page 34: Using The Fiery Downloader To Print
1. Create a PostScript, EPS, or PDF file. Specify the appropriate print options and include (embed) any necessary fonts that are not resident on the Fiery ZX. For a list of fonts resident on the Fiery ZX, check with the operator or see Appendix B, “Font List.”... -
Page 35: Chapter 3: Printing From Unix Workstations
3-1 Printing to the Fiery ZX You can print to the Fiery ZX directly from UNIX. Jobs printed to the Fiery ZX are Chapter 3: sent to the Print queue or Hold queue and can be manipulated from the Command... - Page 36 On a system running Solaris 2.x or any System V implementation of UNIX, use the lp command to send a job to the Fiery ZX as follows: lp -d <printername> {-n <-#copies>} <filename> For example, if the Print queue of your Fiery ZX is named , your file is print_Server...
- Page 37 <-Pprinter> <job #…> You can use the lpq command to check the job number. For example, to remove job number from the Print queue of your Fiery ZX named , type: print_Server lprm -Pprint_Server 123 The lprm command reports the names of any files it removes.
-
Page 38: Chapter 4: Special Features
The master document can comprise multiple pages. 2. Print the master document to the Fiery ZX with the Create Master print option set to one of the FreeForm Master bin numbers (1 through 15). -
Page 39: Printing Simulations
WorkStation or the Fiery WebSpooler. Printing simulations You can use the Fiery ZX to proof offset press jobs or to simulate the output of other print devices by specifying settings for two print options: CMYK Simulation and CMYK Simulation Method. These print options affect CMYK data only. -
Page 40: Printing Booklets
Windows 95 version comes first, followed by the Mac OS version. Make sure that the Fiery Booklet Maker XTension software is installed in the QuarkXPress XTension folder and that the correct Fiery ZX PPD file is installed in the QuarkXPress PDF folder. - Page 41 1. Launch QuarkXPress and open the document. 2. Choose Printer Setup (Windows) or Page Setup (Mac OS) from the File menu and choose the Fiery ZX printer file from the Use PDF For: (Windows) or Printer Type (Mac OS) menu.
- Page 42 4-5 Printing booklets Gap size Trim Fold Sheet tag Page Up/Page Down Gap size Trim Fold Sheet tag The spine of the document is shown as a blue line between pages Page of Page menu The layout of the front and back of the first printing sheet, as defined by the current settings, appears in the Print dialog box.
- Page 43 4-6 Special Features 5. For Windows, use the Page Up/Page Down arrows to see the layout of the remaining sheets. For Mac OS, use the Page of Page menu to see the layout of the remaining sheets. 6. Choose the layout you want on each side of each sheet from the Layout menu. Choose for standard printer’s spreads, choose for a calendar spread,...
- Page 44 4-7 Printing booklets 11. From the Binding menu, choose the type of binding to be used. Choose if the document will be bound by staples in the center of the Saddle Stitched pages (gutter). Choose if the document will be glued at the spine with each page folded in half Perfect and layered on top of the previous sheet.
- Page 45 4-8 Special Features For Windows, the sheet dimensions are displayed on the right side of the window. Click to display previous and later pages For Mac OS, you can Option-Click the Preview button to see the layouts without thumbnail images of the pages to save time. Click to enlarge Click to reduce The number of sheets in the document and the sheet dimensions are displayed below...
- Page 46 4-9 Printing booklets O PRINT THE BOOKLET 1. Click Setup in the Print dialog box to open the (Print Booklet) Setup dialog box. Specify the appropriate settings. Many of the features of this window are standard QuarkXPress features. See that documentation for additional information.
- Page 47 4-10 Special Features —Specify whether you want to print , or pages. Order Even —Choose the plates to be printed from Plate All Plates Black Blue Cyan Green , and , as well as any additional spot colors defined in Magenta Registration Yellow...
-
Page 48: Printing Duplex Pages
A preview of the booklet layout appears on the left side of the window. Printing duplex pages You can use the Fiery ZX to print double-sided (duplex) pages. O PRINT DUPLEX PAGES 1. When specifying print options, set Duplex to the desired setting. -
Page 49: Chapter 5: Downloading Files And Fonts
The Fiery Downloader allows you to send PostScript, EPS, and PDF files directly to Chapter 5: the Fiery ZX without using the application they were created in. It also enables you to Downloading manage printer fonts on the Fiery ZX. - Page 50 5-2 Downloading Files and Fonts The Fiery Downloader Status window appears and you see the Fiery Downloader Toolbar, menus, and the status bar at the bottom of the screen. Buttons for some menu functions appear in the Toolbar at the top of the window: Open Click to connect to a different Fiery ZX.
- Page 51 You can click the Font list button or choose Font List from the File menu to view font information in the window. 3. To select a different Fiery ZX, choose Open from the File menu or click the Open button.
-
Page 52: Printing With The Fiery Downloader
5-4 Downloading Files and Fonts Printing with the Fiery Downloader Printing files with the Fiery Downloader is fast—generally faster than printing from within applications. If you regularly print large files, be sure to try printing with the Fiery Downloader. O DOWNLOAD A FILE OR FONT WITH THE... - Page 53 All Known Formats All Files Formats lists all files in formats supported by the Fiery Downloader. You can download files and fonts in the same batch. If the fonts are used by files in the same batch, the fonts should be downloaded first.Fonts can be downloaded via the Direct connection only.
- Page 54 Some applications, including Adobe Photoshop, provide transfer functions that let you specify density settings for an image. If the file you are printing includes transfer functions, the Fiery Downloader Brightness option has no effect. For more information on using transfer functions, see the documentation for your application.
-
Page 55: Downloading And Managing Printer Fonts
Direct connection, you must embed any special fonts used by the file in the file when you generate it. The screen fonts that correspond to the printer fonts installed on the Fiery ZX are not automatically installed on your Windows system. - Page 56 Occasionally, you may want to use Adobe Type 1 (Windows) or PostScript (Mac OS) fonts that are not included with the Fiery ZX. If so, you will need to install both the screen fonts and the printer fonts on your computer. To do this, follow the instructions from the font manufacturer.
- Page 57 4. To delete a font, select it in the font list and click the Delete icon. Shift-click to select multiple fonts. Ctrl-click to select multiple non-sequential fonts. The 136 printer fonts included with the Fiery ZX (resident fonts) are locked. Locked fonts appear with a lock icon next to the name and cannot be deleted.
-
Page 58: Chapter 6: Tracking And Managing Print Jobs
The Command WorkStation and the Fiery WebSpooler both provide the capability to view and control the flow of print jobs to the Fiery ZX. If the administrator has set Administrator and Operator passwords in Setup, you need one of these passwords to perform most Command WorkStation and Fiery WebSpooler functions. -
Page 59: Checking Fiery Zx Status With The Status Webtool
To open a new browser window for the Status display, click Float. You can then close other browser windows and leave the Status window open to continue checking the status of the Fiery ZX. As long as you keep the Status window open, it is dynamically updated. -
Page 60: Appendix A: Print Options
Print options give you access to the special features of the DocuColor 40 and the Appendix A: Fiery ZX. Print options can be specified in several places—in Fiery ZX Setup, from the Print Options printing application, from the Fiery Downloader, from the Command WorkStation, or from the Fiery WebSpooler. -
Page 61: Print Options And Override Hierarchy
In the following table, the default printer driver settings (PPD defaults) are underlined. The Printer’s Default setting indicated that a default has been specified in Fiery ZX Setup. To find out about the current Setup defaults, print the Configuration page from the Command WorkStation or from the Fiery ZX Control Panel. - Page 62 A-3 Print Options Option and settings: Requirements, constraints, Description: (Default setting is underlined) and information: Select a CMYK simulation target to use See the Color Guide for more CMYK Simulation for the current print job. information. Printer’s Default/SWOP-Coated/DIC/ Euroscale/Custom-1/Custom-2/ Custom-3/Custom-4/Custom-5/None/ Match Copy Select to apply one-dimensional...
- Page 63 A-4 Print Options Option and settings: Requirements, constraints, Description: (Default setting is underlined) and information: Specify the number of copies of the job to Copies print. 1 - 999 To create a FreeForm master from this For more information, see page 4-1. Create Master job, specify a number to assign to the None/1 - 15...
- Page 64 Windows 95 computers using the Adobe SEF A4/SEF B5/SEF 8x10/8x10/9x11/ 9x12/Docupac/Custom 1/Custom 2/ PostScript Printer Driver provided with Custom 3 your Fiery ZX user software. Specify the source for the media on For more information, see page A-7. Paper Source which to print the job.
- Page 65 A-6 Print Options Option and settings: Requirements, constraints, Description: (Default setting is underlined) and information: Specify the percentage at which to print For more information, see page A-8. Scale the job. 100%/200%/150%/75%/50% Specify whether to insert a slip sheet Slip Sheet between copies of multiple-copy jobs.
-
Page 66: More Information About Print Options
A-7 Print Options More information about print options The following sections provide additional information about print options. See the table above for information on the settings, requirements, and constraints in effect for these options. Combine Separations The Combine Separations option specifies whether to combine color separations created in desktop publishing applications on a single page to simulate printing on a press from film separations. - Page 67 Use this option to select a default color rendering dictionary (CRD) to be used when you print RGB images, objects, and text. —Optimizes the range of colors on the Fiery ZX to produce the best Photographic results for photographic or bitmapped images.
-
Page 68: Appendix B: Font List
Font List PostScript printer fonts Listed below are the 136 built-in PostScript printer fonts on the Fiery ZX. In addition to the fonts listed below, two Adobe Multiple Master fonts are included and are used for font substitution in PDF files. - Page 69 B-2 Font List • GillSans, GillSans-Bold, GillSans-Italic, GillSans-BoldItalic, GillSans-Condensed, GillSans-BoldCondensed, GillSans-Light, GillSans-LightItalic, GillSans-ExtraBold • Goudy, Goudy-Bold, Goudy-Italic, Goudy-BoldItalic, Goudy-ExtraBold • Helvetica, Helvetica-Bold, Helvetica-BoldOblique, Helvetica-Condensed, Helvetica-Condensed-Bold, Helvetica-Condensed-BoldObl, Helvetica-Condensed- Oblique, Helvetica-Narrow, Helvetica-Narrow-Bold, Helvetica-Narrow- BoldOblique, Helvetica-Narrow-Oblique, Helvetica-Oblique • JoannaMT, JoannaMT-Bold, JoannaMT-Italic, JoannaMT-BoldItalic • LetterGothic, LetterGothic-Bold, LetterGothic-BoldSlanted, LetterGothic-Slanted •...
-
Page 70: Truetype Fonts
B-3 Font List TrueType fonts The Fiery ZX includes 19 TrueType fonts: • Apple-Chancery • ArialMT, Arial-BoldMT, Arial-ItalicMT, Arial-BoldItalicMT • Chicago • Geneva • HoeflerText-Regular, HoeflerText-Black, HoeflerText-Italic, HoeflerText-BlackItalic, HoeflerText-Ornaments • Monaco • NewYork • TimesNewRomanPSMT, TimesNewRomanPS-BoldMT, TimesNewRomanPS- ItalicMT, TimesNewRomanPS-BoldItalicMT • Wingdings-Regular... - Page 71 Print to a queue instead of to the Direct connection. computer for too long. When you print to a queue, the job is stored on the Fiery ZX until it can be processed and printed; when you print to the Direct connection, the job cannot be sent to the Fiery ZX until the previous job is finished processing, so you must wait longer to use...
- Page 72 Command WorkStation. • Did you select the Fiery ZX as the current printer? Before printing, you must select the Fiery ZX as the current printer from your Mac OS, Windows, or UNIX workstation. • Make sure that the copier is switched on.
- Page 73 Try this: Jobs sent to the parallel port • Review the procedures provided in Getting Started on how to prepare the Fiery ZX and do not print. your Windows 95 computer for parallel port printing. Also see your Windows 95 documentation.
- Page 74 • Adjust the Brightness option. dark. You can use the Brightness option when printing from an application or from the Fiery Downloader to lighten your image whenever you print a PostScript or Encapsulated PostScript (EPS) file. Color output is incorrect.
- Page 75 Make sure that the Fiery ZX is not being calibrated. Fiery ZX from the Fiery If the Fiery ZX is being calibrated, you cannot connect to it. This insures that only one Downloader. person is calibrating the server at any time and that print jobs do not use unexpected calibration.
- Page 76 Print or Hold queue.) Extra blank page prints after a • Turn off the “Showpage (after EPS file)” option. Fiery Downloader job. This option adds a special PostScript command that will cause an extra blank page to print if it is not needed.
- Page 77 Copier Mode option A-3 Black Detection option A-2 Text Enhancement setting C-4 Black Overprint option A-2 Copies option A-4 Booklet Maker XTension, see Fiery Booklet CRDs (color rendering dictionaries) A-5 Maker XTension Create Master option 4-1, A-4 Brightness option A-1, A-2...
- Page 78 5-2 Mac OS printing 5-2 PostScript printer drivers 2-5 to 2-8 Font List option (Fiery Downloader) 5-3 printing 2-1 to 2-9 fonts printing with Fiery Downloader 2-9, Adobe Type 1 5-7, 5-8, B-1 to B-2 5-1 to 5-9...
- Page 79 Paper Source option 1-2, A-5, A-7 duplex pages 4-11 parallel port font list 5-2 printing problems C-3 from Fiery Downloader 2-9, 5-1 to 5-9 printing with 1-12 from Windows applications 1-1 PDF files 1-13, 2-9, 5-1, 5-5 Mac OS 2-1 to 2-9...
- Page 80 I-4 Index print jobs, previewing with Fiery Booklet Solid Color rendering style A-5 Maker 4-2 Sorter option A-6 print options A-1 to A-8 Spot Color Matching option A-6 Mac OS 2-4 to 2-8 Stapler option A-6 settings 1-5, 1-6 Status WebTool, see Fiery WebTools specific to color server 1-4...
- Page 81 1-1, 1-10 to 1-11 printing from applications 1-1 print options 1-11 Windows 3.1x Windows printing 1-1 PostScript printer driver 1-7 to 1-9 WINS printing 1-1 printing 1-6 to 1-9 print options 1-6 to 1-9 XTension for QuarkXPress, see Fiery Booklet Maker XTension...
Need help?
Do you have a question about the ZX-40 and is the answer not in the manual?
Questions and answers