
Related Manuals for Altis ICONA


Summary of Contents for Altis ICONA
- Page 1 ICONA USER MANUAL Read all instruction carefully before use this product. Retain this owner’s manual for the future’s reference...
-
Page 2: Safety Precaution
SAFETY PRECAUTION Warning: Now here we suggest that you should consult with your physician or health professional before starting your workout, especially for the age up to 35 old or once-health problem people. We take no responsible for any troubles or hurts if you don’t following our specification. Treadmill will be carefully assembled and covered the motor shield, then connect to the power. -
Page 3: Fixing Tools
ASSEMBLY INSTRUCTIONS When you open the carton, and you will find the below parts in the carton Part List: DES. Specification Nos. NO. DES. Specification Nos. Main frame Oil Bottle 5# Allen Wrench Twister Bolt M8*45 Massager assemblies Bolt M8*16 80 Massager support frame Screw Massager fix frame... - Page 4 STEP 1: Open the carton, get out the above spare parts, and put the Main Frame onto the level ground. STEP 2: 1.Push up the Computer and L& R upright as the arrow position. 2.Screw off the M8*16 bolt(51) and Arc washer(68)from right upright.
- Page 5 STEP 4: 1.Use the 5# Allen wrench,fix the right upright onto the base frame with M8*45 screw(55), arc washer(68), and screw (47) And then fix the right upright onto the base frame with screw M8*16(51) and arc washer(68). Same way to fix the left upright onto the STEP 5: base frame.
- Page 6 STEP 7: 1. Cover the foam (85) into the Massager support frame (80) STEP 8: 1.Use the 5# Allen wrench and Wrench screw Drive,screw M8*16(51), lock washer (68)fix one side of massager support frame (80) on the frame. 2.Use Wrench screw Drive, bolt M8(47), lock washer(68)fix the other side of massager support frame (80) on the massager fixing frame.
- Page 7 STEP 10: 1. Hand the massager belt(83) on the massager head(82). STEP 11: Put the safety key (43) on the computer,and put the twister on the right or left of treadmill. ATTENTION:Please confirm complete assembly as the require above and lock all the bolt. Do the following operation after checking everything is OK.
- Page 8 Pulling up: Pull up the base frame at position A, till hearing the sound that the air pressure bar B is locked into the round tube. Pulling down: Support place A with hand , kick the place of air pressure bar, then the base frame will fall down automatically ( Please keep anybody and any pet away the machine when falling down).
-
Page 9: Running Board
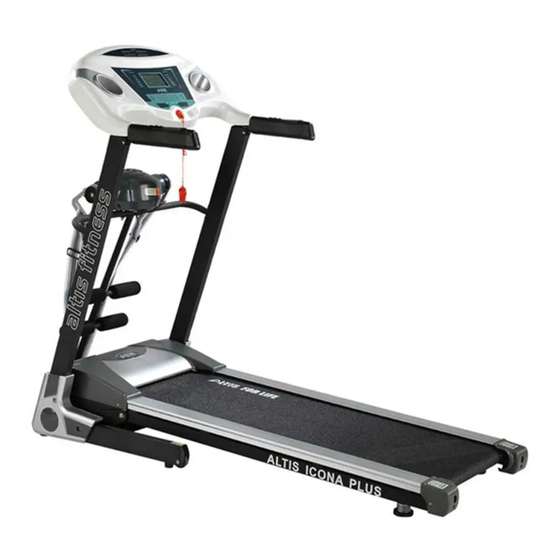
TECHNICAL PARAMETER BUILT UP SIZE(mm) 1689*690*1341mm POWER As the rating label showing FOLDABLE Maximum output 928*690*1452mm As the rating label showing SIZE(mm) power RUNNING BOARD 420*1250mm SPEED RANGE 0.8-14KM/H SIZE(mm) NET WEIGHT 58KG 1 LCD WINDOW Speed, Time, Distance, Calories, Pulse WITH BLUE BACKGROUND GROUNDING METHOD... -
Page 10: Function Keys
OPERATION GUIDE LCD WINDOW DISPLAY: 1.Speed window show current speed values, the speed range is 0.8-14.0KM/H. 2.Time window show running time. Time ranges from 0:00-99:59. 3. CAL/DIST window show the calorie consumption or the running distance. When in standby or running state,it will show the calorie consumption or the running distance every other 5 seconds. -
Page 11: Manual Mode
automatic increases or decreases. 6. “SPEED: 3. 6. 9” are shortcut keys for speed which can set the speed quickly. QUICK START( MANUAL MODE) 1. Turn on the power switch, put the safety key on computer panel correctly. 2. Press “START” key, the window will display: 3-2-1, a buzzer will sound, at the same time, the treadmill will run at the lowest speed. -
Page 12: Program Schedule
PROGRAM SCHEDULE TIME To set time / 20 time = running time of each period PROGRAM 10 11 12 13 14 15 16 17 18 19 20 SPEED SPEED SPEED SPEED SPEED SPEED SPEED SPEED SPEED SPEED SPEED 10 7 10 10 7 10 10 SPEED... - Page 13 VALUE RANGE DEFAULT DEFAULT RANGE SET RANGE MODE PROGRAM SPEED 0.8KMH—14KMH -------- -------- -------- TIME 0:00—99:59 30:00 30:00 5:00---99:00 DISTANCE 0.00KM—99.9KM 1.00KM -------- 0.5KM—99.5KM CALORIES 0Kcl—999Kcl 50Kcl -------- 10Kcl—995Kcl SAFETY KEY FUNCTION In any state, pull off safety key can stop the treadmill emergently, speed window shows "OFF", and buzz BI-BI-BI sound will be heard.
-
Page 14: Exercise Instructions
1. Probable reason for computer not workable after power start: The wire from computer to bottom control board didn’t connected well or the transformer was burnt out. Check the each wire from computer to control board, make sure they are connected well. If the wire is destroyed , change it. If the above can not settle the problem, try to change a good transformer. -
Page 15: Exercise Intensity
EXERCISE INTENSITY Warm up at the speed 4.8 km/h in 2 minutes, then add the speed to 5.3 km/h and keep walking in 2 minutes, then add to 5.8km/h and walk in 2 minutes. After that, add up 0.3 km/h in each 2 minutes, until rapid breath but not feel comfortable Calorie burning---the best effective way Warm-up for 5mints by the velocity:4-4.8KM/H, then slowly increase the speed by... - Page 16 WARM-UP INSTRUCTION Before exercise, it is better to do stretching exercises . Warm muscles stretch more easily, so the first of 5 ~ 10 minutes to warm up. Then in accordance with the following methods to stop and do stretching exercises - do five times, each leg every time 10 seconds or more time to do it again after the end of the exercise.
-
Page 17: Running Belt Adjustment
RUNNING BELT ADJUSTMENT Warning: ALWAYS UNPLUG THE TREADMILL FROM THE ELECTRICAL OUTLET BEFORE CLEANING OR SERVICING THE UNIT. Clean: General cleaning or the unit will greatly prolong the treadmill. Keep treadmill clean by dusting regularly. Be sure to clean the exposed part of the deck on either side of the walking belt and also the side rails. - Page 18 CENTER THE RUNNING BELT ●Place treadmill on a level surface. Run Treadmill at approximately 6-8KM/H, checking the running condition. If the belt has drifted to the right, pull out of the save clock and switch, turn the right adjusting bolt 1/4 turn clockwise, then start running until centering the belt.
-
Page 19: Exploded Drawing
EXPLODED DRAWING... -
Page 20: Parts List
PARTS LIST Item Spec. No. No. Item Spec. Computer Bottom Main Frame Wire Base Frame Computer Up Wire Left Upright bracket Screw ST4.2*13 Right Upright bracket Bolt Motor Bracket Bolt M8*25 Computer frame Bolt M6*55 Standard spring Cylinder washer Front Roller Bolt M8*16 M8*25... - Page 21 Item Spec. No. No. Item Spec. Massager 36 Computer Bottom Cover Frame Bottle Holder Massager Head Tube plug Massager Belt Wrench w/screw Driver S=13,14,15 Twister 5#Allen Wrench Foam Magnetic Ring Circle Inner Plug AC single Wire Bolt M8*15 Safety key...
- Page 22 THANK YOU FOR PREFERRING OUR PRODUCT. This product you have already purchased in under the guarantee of the SPOR DÜNYASI. In case you have any problems with regard to installation or service, please do not hesitate to contact our technical service department by calling 0850 495 52 12.
Need help?
Do you have a question about the ICONA and is the answer not in the manual?
Questions and answers