Advertisement
Available languages
Available languages
Quick Links
MONTAGEANLEITUNG
MOUNTING INSTRUCTIONS
INSTRUCTIONS DE MONTAGE
INSTRUCCIONES DE MONTAJE
GUIDA AL MONTAGGIO
DUCATI Hyperstrada 2013-
© by MRA-Klement GmbH – 10/2015 4025066146772
MRA-Klement GmbH Siemensstr. 6 D-79331 Teningen Tel.: +49 7663 93890 Email: info@mra.de
1
Advertisement

Related Manuals for MRA 23.035.R


Summary of Contents for MRA 23.035.R
- Page 1 MONTAGEANLEITUNG MOUNTING INSTRUCTIONS INSTRUCTIONS DE MONTAGE INSTRUCCIONES DE MONTAJE GUIDA AL MONTAGGIO DUCATI Hyperstrada 2013- © by MRA-Klement GmbH – 10/2015 4025066146772 MRA-Klement GmbH Siemensstr. 6 D-79331 Teningen Tel.: +49 7663 93890 Email: info@mra.de...
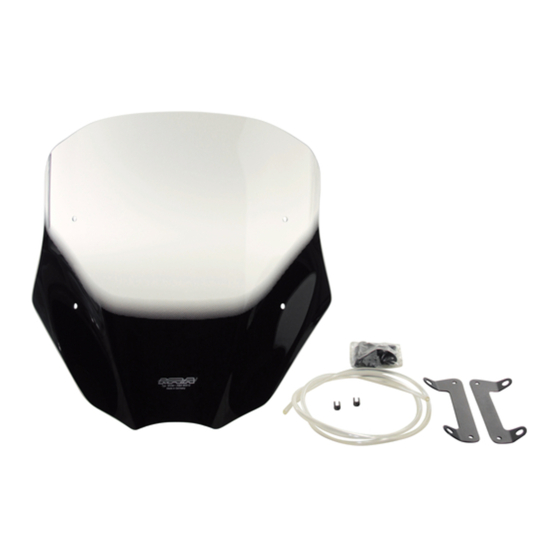
- Page 2 Positionen montierbar (P2 & P3). 4. Stecken Sie die Gummimuttern in die Löcher (P2). 5. Bringen Sie die MRA-Racingscheibe in Position und befestigen Sie die mit den Linsenschrauben und den Unterlegscheiben. Nach Montage und danach in regelmäßigen Abständen alle Schrauben auf festen Sitz prüfen und ggf.
- Page 3 (P2 & P3). 4. Insert the rubber nuts into the holes (P2). 5. Position your MRA racing screen and fasten it to your bike using the oval- head screws and washers. After installation, check that all of the screws are tight; tighten them up if necessary. Repeat this at regular intervals.
- Page 4 (P2 & P3). 4. Placez les écrous de caoutchouc dans les trous (P2). 5. Amenez le pare-brise MRA-Racing en position et fixez-le au moyen des vis à tête bombée et des rondelles. Après le montage et ensuite, à des intervalles réguliers, vérifiez si toutes les vis sont bien serrées. Si nécessaire, les resserrer.
- Page 5 (P2 e P3). 4. Inserire i dadi in gomma nei fori (P2). 5. Portare il cupolino racing MRA in posizione e fissarlo con le viti a testa bombata e le rondelle. Dopo il montaggio e, successivamente, a intervalli regolari controllare che tutte le viti siano in sede ed eventualmente serrarle.
- Page 6 (P2 y P3). 4. Inserte las tuercas de goma en los orificios (P2). 5. Coloque pantalla Racing de MRA en posición y fíjela con los tornillos alomados y las arandelas. Después del montaje, y más adelante a intervalos regulares, comprobar que todos los tornillos están bien colocados y dado el caso volver a apretarlos.
Need help?
Do you have a question about the 23.035.R and is the answer not in the manual?
Questions and answers