Table of Contents
Advertisement
Quick Links
ICE MAKER User's Manual
Model KRU-70-AB
This product is designed for indoor use.
●
The external appearance, design, color, and components of this machine
●
may be changed without prior notice.
This product requires a floor drain.
●
The water supply and drain hoses are not supplied with the product and
●
will need to be purchased separately.
Toll Free: (888) 275-4538
international: (514) 737-9701
Fax: (514) 342-3854
Toll Free Fax: (877) 453-8832
Advertisement
Table of Contents

Subscribe to Our Youtube Channel
Related Manuals for MVP KOOL-IT KRU-70-AB


Summary of Contents for MVP KOOL-IT KRU-70-AB
- Page 1 ICE MAKER User's Manual Model KRU-70-AB This product is designed for indoor use. ● The external appearance, design, color, and components of this machine ● may be changed without prior notice. This product requires a floor drain. ● The water supply and drain hoses are not supplied with the product and ●...
-
Page 2: Table Of Contents
Contents 1. Safety Precautions - Power supply related items - Installation related items 2. Part names 3. Installation specifications 7~10 - Gravity Drain 4. What to check prior to installation 5. Installation of the Ice Maker 12~13 6. Specific Features 7. -
Page 3: Safety Precautions 3~5
1. Safety Precautions To prevent any safety-related accidents and to ensure a long and trouble free usage of this product with better understanding, cautions and warnings are accompanied by symbols and figures. Make sure you understand the symbols and figures below before proceeding. Using the product without taking careful note of this symbol Danger may cause death or serious injury or fire. -
Page 4: Power Supply Related Items
■ Power supply related items ■ Stop using the product Avoid putting any object on the if the power cord is power cord and make sure that damaged. the cord does not get tangled It may cause fire or electric or tied. -
Page 5: Installation Related Items
■ Installation related items ■ Do not install the product Keep any heating appliance at a place where moisture or away from the power cord. dust gathers easily or where It may melt the coating of the rain or water splatters. cord, causing fire or electric shock. -
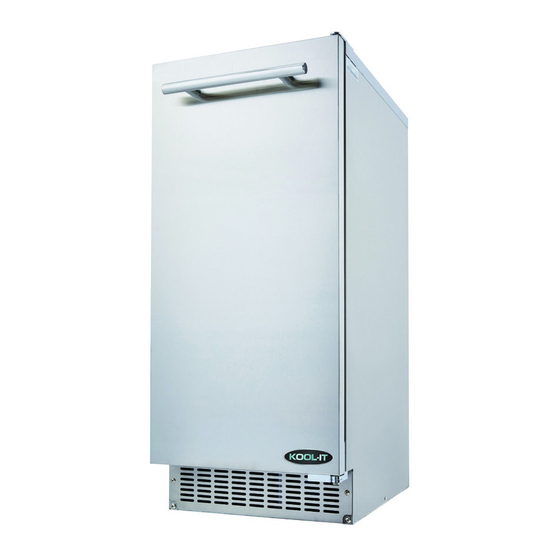
Page 6: Part Names
2. Part names 【 FRONT 】 Top cover Water trough Door handle Door Operation switch Front panel Bottom grill 【 BACK 】 Back cover Water supply connector 3/8" FPT (Inlet) Drain connector 3/4"FPT Power cord... -
Page 7: Installation Specifications 7~10
3. Installation specifications Space requirements for installation - When moving the ice maker, check whether the prepared opening dimensions,electric rating, and piping position are correct. - Refer to the installation specifications and drawings shown on pages 9 and 10. - Figures 4, 5, 6 and 7 show the entire dimensions of the product. - Page 8 Requirements for plumbing The water supply system needs to be installed as follows: Connect the ice machine to the cold potable water supply using a 1/4" water supply hose with a 3/8"MPT connector. A shut off valve is recommended between the water supply and the ice maker.
-
Page 9: Gravity Drain
Gravity Drain Model Before connecting the drain and water supply hoses, check the following: The drain hose must drop a 1/4" for every foot in length to allow for adequate draining. An air gap is required between the drain hose and the floor drain to prevent backflow into the ice storage bin. -
Page 10: What To Check Prior To Installation
4. What to check prior to installation ■ Follow this process! ■ Water source valve 115V, 60Hz Water source tube Drain hose - The water supply valve may have different shapes depending on the installation condition. - The filter may be located close to the water source or back of the product depending on the situation. Avoid uneven surface or any place with too much moisture,direct sunlight, too much dust, or water splatter. -
Page 11: Installation Of The Ice Maker
5. Installation of the Ice Machine Changing Door-opening Method The direction in which the door opens can be changed. The hinges are attached to the right-hand side of the door when the product is shipped from the factory. However, the ice maker is designed so that the hinges may be installed on either side. If the hinges are moved to the holes on the left-hand side, the door will open to the left. - Page 12 Installation Checklist Important Information : The installation technician should check whether any installation part has been omitted and follow the check list below to ensure safe and proper installation. If you have any questions or problems regarding installation, address your queries to the distributor or dealer.
-
Page 13: Specific Features 12~13
6. Specific Features Fig. 9 Solid figure ■ The gravity drain naturally drains water and requires a floor drain. ■ A perfect and unified design system with 24.6" of depth. ■ The product supplies good-quality transparent ice. ■ The maximum capacity of the ice container is 26 lb. ■... -
Page 14: Guide To Operating The Ice Maker
7. Guide to Operating the Ice Maker Initial operation ① Open the water supply valve connected to the ice maker. ② Insert the plug of the ice maker into the electric outlet. ③ Open the door and turn the switch to the “ICE” position.” ④... -
Page 15: Cleaning The Ice Maker 15~17
Operation time It takes about 20-35 minutes to produce a set of 24 ice cubes. The length of one cycle of the ice maker (ice production and ice harvest) differs depending upon the cleanliness of the ice maker, the ambient temperature, and the temperature of the water supplied to the ice maker. It takes about 8-10 hours to fill the empty ice container with ice. - Page 16 [ Cautions for cleaning the external panels (stainless steel) ] ※ How to remove rust How to clean rusted parts 1. Rust spots in early stage - Rust spots in early stage mean that the stainless steel itself is not severely affected, so a mild detergent or any commercially available cleaning agent will restore the original state.
- Page 17 8. Washing the Ice Maker ■ Cleaning the nozzle / ice slide / water trough ■ 1. Open the door and remove two front injection bolts on the top cover. 2. Pull the top cover to remove it. 3. Slightly lift the ice slide to remove it. 4.
- Page 18 5. Clean the gap of the nozzle frame fixed on the vessel sheet (water trough). 6. Lift the drain plug inside the vessel sheet (water trough), clean it, and drain the water. * Make sure that the drain plug is assembled back in the correct position after cleaning;...
- Page 19 2. Open the front door and remove the filter screens from the bottom of the ice bin and water trough. < Water trough > < Ice bin > 3. Rinse the screens with running water, and then assemble them back in the water trough and ice bin.
- Page 20 ■ Cleaning the condenser ■ 1. Remove two screws on the front panel and remove. 2. Remove dust from the surface of the condenser with a residential vacuum cleaner or a portable cleaner. 3. Reinstall the front panel after cleaning. Cleaning the condenser - Cleaning at least once a month after turning off the power For your...
- Page 21 ■ Ice Machine cleaning and sanitizing ■ The type and concentration of sanitizing agent (Ice Maker Cleaner, Sanitizer, mild or neutral detergent,) are recommended to comply with 40 CFR 180.9403 or Be registered with the USA Office of pesticides program Antimicrobials Division as a food contact sanitizer - If produced by a device, as defined per 40 CFR 152.5003, be demonstrable to be efficacious per US EPA performance.
- Page 22 ※ Caution: Wash the ice scoop regularly. The handle of the ice scoop can be easily exposed to germs by contact with hands. The detergent may cause burns. If you accidentally swallow the detergent, do not force yourself to vomit. Instead, drink large amount of water or milk and contact your doctor immediately.
-
Page 23: Maintenance Of The Ice Maker 18~23
Step 14: After the automatic cleaning is completed (+-21 minutes), turn the switch to OFF. If the disinfectant remains in the water container, use the drain plug to remove the disinfectant.Replace the drain plug and pour 1 qt of water into the trough, turn the switch to WASH and circulate the water again for 10 minutes. -
Page 24: Specifications
10. Specifications CATEGO RY UNI T KRU-70-AB Maximum Manufacturing lb/day Capacitor WxDxH 380 x 625 x 857 ( Include Han dle, Leg, Hinge) (mm ) Dimension WxDxH 14.9 x 24.6 x 33.7 ( Include Handle, Leg, Hinge ) (inch ) Quantity of Ice 24 cubes Electrical rating... -
Page 25: Troubleshooting Guide
11. Troubleshooting guide PROBLEM POSSIBLE CAUSE POSSIBLE SOLUTION Ice maker is unplugged Plug ice maker in. Breaker tripped Reset breaker - if it happens again, call an authorized service center. Ice maker does Switch turned to “OFF” Turn switch to “ICE”. not operate The ice maker has stopped since the ice detection sensor inside the tank is activated. -
Page 26: Manufacturer's Warranty 26~27
If a defect arises and MVP Group receives a valid warranty claim prior to the expiration of the warranty period, MVP Group shall, at its option: (1) repair the product at MVP Group ’ s cost, including straight time labor charges, (2) replace the product with one that is new or at least as functionally equivalent as the original, or (3) refund the purchase price for the product. - Page 27 All parts are to be sourced through the local Distributor to qualify for warranty. Labor warranty is to repair or replace defective components as per time and hourly rate guidelines published by MVP Group. Shall not include travel, normal maintenance, cleaning, adjustments, or correction of improper installation.
- Page 28 Toll Free: (888) 275-4538 international: (514) 737-9701 Fax: (514) 342-3854 Toll Free Fax: (877) 453-8832 3 2 4 0 4 1 3 - 0 0...
Need help?
Do you have a question about the KOOL-IT KRU-70-AB and is the answer not in the manual?
Questions and answers