Table of Contents
Advertisement
Quick Links
ICE MAKER User's Manual
Model KCU-180-AH
ㆍAs this product is designed for indoor use, please do not use
outdoors.
This unit requires a floor drain.
. The water supply and drain hose are not supplied with the
unit and will need to be purchased separately.
ㆍMake sure to familiarize yourself with this user's manual prior to using
the product and ensure easy access to this manual.
Appearance, design and/or color of this product may be changed
without prior notice for improvement of the product's performance.
Toll Free: (888) 275-4538
international: (514) 737-9701
Fax: (514) 342-3854
Toll Free Fax: (877) 453-8832
Advertisement
Table of Contents

Subscribe to Our Youtube Channel
Related Manuals for MVP KOOL-IT KCU-180-AH


Summary of Contents for MVP KOOL-IT KCU-180-AH
- Page 1 ICE MAKER User's Manual Model KCU-180-AH ㆍAs this product is designed for indoor use, please do not use outdoors. This unit requires a floor drain. . The water supply and drain hose are not supplied with the unit and will need to be purchased separately. ㆍMake sure to familiarize yourself with this user's manual prior to using the product and ensure easy access to this manual.
-
Page 2: Table Of Contents
Contents Features of the Ice Maker Safety precautions 4~10 Basic components Cautions for installation 12~13 How to install Correct operation Indicator description Cleaning and disassembling 17~18 Cleaning method 19~20 Ice Maker cleaning and sanitizing 21~23 Gasket cleaning guide....Product error guide Ice thickness control Ice Making and harvest Operations... -
Page 3: Features Of The Ice Maker
Features of the Ice Maker Thank you for purchasing this ice maker. Please read through this user manual as it aims to prevent injuries and ensure complete customer satisfaction. New, highly creative technology.Fast cooling anytime of the year.Unmatched ice making performance. 1. -
Page 4: Safety Precautions 4~10
Safety Precautions Safety precaution symbols are shown to help prevent accidents from the incorrect use of this product.Make sure to understand the following symbols and their meanings before continuing. Failure to comply with the warning listed below may result in death, serious injury or fire. Danger Failure to comply with the warning listed below may result in death, serious injury or fire. - Page 5 Warning ■ The Ice Machine must be grounded. - Do not use an adapter or extension cord. - Do not remove the grounding prong. - The unit must be installed in accordance with the state and local electrical and plumbing codes. ■...
- Page 6 Warning ■ Do not apply excessive force to the power cord, bend or place it under a heavy object. - It may cause an electric leak or electric shock. ■ Do not use a damaged power cord. - It may cause an electric shock or fire. - If the cord is damaged, contact your local service agent.
- Page 7 Warning ■ For cleaning and maintenance, remove the power plug from the outlet and close the water supply valve. Perform work only after the ice making operation stops. - Failure to do so may cause an electric shock or injury. ■...
- Page 8 Warning ■ Be sure to use the potable water supply. ■ When moving the product, do not tilt more than 45 degrees . - It may cause a product failure. ■ Do not twist or kink the water supply or drain hose. - It may cause a water leak, ice to melt in the bin or product failure.
- Page 9 Caution ■ Use this product as described in the user manual. - If you do not follow the instructions, it may cause an electric shock or property loss. - When transferring the product to another person, transfer the user manual with the product.
- Page 10 Caution ■ When needing to store ice for a long period of time, remove the ice from the bin and store a freezer. - The ice bin is not refrigerated and relies on the ice coldness. Ice will melt over time. ■...
-
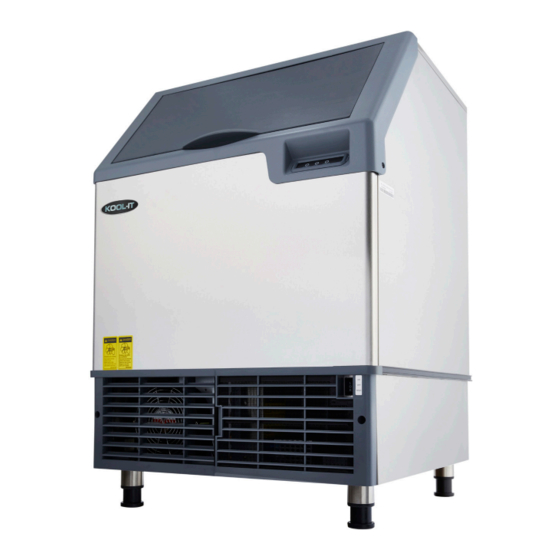
Page 11: Basic Components
Basic components [ FRONT ] [ BaCK ] Door Rear panel Front panel Power Switch Power cord Levelling foot Ice making water supply Ice making inlet(3/8" FPT) water drain (3/4" FPT) [ SIDE ] [ DETaIlS ] Water distribution cover Ice making &... -
Page 12: Cautions For Installation 12~13
Cautions for installation [ Installation area ] Install the product in a location away from any heat source. - Install the product away from heat generators such as heaters and gas stoves. - Do not install it in an area where the ambient temperature is above 100℉. - Page 13 Adjust the feet at the bottom of the product to ensure that it is standing evenly if the floor is sloped. MVP Group shall not be held liable for damages from not complying with the above mentioned regulations, including removal of the water supply/drain hoses and a poor drainage system.
-
Page 14: How To Install
How to install 1. Unpacking ice maker - After removing the cardboard outer box from the ice maker, remove the provided parts from inside the ice maker. 2. Installing the leveling feet djustable feet onto - Install the 4 height a the bottom of the ice maker. -
Page 15: Correct Operation
Correct operation Protecting water supply hose - Do not place heavy objects, or walk, on the water supply hose. Appropriate water pressure, water temperature and ambient temperature Use the product while the supply pressure is within 20-8 0 psi, the water temperature is within 50-9 0 ℉, and ambient temperature is within 50-100℉. -
Page 16: Indicator Description
Indicator description POWER indicator(green) - Lights up when power is supplied. ● POWER indicator flashes 1)Water not supplied properly: Upper limit sensor does not work within 5 minutes after opening the water supply valve(LOW) 2)Delayed ice making: Ice cubes are not made within 65 minutes (10 seconds for low limit sensor) 3)Delayed ice delivery: Ice cubes are not delivered within 5 minutes (ICE FULL not detected) 3 times in a row... -
Page 17: Cleaning And Disassembling 17~18
Cleaning and Disassembling [ Read the following carefully for proper handling! ] Warning : Disconnect the power plug before cleaning the machine or replacing parts. It may cause an electric shock or fire. - Do not directly spray water on the ice maker. It may cause a machine Danger! failure, electric leak or electric shock. - Page 18 [ Cautions for cleaning the external panels (stainless steel) ] ※ How to remove rust How to clean rusted parts 1. Rust spots in early stage - Rust spots in the early stages means that the stainless steel itself is not severely affected, thus mild detergent or any commercially available cleaning agent will restore to the original state.
-
Page 19: Cleaning Method 19~20
Cleaning Method [ Cleaning the ice bin and water trough. ] 1. Set the switch to OFF. ※ If the ice maker was in the ice making operation, it will stop after harvesting the current batch of ice cubes. WASH 2. - Page 20 10. Reassemble in the reverse order. Assemble the high water level sensor onto the front of the water trough as in the figure below. (Make sure that the top and bottom holes in the fixing clip are left open.) Caution Make sure that the top extended part of the water distribution cover goes under the opposite surface.
-
Page 21: Ice Maker Cleaning And Sanitizing 21~23
Ice machine cleaning and sanitizing The type and concentration of sanitizing agent(Ice Maker Cleaner, Sanitizer, mild or neutral detergent) is recommended to comply with 40 CFR 180.9403 or be registered with the USa Office of the pesticides program antimicrobials Division as a food contact sanitizer. - If produced by a device, as defined per 40 CFR 152.5003, Shown to be efficacious per the US EPa performance data. - Page 22 ※ Warning Wear rubber gloves and safety goggles(and/or face shield) when handling Ice Machine Cleaner or Sanitizer. Cleaning Procedure Ice machine cleaner is used to remove lime scale and mineral deposits. It cannot be used to remove algae and slime. Refer to sanitization procedure on the following pages for removal of algae and slime.
- Page 23 Step 5. While the components are soaking into the solution, use a soft bristle brush to clean ice zone surface of bin. Clean door interior, door rail, bin and evaporator mounting bracket thoroughly and rinse them with clean water. Step 6. Replace all removed parts after cleaning Step 7.
-
Page 24: Gasket Cleaning Guide
Bin Gasket Cleaning Guide * When cleaning the gasket, it is recommended to use a professional service agent. Disconnect power and water supply to the ice maker. TOP COVER 1. Loosen two screws behind the top cover and remove. 2. Remove the door(see picture on right) by sliding off the left and right door slides. -
Page 25: Product Error Guide
Product error guide Type Cause Display Lamp Solution Release Status No water No water supply POWER lamp 1.Check the amount Stop Automatically reverts blinks of water supply to initial mode after 1 hour supply in time for ice 2.Check the connections production after turning off, or resets the error when the machine... -
Page 26: Ice Thickness Control Ice
Ice thickness control There are three steps to adjust ice cube thickness. 1. The float switch is installed in 'Normal' mode at the factory . There are 4 protruding buttons on the water trough and 6 holes on the bracket. To adjust the ice thickness, detach the float switch bracket from the water trough and adjust per instructions below. -
Page 27: Operations
Ice Making and Harvesting Operations ◆ When ice cubes are made at the ice making evaporator, low water level sensor works and ice delivery starts. ◆ Ice cubes will automatically fall and are collected in the ice bin when they are removed by high pressure gas. -
Page 28: Maintenance Schedule
Maintenance schedule ※ Following maintenance schedule is for reference. ※ More frequent maintenance will be needed in accordance with the local hygiene regulations, water quality, and conditions at the location. Inspection Area Details schedule Daily SCOOP 1. Clean the ice scoop with mild detergent. 2. -
Page 29: What To Check
What to check [ Sensor system ] 1. Bin full sensor - This ice maker is designed as a complete ice making and storage system. - The automatic sensor detects when the amount of ice reaches the top of the ice bin and stops making ice. -
Page 30: Troubleshooting
Troubleshooting If the ice maker is not performing as designed, check the following items. If the symptoms still persist, contact the dealer or manufacturer. Operational status What to check Measures 1. Is Power supplied? 1. Supply power. 1. Ice maker does 2. -
Page 31: Specifications
Specifications Specifications Item UNIT KCU-180-AH Maximum /day ice making capacity Cooling capacity Ice cubes are produced 30 minutes after powering on Storage capacity Dimensions W x D x H inch 26.0 x 27.3 x 39.0 (including feet) Single Power source 115 V / 60 Hz phase Rated current... -
Page 32: Warranty 32~33
If a defect arises and MVP Group receives a valid warranty claim prior to the expiration of the warranty period, MVP Group shall, at its option: (1) repair the product at MVP Group ’ s cost, including straight time labor charges, (2) replace the product with one that is new or at least as functionally equivalent as the original, or (3) refund the purchase price for the product. - Page 33 All parts are to be sourced through the local Distributor to qualify for warranty. Labor warranty is to repair or replace defective components as per time and hourly rate guidelines published by MVP Group. Shall not include travel, normal maintenance, cleaning, adjustments, or correction of improper installation.
- Page 34 Memo...
- Page 35 Memo...
- Page 36 Toll Free: (888) 275-4538 international: (514) 737-9701 Fax: (514) 342-3854 Toll Free Fax: (877) 453-8832 3 2 4 0 4 1 2 - 0 0...
Need help?
Do you have a question about the KOOL-IT KCU-180-AH and is the answer not in the manual?
Questions and answers
who can come to see my machine at my restaurant Mirabel,Quebec'canada Ri/io080042N100/0068 KCU-180-AH