Table of Contents
Advertisement
Available languages
Available languages
Quick Links
quick start guide
Keep in mind!
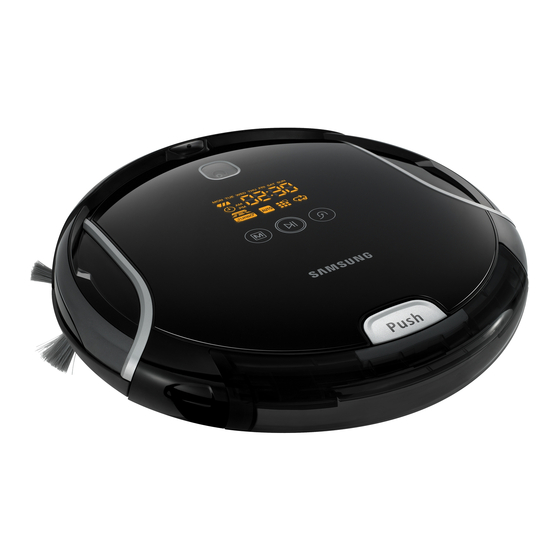
How to turn on the power switch?
When you initially purchase the product, the power
switch will be kept off. Turn on the power switch at
the bottom of the cleaning robot.
All functions will work only when the power switch
is turned on. Lift the body and turn on the power
switch while making sure not to press any other button.
If you turn off the power switch, all settings except for the
current time and the Weekly reservations are reset.
NOTE
Battery is naturally discharged!
When you separate the cleaning robot from the charger, the battery
will naturally be discharged. Therefore keep the cleaning robot on the
charger, if possible.
If no key is pressed for approximately 1 minutes after turning
the power on, the power is automatically cut to prevent the
battery discharging. To turn the power on again, press and
NOTE
hold the power (Run/Stop) button on the main body.
Auto charge is not smooth!
When you execute the cleaning mode while the cleaning robot is
charged on the charger, it will return to automatically charge more
quickly and accurately.
1. In the following cases, lift the cleaning robot with your hand and put it
on the charger to charge it.
- When the charger is installed in a corner.
- When the battery is fully discharged.
- When the cleaning robot is trapped with an obstacle.
- When the cleaning robot cannot pass over the doorsill to the location
where the charger is installed.
2. When the charger and the cleaning robot are in separate rooms, it
could take a long period of time to automatically charge the robot.
3. Check the installed condition of the charger.
(Refer to Installing the charger)
4. Wipe the obstacle sensor window lightly with a soft cloth.
To test the auto Homing, press the Charge button when the
cleaning robot is within 1.5M of the charger.
NOTE
The cleaning robot cannot cross over the
doorsill!
The vacuum cleaning robot innovative
driving system makes it possible for it to
cross over doorsills with a height of about
1cm and clean all rooms. The vacuum
cleaning robot may not be able to pass a
1cm doorsill depending on the shape of the doorsill.
What do I do when the suction power is low
or the noise level is high?
Clean the dust bin and fi lter.
Clean the power brush.
The cleaning robot hits the obstacles such as
wall, furniture etc.
The cleaning robot can bump into chair legs, table legs, sofa etc.
during the operation. Put the chair on top of the table while cleaning.
DJ68-00637Q-1 EN.indd 01
DJ68-00637Q-1 EN.indd 01
The cleaning robot is not able to clean the
corners!
Because the cleaning robot cannot
completely clean the tight corners, wall
between the sofas you should regularly
clean those areas.
There is a weird noise!
After turning off the power switch on the bottom, fl ip the cleaning robot
and remove any foreign substances (Paper, vinyl) on the power brush
or air pump.
Charging time is too long!
If you charge the cleaning robot when the battery is heated after the
cleaning, the charging time could take longer.
Troubleshoting for Error Codes
ERROR
CODE
• Vacuum cleaning robot is
caught, stuck or trapped
while navigating.
• A foreign substance (string,
paper, toy etc.) is caught
in the power brush.
• A foreign substance (string,
paper, toy etc.) is caught
in the left driving wheel.
• A foreign substance (string,
paper, toy etc.) is caught
in the right driving wheel.
• Check the Bumper sensor. • Turn off the Emergency
• A foreign substance
(dust, stain etc.) is on the
About 1cm
Obstacle sensor window.
Vertical
Vertical
Stair
Stair
type
type
type
type
• A foreign substance (Dust,
stain etc.) is on the Cliff
sensor window.
• Dust bin not inserted.
• A foreign substance
(String, cloth etc.) is caught
on the edge-cleaning side
rotating brush.
✽ If you press the Start/Stop button or turn off the Power Switch, the error
code is cleared.
CAUSE
SOLUTION
• Turn off the Power Switch
at the bottom and move
the robotic vacuum cleaner
to a different location.
• Turn off the Power Switch
at the bottom and remove
the foreign substance from
the power brush.
• Turn off the Power Switch
at the bottom and remove
the foreign substance from
the left driving wheel.
• Turn off the Power Switch
at the bottom and remove
the foreign substance from
the right driving wheel.
Stop switch at the bottom,
and then remove the
obstacle from the front of
the vacuum cleaning robot
or move it to a different
location.
• Turn off the Power Switch
at the bottom and wipe
the foreign substance from
the front and rear sensor
windows using a soft
cloth.
• Turn off the Power Switch
at the bottom and wipe
the foreign substance on
the cilff sensor window
with a soft cloth.
• Insert the dust bin until you
hear a "Click" sound.
• Turn off the Power Switch
at the bottom and wipe
the foreign substance from
the edge-cleaning side
rotating brush.
Code No. DJ68-00637Q REV(0.0)
SR8950
English
13. 01. 07 오후 5:34
13. 01. 07 오후 5:34
Advertisement
Table of Contents

Related Manuals for Samsung SR8950


Summary of Contents for Samsung SR8950
- Page 1 SR8950 The cleaning robot is not able to clean the Keep in mind! corners! How to turn on the power switch? Because the cleaning robot cannot completely clean the tight corners, wall When you initially purchase the product, the power between the sofas you should regularly switch will be kept off.
-
Page 2: Cleaning The Vacuum Cleaning Robot
Cleaning the vacuum cleaning robot Cleaning the Dust Bin and the Filter When separating the dust bin, take care not to spill the dust out of the dust bin. Empty the dust bin in the following cases. Press the Dust Bin Eject (PUSH) Separate the dust bin 1. -
Page 3: Installing The Vacuum Cleaning Robot
Installing the vacuum cleaning robot You can confi ne the vacuum cleaning robot to a particular section by using Fence (virtual wall) mode. Lamp operations - Fence (virtual wall) Mode: The red lamp fl ashes. - Off :The lamp is turned off. Turn the Power Button on Power Button Lamp... -
Page 4: Weekly Reservation
Weekly Reservation Standby mode • In Standby mode, the scheduled days of the week are displayed. When there is no reservation Blinks Hold down the Timer/Weekly button for more than 3 seconds. Press the buttons to set the day of the week. When there is a reservation •... -
Page 5: Краткое Руководство Пользователя
краткое руководство пользователя SR8950 Роботизированный пылесос не может Помните! выполнять уборку в углах! Включение переключателя питания Роботизированный пылесос не может полностью очищать узкие места, При покупке устройства переключатель поэтому необходимо регулярно питания выключен по умолчанию. Включите самостоятельно очищать пол и стены... - Page 6 Очистка роботизированного пылесоса Очистка контейнера для пыли и фильтра При извлечении контейнера для пыли будьте осторожны и не просыпьте пыль из него. Удаляйте пыль из контейнера в следующих случаях. Нажмите кнопку извлечения Потяните крышку 1. Когда в контейнере скопилась пыль. контейнера...
- Page 7 Установка роботизированного пылесоса Для роботизированного пылесоса можно ограничить область уборки с помощью режима Fence (Ограждение) (виртуальная стена). Работа индикатора - Режим Fence (Ограждение) (виртуальная стена): Индикатор мигает красным светом. - Off (Выкл.): индикатор не светится. Включите кнопку питания Кнопка питания Индикатор...
- Page 8 Функция расписания уборки на неделю Режим Standby (Ожидание) • В режиме Standby (Ожидание) отображаются выбранные дни недели. При отсутствии настроенного расписания Удерживайте кнопку Timer/Weekly (Таймер/Неделя) в нажатом состоянии Мигает более 3 секунд. Нажмите кнопку или для настройки дня недели. При наличии настроенного •...
- Page 9 הגדרת מועד פעולה שבועי ( )המתנהStandby מצב . )המתנה(, ימי השבוע שתוזמנו מוצגיםStandby במצב • כאשר לא הוגדר מועד פעולה מהבהב . )שעון עצר/שבועי( למשך למעלה מ- 3 שניותTimer/Weekly לחץ ממושכות על הלחצן .כדי לקבוע את היום בשבוע או לחץ על הלחצנים .אם...
- Page 10 התקנת הרובוט לשאיבת אבק .( )קיר וירטואליFence ניתן להגביל את הרובוט לשאיבת אבק באזור מסוים באמצעות מצב פעולות הנורה . )קיר וירטואלי(: הנורה האדומה מהבהבתFence מצב . )כיבוי(: הנורה נכביתOff הפעלה באמצעות לחצן ההפעלה לחצן הפעלה נורה . )כיבוי( נבחר ברצף זהPower off (...
- Page 11 ניקוי הרובוט לשאיבת אבק ניקוי מכל האבק והמסנן בעת הפרדת מכל האבק, היזהר שלא לשפוך את האבק מחוץ למכל .האבק .רוקן את מכל האבק במקרים הבאים הפרד את המכסה של מכל האבק על-ידי )לחצן השחרורDust Bin Eject (PUSH) לחץ על הלחצן .כאשר...
- Page 12 מדריך להפעלה מהירה VCR8950 SR8950 !הרובוט לשאיבת אבק לא מנקה את קצוות הפינות !חשוב לזכור מאחר שהרובוט לשאיבת אבק אינו מגיע לפינות ולרווחים הצרים שבין הקירות לספות, יש לנקות אזורים אלה על בסיס ?כיצד להפעיל את מתג ההפעלה .קבוע בשלב הראשון לאחר רכישת המוצר, מתג ההפעלה נותר כבוי. הפעל את מתג...
Need help?
Do you have a question about the SR8950 and is the answer not in the manual?
Questions and answers