Advertisement
Quick Links
Doc.No. LEHZ-MM00501-A
Maintenance Manual
Product Name
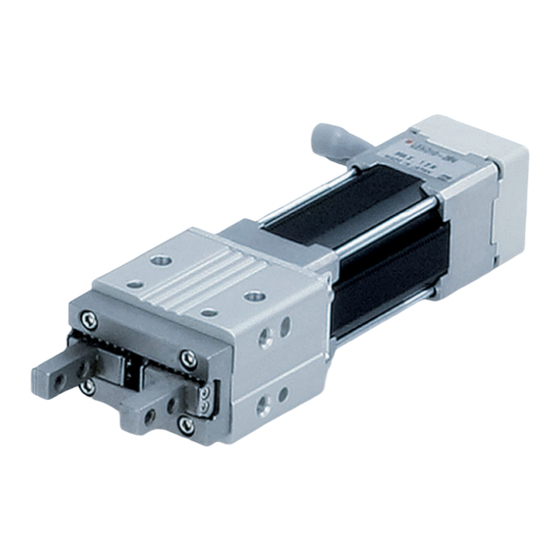
Electric Gripper
Model / Series / Product Number
LEH
LEHZ (J) / LEHF / LEHS Series
Type Z
Type F
(2 fingers)
(2 fingers)
● Standard: LEHF Seres
● Standard: LEHZ Seres
Type S
(3 fingers)
● With dust cover: LEHZJ Seres
● Standard: LEHS Seres
Products after parts replacement by the user are
outside of warranty.
Advertisement

Related Manuals for SMC Networks LEH Series


Summary of Contents for SMC Networks LEH Series
- Page 1 Doc.No. LEHZ-MM00501-A Maintenance Manual Product Name Electric Gripper Model / Series / Product Number LEHZ (J) / LEHF / LEHS Series Type Z Type F (2 fingers) (2 fingers) ● Standard: LEHF Seres ● Standard: LEHZ Seres Type S (3 fingers) ●...
- Page 2 Revision History Rev. Date of Approved Person in Details of the changes Remarks symbol change charge T.Sugiyama H.Watanabe 2016/03/16 First edition 2016/03/16 2016/03/16 T.Sugiyama H.Watanabe 2016/06/16 Addition of grease part number 2016/06/16 2016/06/16...
-
Page 3: Table Of Contents
Contents 1. Maintenance Precautions ................2 2. Replacement of Motor Assembly (LEHZ(J), LEHS) ........2 3. Replacement of Dust Cover and Encoder Dust Cover (LEHZJ) ....4 4. Replacement of Finger Assembly (LEHZ) ............5 5. Replacement of Finger Assembly (LEHZJ) ............ 7 6. -
Page 4: Maintenance Precautions
1. Maintenance Precautions Warning 1. Remove the workpiece and disconnect the power supply during maintenance and replacement of the product. 2. The motor can be replaced only as a motor assembly. 3. If no locking adhesive is applied to the bolts or screws, take a precaution when loosening. - Page 5 2-2. Re-mounting of motor assembly (Common for the LEHZ(J) and LEHS) (1) Insert the motor assembly into the body. Make sure to rotate the manual override in "S" direction when inserting the motor assembly. * If the motor assembly is inserted forcibly, it may damage the product. Manual override Body Motor assembly...
-
Page 6: Replacement Of Dust Cover And Encoder Dust Cover (Lehzj)
3. Replacement of Dust Cover and Encoder Dust Cover (LEHZJ) 3-1. Removal of dust cover and encoder dust cover (1) Remove the dust cover and encoder dust cover. Dust cover Encoder dust cover 3-2. Re-mounting of dust cover and encoder dust cover (1) Mount the dust cover and encoder dust cover. -
Page 7: Replacement Of Finger Assembly (Lehz)
4. Replacement of Finger Assembly (LEHZ) 4-1. Removal of finger assembly (LEHZ) (1) Remove the finger assembly mounting screws to remove the finger assembly. The parallel pins are mounted onto the product size 32 and 40 only. Be careful not to drop the parallel pins when removing the finger assembly. Size: 10, 16, 20, 25 Size: 32, 40 Hexagon socket... - Page 8 4-2. Re-mounting of finger assembly (LEHZ) (1) Mount the finger assembly onto the body. The datum level of the finger assembly should face the same direction as the body mounting surface. Refer to Figure 4-1 for finger assembly mounting. For size 32 and 40, mount the finger assembly after inserting the parallel pins into the body. (2) Tighten the finger assembly mounting screws to secure the body and finger assembly.
-
Page 9: Replacement Of Finger Assembly (Lehzj)
5. Replacement of Finger Assembly (LEHZJ) 5-1. Removal of finger assembly (LEHZJ) (1) After removing the dust cover, remove the hexagon socket flat countersunk head cap screws to remove the finger assembly. *1: Refer to the step (1) in the section "3-1. Removal of dust cover and encoder dust cover" of "3. - Page 10 5-2. Re-mounting of finger assembly (LEHZJ) (1) Mount the finger assembly onto the body. Refer to Figure 5-1 for finger assembly mounting. The datum level of the finger assembly should face the same direction as the body mounting surface. (2) Tighten the finger assembly mounting screws to secure the body and finger assembly. (3) Mount the dust cover and encoder dust cover.
-
Page 11: Replacement Of Finger Assembly (Lehf)
6. Replacement of Finger Assembly (LEHF) 6-1. Removal of finger assembly (LEHF) (1) Remove the hexagon socket head cap screws to remove the finger assembly. Be careful not to drop the parallel pins when removing the finger assembly. Hexagon socket head cap screws Finger assembly Parallel pins Body... - Page 12 6-2. Re-mounting of finger assembly (LEHF) (1) Mount the parallel pins onto the finger assembly and mount it onto the body. Please note the following points: *1: Be careful not to drop the parallel pins. *2: The datum level of the finger assembly should face the same direction as the front face of the body.
-
Page 13: Grease Application (Lehz)
7. Grease application (LEHZ) 1. Refer to the drawing below for the assembly procedure (1) Open the fingers at both ends. (2) Wipe off any grease adhered to the steel ball rolling surface (surface with arrows) using a cloth. (3) Apply grease evenly to the part which pointed by arrow (rolling contact surface of steel ball) by “things like a thin spatula”. -
Page 14: Grease Application (Lehf)
8. Grease application (LEHF) 1. Refer to the drawing below for the assembly procedure (1) Open the guide blocks at both ends. (2) Wipe off any grease adhered to the steel ball rolling surface (surface with arrows) using a cloth. (3) Apply grease evenly to the part which pointed by arrow (rolling contact surface of steel ball) by “things like a thin spatula”. - Page 15 4-14-1, Sotokanda, Chiyoda-ku, Tokyo 101-0021 JAPAN Tel: + 81 3 5207 8249 Fax: +81 3 5298 5362 http://www.smcworld.com Note: Specifications are subject to change without prior notice and any obligation on the part of the manufacturer. © 2016 SMC Corporation All Rights Reserved -13-...
- Page 16 LEH Spare parts list No. LEHZ-MM00301 LEHZ* LEHZ* LEHZ* LEHZ* LEHZJ* LEHZJ* LEHZJ* LEHZJ* LEHS* LEHS* LEHS* LEHS* LEHF* LEHF* LEHF* LEHF* Guarantee expires after parts replacement by customer or SMC subsidiary. Name Order number Applicable actuator model Contents Remark LEH-MP10-D LEH-MP10-D LEHZ10*-* / LEHZJ10*-* / LEHS10*-* / LEHS10*-*R LEH-MP10-D...
Need help?
Do you have a question about the LEH Series and is the answer not in the manual?
Questions and answers