Table of Contents
Advertisement
Quick Links
Advertisement
Table of Contents

Related Manuals for Rangevision Smart


Summary of Contents for Rangevision Smart
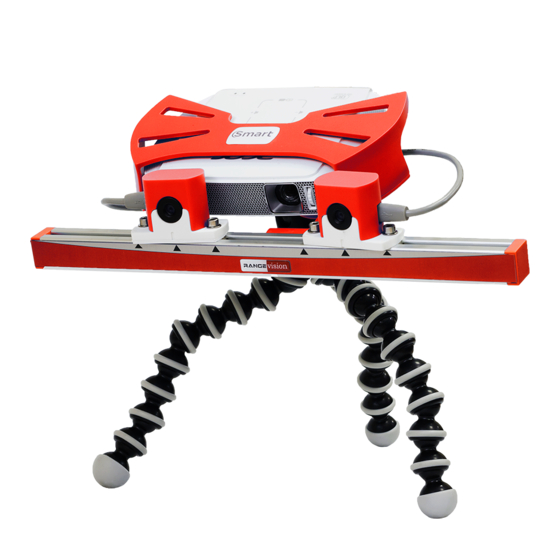
- Page 1 RangeVision Smart ScanCenter 2016.1...
-
Page 2: Table Of Contents
Contents Contents ...............................1 Introduction..............................3 Warnings……………………………………………………………………………………………………………………………………………………….3 Technical specifications.............................3 System requirements............................4 Before the first start............................5 Package contents...............................4 Installing software and drivers...........................5 Setting up your computer for the work with the scanner................................6 Connecting projector............................6 UAC setting..............................7 Connecting cameras............................8 Configuring computer parametres .........................9 Connecting the turn table..........................9 Scanner setup.......................... - Page 3 Scanning without markers..........................23 Scanning with markers.............................24 Options................................26 Scanning with texture............................27 Scanning at turn table.............................28 Solutions to possible problems........................29...
-
Page 4: Introduction
Introduction Thank you for choosing RаngeVisiоn product. Please read the instructions for setting up and scanning before using the RаngeVisiоn Smart 3D scanner, as well as familiarize with the manual in processing the scan data in RangeVisiоn SсаnMerge. Here are described... -
Page 5: System Requirements
Source of light Weight of the scanning module 0,7 kg Calibration time ~ 5 min System requirements Operating system - Windows XP and newer versions Processor - not worse than Intel Core i3 1.7 GHz Graphics card with ability to connect projector RAM not less than 4Gb 3 USB-ports (4 if using turn table) Preparing to work... -
Page 6: Before The First Start
Installing software and drivers Connect USB disk with RangeVision logo to your PC and launch RangeVision ScanCenter setup... -
Page 7: Setting Up Your Computer For The Work With The Scanner
Following the tips, choose the language, type and the path of installation. After copying the files install drivers and graphic libraries, which are necessary for correct functioning of RangeVision 3D scanner. After the setup on the desktop should appear RangeVision programs: ScanCenter, ScanMerge and IDS Camera Manager. -
Page 8: Uac Setting
Note If the second monitor (projector) wasn`t recognized by the system – check cable connection and restart the computer. You can also connect the cable to computer with switched on projector if it was off. ● After clicking by the right button on the desktop, choose screen resolution ●... -
Page 9: Connecting Cameras
Connecting cameras After installing camera drivers at the desktop of your computer there should appear IDS camera Manager. Do not connect cameras before installing drivers! Connect cameras to USB-ports of the computer and launch IDS Camera Manager. The application will show connected cameras and their state. Both cameras must be available. If one of the cameras is busy, check any third-party software that can make use of it, for example, Skype. -
Page 10: Configuring Computer Parametres
Scanner may be equipped with different types of turn tables, with additional power supply or without it, and depending on the controller, the name of the connected device can be different, for example Silicon Labs, Arduino Uno, Rangevision Table and so on. - Page 11 Enter Device Manager in control panel properties and remember the name of COM-port, used by the table. After starting ScanCenter (look below) in scanner configuration settings (Adjustment – Configuration – Rotary table) write the port number in the field Device number. Choose the model of the table - TS-12 ( since 01.2016) or Default If the table wasn`t successfully connected, during scanning the error will occur.
-
Page 12: Scanner Setup
Scanner settings Setup Wizard To configure Smart before scanning, launch Setup wizard. It step by step describes all actions, necessary to configure the scanner. In addition, please carefully read this chapter. -
Page 13: Scanning Zones
Wizard. Scanning zones RаngeVisiоn Smart scanner can be configured to 3 scaning zones. By changing the distance between the cameras and the follow-up calibration, changes the size of the scanning zone. For each scanner area a separate calibration plate is used. -
Page 14: Start Rаngevisiоn Sсаncenter
At the first start you will encounter a window, where you have to select the configuration settings of the scanner. After starting the program this menu item is available in Adjustment – Configuration. In the tab Projector select Acer smart. On the cameras tab you should select model XS (determined automatically). -
Page 15: Calibration
Calibration Take the calibration plate in accordance with the selected scanning zone: large for scanning zones № 1,2, small for scanning zone № 3. Install the plate on the magnetic stand in front of the scanner. The approximate distance to fields is specified in the table. Scanning zone, №... - Page 16 Specify the added plate in the list Select plate. When making a selection, settings of Lenses will automatically be changed. RаngeVisiоn Smart always has focal length of the lenses of 4.3 mm. Calibration is performed without illumination with natural light, when you start the calibration dialogue, the mode "Black light"...
- Page 17 If the cameras are focused, you will get a snapshot of the plate in the first position. At the calibration during shooting both the scanner and the calibration plate must be fixed relative to each other! To make snapshots in other positions, set the plate according to the instructions in the program and a schematic representation.
- Page 18 Final precision is 0.** shows the calibration accuracy. Memorize the measured value and close the calibration menu. Orientation Short Calibration function (orientation) is used to test the accuracy of calibration. This is a simplified version of full calibration, the calculation occurs after the one capture of calibration plate in the initial position (at the working distance from the scanner).
- Page 19 Some advice on calibration: ● Do not change the distance from the center of the plate to the scanner when turning the plate. The exception are only snapshots in positions 10 and 11. ● Do not rotate the plate at a very high angle. Ensure that all marks on the plate are visible from both cameras, when you turn the table.
-
Page 20: Scanning
Otherwise, the geometry of the same area of the object surface of different scans may be different, and it will be impossible to unite the pieces into a coherent whole. In RangeVision 3D scanner there are 3 scan options available, which are different, in the first place, by the fragment alignment method: ●... -
Page 21: Creating A New Project
● Scanning with markers (marks) ● Scanning on the turn table (optional, not included in the standard kit) Creating a new project To start scanning create a new project in accordance with the selected scan method. Specify the location where you want to save the project and scan data. When you choose the path where you want to save the project, consider a large volume of scan data. -
Page 22: Placing An Object
Placing an object After you create a project, place an object in front of the scanner at the working distance from the cameras. The approximate distance to the surface of the object is specified in the table in Calibrations ection. The object must be mounted securely to avoid vibration and change of the position during the scan process. -
Page 23: Viewing The Model
stripes. Visually lines and stripes must be the same brightness. Also you may lower the brightness of the projector itself. Viewing the model To see the whole preview model you can rotate, zoom and pan the 3D view. For the convenience of scanning, you can switch the display mode: only images from the cameras, only 3D model or an image and model together. -
Page 24: Scanning Without Markers
Scanning without markers When scanning without markers, the fragments of the model surface may not be oriented in relation to each other, which decreases the scanning speed and the process of gaining a 3D-model. This scanning method may be used if the surface of the object has expressed assymetrical relief, which will later serve as basis for fragments registering. -
Page 25: Scanning With Markers
Scanning with markers This scanning method is more convenient than scanning without markers. In addition to construction of the object surface, in this mode the scanner finds marks and calculates their coordinates. If each of the following scans has enough related marks from previous ones, new fragment automatically will be placed in the desired position. - Page 26 If a project can not cover all necessary areas to scan without moving the object relative to the surface with markers, you need to create multiple projects (by number of positions of the object relative to the markers) and then during the processing load them together to combine. Markers should be attached as chaotic as possible.
-
Page 27: Options
● Perform Orienting to check calibration of the scanner ● If the reference grid of 3D-marks is already created - load it through File → Load reference grid ● Set the object at a working distance from the scanner ● Turn on Stripes and lines mode, check the sharpness of the projector and with the help of the slider adjust the exposure... -
Page 28: Scanning With Texture
Scanning with texture 3D scanner RangeVision Smart has a feature of colored scanning. Obtaining a 3D model with texture can be achieved both through scanning with or without markers. Choice of scan mode is performed when you create a project: Setting parameters of color scanning is performed in the Settings for texture capturing. -
Page 29: Scanning At Turn Table
Before the scan, placing an object in front of the scanner at the working distance, adjust the illumination brightness, amplification and exposure. Set such values of the parameters at which the colors on the image from the cameras will be the most accurately matching the actual object colors. Model with texture can be exported only in the OBJ format. -
Page 30: Solutions To Possible Problems
● To measure the distance from central mark of the field to table surface, to put this number into the field Highness of central mark in Options ● To press the button Define the axe of turn table in the menu Table calibration ●... - Page 31 During the calibration procedure the scanner does not recognize markers on the calibration plate Possible causes: It is possible that cameras "see" other sheet with markers or other calibration plate in addition to the one you use. Perhaps the far markers of the plate do not fall into the frame, not covered fully by the light or covered by mounting construction ...
Need help?
Do you have a question about the Smart and is the answer not in the manual?
Questions and answers