Table of Contents
Advertisement
Advertisement
Table of Contents

Related Manuals for Ecler EVO5


Summary of Contents for Ecler EVO5
- Page 1 USER MANUAL...
-
Page 3: Table Of Contents
13. TECHNICAL CHARACTERISTICS 14. FUNCTION LIST 15. FUNCTION DIAGRAM 16. CONFIGURATION DIAGRAM 17. BLOCK DIAGRAM All numbers subject to variation due to production tolerances. ECLER S.A. reserves the right to make changes or improvements in manufacturing or design which may affect specifications. -
Page 4: Important Remark
Damages caused by mistreatment or negligent handling, lack of elementary precautions, disregard to the instructions in the manual, faulty connection or accidents. ECLER, S.A., will not be held responsible for any direct or indirect damage, loss or other damage originated by or relating to the set. -
Page 5: Introduction
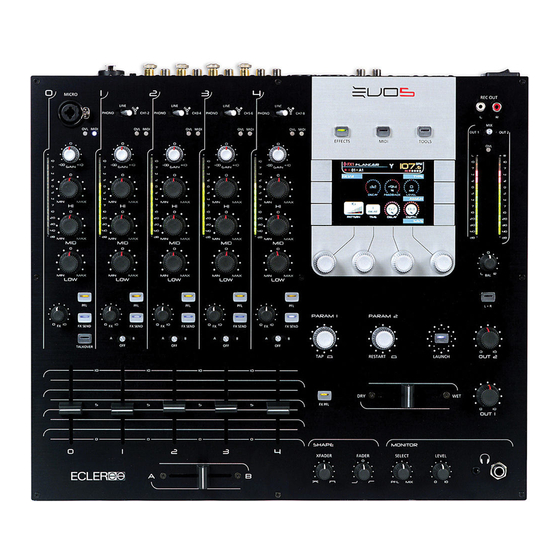
The EVO5 is a perfect tool for today’s DJs and producers thanks to its unique combination of a 12 channel firewire soundcard, the highest digital audio quality with 24 bits and 96 KHz, MIDI Control, full colour display and a completely programmable effects processor. -
Page 6: Installation
3. INSTALLATION The first thing to take into consideration when placing your EVO5 is your comfort and an easy access to all the connections. The EVO5 is basically conceived as a tabletop mixer and its usual placement will be between two vinyls or CD players. The mixer has a 370 mm depth and 432.6 mm) width format. - Page 7 Microphones must have low impedance (200 to 600 and must be mono. For unbalanced connections, it is necessary to short-circuit pin 3 to ground or the central ring. The EVO5 equips an 18V phantom power supply for condenser microphones. An internal soldering jumper allows enabling/disabling the phantom power. The EVO5’s MICRO channel is delivered from factory with enabled phantom power.
- Page 8 8 (MIDI control). The MIDI IN connector (52) is DIN 5 (180º) which allows you to connect other MIDI devices to the EVO5. If you connect a MIDI device to MIDI IN input, all the MIDI data that arrive (except MIDI clock) will be forwarded to the computer via the firewire port.
-
Page 9: Quick Start
4. QUICK START We suggest you to visit our website http://www.eclerdjdivision.com/, where you will find further information. For the following procedure you will need a CD player and headphones. If you also wish to experiment with the MIDI controller and the internal soundcard you will also need a computer with firewire connection. - Page 10 5. Select the input source. Make sure that the input source selector on channel 1 (3) is in LINE position and that the channel's VU-meter (8) lightens up. If this does not happen make sure that CD player is correctly connected and that there is an audio track being played back.
- Page 11 ROM and a FireWire cable. Before connecting the mixer to the computer, run the "setup_evo5" file, which you will find on the CD-ROM. This will automatically install the mixer drivers and the "EVO5 Firmware Upgrade" and "EVO5 Librarian" applications. Once the installation is completed, connect the mixer to the computer in accordance with the following instructions.
- Page 12 Windows XP SP2 Once you connected the mixer to the computer, the message "New hardware found. Ecler EVO5" will pop up. The new hardware found wizard will open. Select the option "No, not this time" and press "Next". Select the "Install software automatically" option (recommended).
- Page 13 A new pop-up informs you that the installation has been successfully completed. If you want to make sure that the drivers are correctly installed, open the "Device Manager", where the mixer will appear as "Ecler EVO5" in the chapter "Sound, video and game controllers".
- Page 14 19. Select a MIDI control pattern. The EVO5 offers 64 different MIDI control patterns and configurations for applications as LIVE 6 and TRAKTOR 3. Press EFFECTS (33) and the encoder identified on screen as LOAD. A list with 64 available patterns will appear.
-
Page 15: Operation And Usage
Thanks to these circuits, the introduced noise due to turning the EVO5 on or off is the lowest possible. However it is strongly recommended to turn on all the devices in the following order: 1. - Page 16 Monitoring System The EVO5 is equipped with an easy and flexible monitoring system that allows the artist to adjust with great precision the effects and mix levels for each input channel using the VU-meters and headphones. Each channel as well as the effect processing can be monitorized visually and pre-listened pressing the dedicated PFL (10) and/or FX PFL (17) yellow led button.
- Page 17 OUT 1 and OUT 2 output levels The EVO5 equips two main output controllers OUT 1 and OUT 2. The OUT 1 level can be adjusted with the OUT 1 potentiometer (24) while the OUT 2 controller adjusts the OUT 2 level (25). Both can be monitored with the main VU-meter using the OUT 1/MIX/OUT 2 switch (29) and can also be edited with the L+R controller and the balance controller (BAL).
- Page 18 MIDI TRANSMISSION MIDI CLOCK LAYOUT NUMBER LAYOUT NAME USER ACTIVE PROFILE MENU TREE...
-
Page 19: Effects Processor
The EVO5 equips a powerful and completely programmable effects processor working at 24 bits and 96 KHz. Using the 10 fully editable basic effects, the EVO5 offers the novel possibility of chaining two of these effects to create new and more creative effects. Up to 64 different effects can be named and saved in the mixer’s memory. - Page 20 PARAM 2 encoder (38) This encoder controls a second parameter of the selected effect. The parameter to be controlled can be easily selected via software. Pressing this encoder you will execute the RESTART function, which synchronizes this instant of the music with the beginning of the selected BPM pattern.
- Page 21 Effects available for the user (personalized) The EVO5's effects unit allows you to use any combination of 2 basic effects FX1 and FX2 in chain and simultaneously. All effect presets that are available for the EVO5’s user are in fact two chained basic effects. This is the reason why in the left part of the display always appears the option to select FX1 or FX2 (the two chained basic effects) and the correspondent name to remember you which basic effect you are working with.
- Page 22 In this way you can create your own sounds and convert your sessions into a unique experience. Using presets The external software “EVO5 Librarian” also lets you import and export preset effects configurations from a computer. This lets you exchange configurations with other artists.
-
Page 23: Internal Soundcard
EVO5 into a perfect console for music production and live acts. The EVO5 has 2 firewire connectors with 6 pins (IEEE1394). These two connectors work as a hub, so you can connect another firewire device to the unused connector. -
Page 24: Midi Control
MIDI device to the MIDI IN input, all information sent from this device (excepting the MIDI clock) will be forwarded to the computer via firewire. In this way, the EVO5 works as a converter card for MIDI data from MIDI (DIN 5) to firewire. - Page 25 MIDI control patterns The EVO5 has 64 different MIDI control patterns. That means that each of the 69 controllers can send 64 different messages, depending on the selected pattern. The controllers, as well as the patterns, can be completely personalized. The mixer includes some preset patterns to control software, e.g.
- Page 26 (note down). Realtime Start (Realtime Stop, Realtime Continue): if the controller is configured this way, the EVO5 sends a MIDI Realtime Start (or Stop or Continue, respectively) message when the controller is pressed. The controllers of the MIDI section (which are located...
- Page 27 Once all the MIDI controllers are configured according to your wishes, you need to save the pattern that you are editing. The EVO5 offers you the possibility to save it using a name, so it will be easy for you to remember it and to access the pattern whenever you want, as any other section of the mixer.
-
Page 28: Settings Menu
9. SETTINGS MENU From the settings menu you can configure the major part of the mixer's parameters. The following explains the different menus and programmable parameters. SETTINGS Default Factory Values Inputs Outputs Shape MIDI FireWire Advanced Inputs Saved configuration EQ ... - Page 29 Outputs Unit password Limiter Select OUT 1 OUT 2 Threshold dB (-10 to +10) Sensibility OUT 1 0/+3/+6 dB OUT 2 0/+3/+6 dB REC Signal MIX-PFL Shape XFader Adjust cut-in-time: 2mm left (-1 to 8mm) 2mm right (-1 to 8mm) DRY/WET ...
- Page 30 Advanced User password Version Sampling rate 96.000 88.200 48.000 44.100 Display Brightness 1-10 Disable User configuration Load Config 1 Config 2 Config 3 Save Config 1 Config 2 Config 3 Change passwords Unit password User password Firmware upgrade Restore Restore the original unit configuration, except for outputs.
-
Page 31: Setting Up Your Mixer
10. SETTING UP YOUR MIXER Being aware of the fact that the mixer can be shared by different DJ's in the same place, the EVO5 can be personalized with three different configurations. For each configuration the following parameters can be saved (detailed with the ... -
Page 32: External Software: Evo5 Librarian And Evo5 Firmware Upgrade
The "Send" button is for bringing all the presets (or layouts) from the table to the connected EVO5. As the data are sent, the cells involved change colour momentarily to indicate the event. -
Page 33: Further Considerations
During the time taken for the "Get" or "Send" operation, the buttons are disabled (on all screens) due to the fact that there is an operation in progress. If an error occurs during these operations (there is no EVO5 connected to the computer, the version of the EVO5 is incorrect, communication timeout, etc.), a dialog box is displayed to report... -
Page 34: Technical Characteristics
13. TECHNICAL CHARACTERISTICS AD/DA 24 bits converter 96kHz (default), 88.2kHz, 48kHz, 44.1kHz selectable. 32/64bits DSP engine. Frequency response -1dB (-3dB): Line:10Hz – (30kHz) Micro: 10Hz – (28kHz) Phono: RIAA 0.5dB (20Hz – 20kHz) Input sensitivity/Impedance: Line: 0dBV/20k... - Page 35 Tones: Full configurable and bypassable, including Microphone parametric. Built in squelch on unused channels. Phantom voltage: +17,5VDC/5mA max. Input Gain: from - to +10dB Mains: 90-264VAC 47-63Hz Power consumption: 50VA Dimensions: 432.6x370x80mm Weight: 6.4kg * Specifications and appearance are subjected to change without notice.
-
Page 36: Function List
14. FUNCTION LIST 1. Microphone XLR/JACK combo connector, MICRO 2. Overload indicator, OVL 3. Input selector 4. MIDI mode indicator 5. Input sensitivity adjust, GAIN 6. Treble control, HI 7. Midrange control, MID 8. LED VU Meter 9. Bass control, LOW 10. -
Page 37: Function Diagram
15. FUNCTION DIAGRAM... -
Page 38: Configuration Diagram
16. CONFIGURATION DIAGRAM... -
Page 39: Block Diagram
17. BLOCK DIAGRAM... - Page 40 ECLER Laboratorio de electro-acústica S.A. Motors 166-168, 08038 Barcelona, Spain INTERNET http://www.ecler.com e-mail: info@ecler.es 50.0138.01.03...
Need help?
Do you have a question about the EVO5 and is the answer not in the manual?
Questions and answers