
Related Manuals for Weston 86-0701-W


Summary of Contents for Weston 86-0701-W
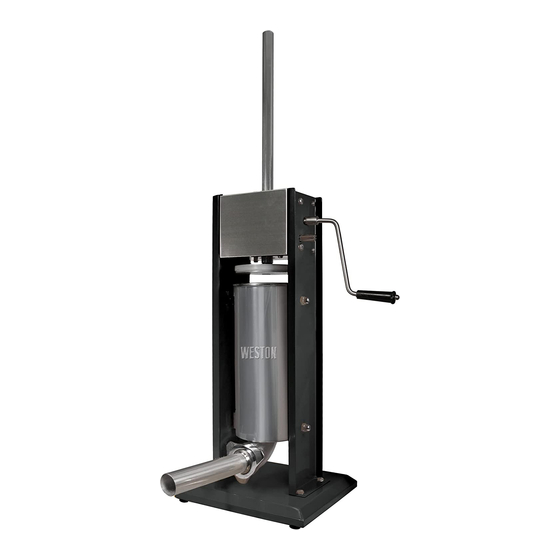
- Page 1 VERTICAL SAUSAGE STUFFERS 7 LB: 86-0701-W 11 LB: 86-1101-W 15 LB: 86-1501-W 30 LB: 86-3001-W...
-
Page 2: Important Safeguards
IMPORTANT SAFEGUARDS WHEN USING APPLIANCES, BASIC SAFETY PRECAUTIONS SHOULD ALWAYS BE FOLLOWED TO REDUCE THE RISK OF INJURY TO PERSONS, INCLUDING THE FOLLOWING: 1. Read all instructions. 2. CHECK FOR DAMAGED PARTS. Before using the Stuffer, check that all parts are operating properly and perform the intended functions. Check for binding of moving parts, mounting and any other conditions that may affect the operation. - Page 3 If any components of this unit are broken, the unit does not operate properly or you need a replacement instruction manual, visit us on the web at WestonSupply.com 1-800-814-4895 Or call Weston Brands, LLC Toll Free at Monday thru Friday 8:00am-5:00pm ET. Outside the U.S. call 001-216-901-6801...
- Page 4 GEAR MOVEMENT Fast gear shaft With the handle attached, turn clockwise to raise the plunger, or counterclockwise to lower the plunger. Slow gear shaft With the handle attached, turn clockwise to raise the plunger, or counterclockwise to lower the plunger. FAST GEAR SHAFT IS BEST FOR ASSEMBLY AND DISASSEMBLY.
- Page 5 (FIGURE 6). 5. Thoroughly coat the inside of the canister Brackets with a registered H1 or H3 food-grade lubricant, such as Weston Registered H1 Food-Grade Lubricant, prior to use (FIGURE 7). FIGURE 6 Bottom...
-
Page 6: Disassembly & Cleaning
Sanitize as needed. 6. Fully lubricate the shaft, canister, pressure-release valve components and the front ring nut with a registered H1 or H3 food-grade lubricant, such as Weston Registered H1 Food-Grade Lubricant, before and after each use. SANITIZING Sanitize using 1 tablespoon (15 ml) of household bleach per 1 gallon (3.8 liters) of... - Page 7 6. Turn the handle until the plunger comes in contact FIGURE 9 with the meat and the mixture is ready to extrude out the end of the funnel. 7. Slip a casing on the end of the funnel until the entire casing has slid onto the funnel (FIGURE 9).
-
Page 8: Weston Warranty Information
WESTON WARRANTY INFORMATION SAVE THIS WARRANTY INFORMATION FOR YOUR RECORDS! This warranty applies to products purchased and used in the U.S. and Canada. This is the only express warranty for this product and is in lieu of any other any other warranty or condition. -
Page 9: Précautions Importantes
PRÉCAUTIONS IMPORTANTES POUR UTILISER UN APPAREIL, VOUS DEVEZ TOUJOURS PRENDRE DES MESURES ÉLÉMENTAIRES DE SÉCURITÉ POUR RÉDUIRE LE RISQUE DE BLESSURE CORPORELLE, EN PARTICULIER LES MESURES SUIVANTES : 1. Lire toutes les instructions. 2. INSPECTER POUR DÉTECTER TOUTE TRACE DE DOMMAGES DES PIÈCES. -
Page 10: Description De La Pièce
WestonSupply.com 1-800-814-4895 Ou communiquez avec Weston Brands, LLC sans frais en composant le : Du lundi au vendredi: de 8h00 à 17h00 ET. En dehors des États-Unis, veuillez appeler le 001-216-901-6801... -
Page 11: Montage
MOUVEMENT DES ENGRENAGES L’arbre d’engrenage rapide avec la manivelle fixée, tourner vers la droite pour relever le poussoir et vers la gauche pour le rabaisser. L’arbre d’engrenage lent avec la manivelle fixée, tourner vers la gauche pour relever le poussoir et vers la droite pour le rabaisser. - Page 12 5. Avant d’utiliser, bien recouvrir l’intérieur du réservoir à l’aide d’un lubrifiant de qualité alimentaire homologué H1 ou H3, comme le lubrifiant de qualité alimentaire homologué H1 de Weston. (FIGURE 7). Brides Vue de inférieures l’extérieur des supports du...
-
Page 13: Démontage Et Nettoyage
à l’aide d’un lubrifiant de qualité alimentaire homologué H1 ou H3, comme le lubrifiant de qualité alimentaire homologué H1 de Weston avant de le remplir avec le mélange de viande. 1. Inclinez le contenant vers l’avant. 2. Remplissez le contenant du mélange de viande et d’assaisonnements (FIGURE 8). - Page 14 6. Tournez la manivelle jusqu’à ce que le poussoir FIGURE 9 entre en contact avec la viande et que le mélange est prêt à sortir de l’autre côté de l’entonnoir de bourrage. 7. Glissez l’enveloppe sur l’extrémité de l’entonnoir de bourrage jusqu’à ce que l’enveloppe entière soit passée sur l’entonnoir (FIGURE 9).
- Page 15 INFORMATION SUR LA GARANTIE DE WESTON CONSERVEZ CETTE INFORMATION SUR LA GARANTIE POUR VOS DOSSIERS! La présente garantie s’applique aux produits, achetés et utilisés aux États-Unis et au Canada. La présente garantie est la seule garantie expresse pour ce produit et remplace toute autre garantie ou condition.
-
Page 16: Salvaguardias Importantes
SALVAGUARDIAS IMPORTANTES CUANDO UTILICE APARATOS, SIEMPRE DEBEN SEGUIRSE PRECAUCIONES DE SEGURIDAD BÁSICAS A FIN DE REDUCIR EL RIESGO DE LESIONES A PERSONAS, INCLUYENDO LAS SIGUIENTES: 1. Lea todas las instrucciones. 2. REVISE SI TIENE PARTES DAÑADAS. Antes de usar la rellenadora revise que todas las partes estén funcionando debidamente y realicen las funciones deseadas. - Page 17 WestonSupply.com 1-800-814-4895 o llame a Weston Brands, LLC larga sin cargo al De lunes a viernes, de 8:00 am a 5:00 pm tiempo del ET. Fuera de Estados Unidos llame al 001-216-901-6801...
- Page 18 MOVIMIENTO DE LOS ENGRANES Eje de engranes rápido con el mango conectado, gire en sentido de las manecillas para elevar el émbolo, en sentido contrario para bajarlo. Eje de engranes lento con el mango conectado, gire en sentido contrario de las manecillas para elevar el émbolo, en sentido de las manecillas para bajarlo.
- Page 19 5. Cubra completamente el interior del cilindro Abrazaderas superiores con un lubricante de grado alimenticio H1 o H3 registrado, como el lubricante de grado alimenticio H1 registrado de Weston, antes de usarlo (FIGURE 7). FIGURA 6 Abrazaderas Vista externa inferiores...
-
Page 20: Desarmado Y Limpieza
6. Lubrique completamente el eje, el cilindro, los componentes de la válvula de liberación de presión y la tuerca anular delantera con un lubricante de grado alimenticio H1 o H3 registrado, como el lubricante de grado alimenticio Weston H1, antes y después de cada uso. - Page 21 6. Gire el mango hasta que el émbolo esté en FIGURA 9 contacto con la carne y la mezcla esté lista para ser expulsada por el extremo del embudo de rellenado. 7. Deslice un forro en el extremo del embudo de rellenado hasta que se haya deslizado completamente en el embudo (FIGURE 9).
-
Page 22: Información De Garantía Weston
INFORMACIÓN DE GARANTÍA WESTON ¡GUARDE ESTA INFORMACIÓN DE GARANTÍA PARA SUS REGISTROS! Esta garantía aplica a los productos que se compran y usan en los EE. UU. y Canadá. Esta es la única garantía expresa para este producto y reemplaza cualquier otra garantía o condición. Este producto está... - Page 24 DISTRIBUIDOR. Para todas aquellas preguntas referentes al uso del producto, partes faltantes, daño del producto, dificultad o activación de la garantía, comuníquese con el equipo de servicio al cliente de weston Brands: desde las 8:00 am hasta las 5:00 pm ET, de lunes a viernes CustomerService@WestonSupply.com...
Need help?
Do you have a question about the 86-0701-W and is the answer not in the manual?
Questions and answers