Advertisement
Table of Contents
- 1 Table of Contents
- 2 Owner's Information
- 3 General Specifications
- 4 General Rules for a Correct Overhauling and Maintenance
- 5 Specific Tools
- 6 Failures, Causes and Remedies
- 7 Recommendations for Use
- 8 Installation
- 9 Adjustments
- 10 Disassembly
- 11 Disassembly Diagram
- 12 Reassembly
- 13 Fork Exploded View
- Download this manual
Advertisement
Table of Contents

Related Manuals for Marzocchi Bomber Super Fly z.2


Summary of Contents for Marzocchi Bomber Super Fly z.2
-
Page 2: Table Of Contents
The responsibility of the owner 1) The Marzocchi suspension system is designed to absorb the shocks of an uneven road surface in order to give the rider more control over this bicycle. It is not designed to absorb the forces generated by jumps or other acrobatic maneuvers. If you subject the Marzocchi suspension system to repeated jumps or other acrobatic maneuvers, you could cause one or more of the components of the suspension system to unexpectedly break, resulting in a loss of bicycle control and serious injury to the rider. -
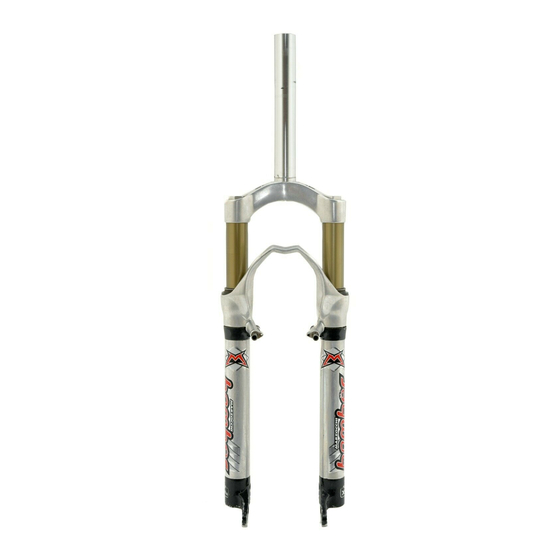
Page 3: General Specifications
– Wrench to set rebound GENERAL RULES FOR CORRECT OVERHAULING AND MAINTENANCE 1. Where specified, assemble and disassemble the shock absorption system only using the LARM or MARZOCCHI special tools, as shown in the table below. 2. On reassembling the suspension system, always use new seals. -
Page 4: Specific Tools
SPECIFIC TOOLS Ref. Item./Art. Description and use 536003AB Slider protector: to remove the oil seal from the slider R 5068 Oil seal press: to press oil seal into the slider Driver to fit seal pack onto the pumping rod These are the specific tools necessary for an overhaul, you may find it necessary to use common tools found in your shop. -
Page 5: Recommendations For Use
RECOMMENDATIONS FOR MAINTENANCE MARZOCCHI forks are based on advanced technology, supported by year-long experience in the field of professional mountain biking. In order to achieve best results, we recommend to check and clean the area below the oil seal and the stanchion tube after each use and lubricate with silicone oil. -
Page 6: Disassembly
REBOUND ADJUSTMENT (FIG. C) FIG. C Each fork leg is equipped with an adjuster screw (19) for COMPRES- SION and REBOUND damping. Turn the adjuster with the 2.5 mm Allen wrench supplied with the fork. When turned, the adjuster - integral with the inner pumping rod - will change the area in which fluid flows, thus determining the rate of compression &... - Page 7 STANCHION FIG. 1 FIG. 1 Discharge inner pressure of each fork leg (see page 22). Place the stanchion tube in a vice making sure it is not damaged or dented in the process and unscrew the cap (2) with a 26 mm box wrench.
- Page 8 PILOT BUSHING AND SEAL ASSEMBLY FIG. 5 FIG. 5 Remove the dust seal (5) from the slider top (10-11). 10-11 FIG. 6 FIG. 6 Remove the stop ring (6) from the slider by placing the screwdriver bit in one of the three openings on the stop ring and carefully lifting the ring out of place.
- Page 9 FIG. 9 FIG. 9 Fit the bit of a small screwdriver into the upper edge slot of the pilot bushing (9) and lift gently. Pull the bushing out of the slider and make all necessary changes. FIG. 10 FIG. 10 Pull out the retainer cup (20) complete with O-ring (21) from the pumping rod (30) top.
- Page 10 FIG. 13 FIG. 13 Two seal rings are fitted on the pumping rod. The upper ring (33) is thicker and has fitting joints, whereas the lower ring (32) is slimmer and should be in good conditions for proper fork operation. PARKER SEAL DISASSEMBLY FIG.
-
Page 11: Reassembly
REASSEMBLY FIG. 17 CAUTION: before reassembling, all metal parts should be washed carefully with inflammable and biodegradable solvent and dried with compressed air. PILOT BUSHING AND SEAL ASSEMBLY FIG. 17 Check that no dirt or debris is between slider and bushing. Insert the pilot bushing (9) into place so that it adheres to the slider. - Page 12 FIG. 21 FIG. 21 Lubricate the dust seal (5) and insert it into the top of the slider. PUMPING ROD FIG. 22 FIG. 22 Fit the lower (32) and upper (33) rings on the pumping rod (30). Insert the pumping rod into the bottom of the stanchion, ring side first. Push it into the stanchion, pressing the rings with your fingers.
- Page 13 FIG. 25 FIG. 25 Push the seal pack all the way into the stanchion and fit the lower washer (27). Fit the outer stop ring (22). Make sure it is completely seated into the stanchion (4). FIG. 26 FIG. 26 Fit the OR (31) duly greased in its seat in the pumping rod (30).
- Page 14 FIG. 29 FIG. 29 Screw the foot nut (18) on the pumping rod treading. Hold the slider (10- 11) tightly and tighten the nut at 12 Nm. Check to see that the stanchion tube slides unrestricted by cycling the fork up and down several times. The tube should slide freely inside the seal assembly without any play.
-
Page 15: Fork Exploded View
FORK EXPLODED VIEW Ref. Description Safety ring O-ring Stanchion Dust seal Stop ring Seal ring Upper washer Pilot bushing R.H. slider L.H. slider Arch Screw Cantilever boss Valve cap Air valve O-ring Foot nut Adjuster Retainer cup O-ring Safety ring O-ring Seal pack Parker seal...
Need help?
Do you have a question about the Bomber Super Fly z.2 and is the answer not in the manual?
Questions and answers