Table of Contents
Advertisement
Available languages
Available languages
Quick Links
Advertisement
Chapters
Table of Contents

Related Manuals for Progress Lighting AirPro P2596


Summary of Contents for Progress Lighting AirPro P2596
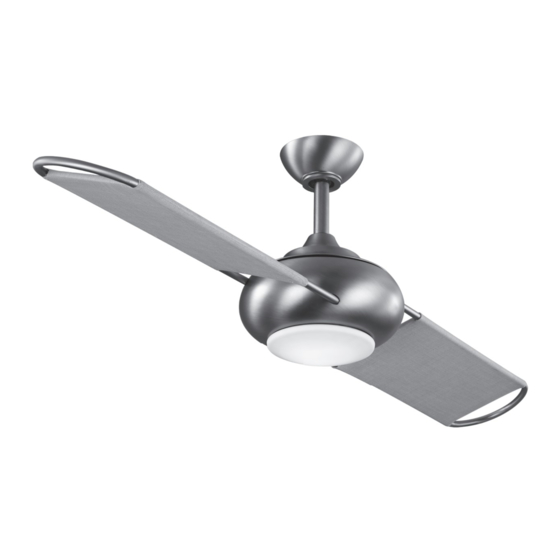
- Page 1 Ceiling Fan Installation Manual P2596 93099661_A...
- Page 2 Limited Lifetime Warranty Progress Lighting fan motors are warranted to the original purchaser to be free of electrical and/or mechanical defects for so Date Purchas ed long as the original purchaser owns the fan. Pull chain switches, reverse switches, capacitors and metal finishes are warranted to be free from defects in materials or workmanship for a period of 1 year from the date of purchase.
-
Page 3: Table Of Contents
Safety Rules..................................... Unpacking Your Fan ..................................Installing Your Fan ..................................Installing the Light Kit..................................Operating Your Transmitter ................................Care of Your Fan ................................... Troubleshooting .................................... Specifications ....................................Table of Contents... -
Page 4: Safety Rules
1. To reduce the risk of electric shock, insure electricity has been turned off 8. To avoid personal injury or damage to the fan and other items, be at the circuit breaker or fuse box before beginning. cautious when working around or cleaning the fan. 2. -
Page 5: Unpacking Your Fan 2
Unpack your fan and check the contents. You should have the following items: 1. Fan blades (2) 8. Mounting plate 14. Loose parts bag containing: 2. Blade support plate with aid screws (2) 9. 18-Watt LED light kit 3. Blade support plate (2) 10. -
Page 6: Installing Your Fan
SUPPORT OF LIGHTING FIXTURES MAY NOT installation hanger bar as shown in Figure 4 BE ACCEPTABLE FOR FAN SUPPORT AND MAY NEED TO BE REPLACED. CONSULT A (available at your Progress Lighting Retailer). QUALIFIED ELECTRICIAN IF IN DOUBT. 3. Installing Your Fan... - Page 7 Step 2. Insert the blade assembly through the two Step 4. Remove the aid screws. You can keep Attaching the Fan Blades holes in the motor housing. Carefully insert blade the aid screws for future use. (Fig. 7) support plate with aid screw to blade arm on top Step 1.
- Page 8 Step 7. Align the holes at the bottom of the downrod Hanging the Fan with the holes in the collar on top of the motor Ceiling UL Listed housing (Fig. 10). Carefully insert the hanger pin REMEMBER to turn off the power. Follow hanger electrical through the holes in the collar and downrod.
- Page 9 Step 3. (Fig. 13) Receiver to House Supply Wires Make the Electric Electrical Connections: Connect the black (hot) Connections wire from the ceiling to the black wire marked Code switch "AC in L" from the receiver. Connect the white (neutral) wire from the ceiling to the white wire WARNING: To avoid possible electrical shock, marked "AC in N"...
- Page 10 Finishing the Installation Outlet box Outlet box Step 1. Tuck connections neatly into ceiling outlet White (neutral) Black (hot) box. Hanger Green or bare bracket copper (ground) Black ("AC IN L") White ("AC IN N") Step 2. Slide the canopy up to mounting bracket and Screws place the key hole on the canopy over the screw on Receiver...
-
Page 11: Installing The Light Kit
CAUTION: Before starting installation, Installing the Mounting disconnect the power by turning off the circuit Plate breaker or removing the fuse at fuse box. Turning power off using the fan switch is not sufficient to Step 1. Remove 1 of the 3 screws from the prevent electric shock. - Page 12 Installing the Transmitter Outlet box Switch Holder Plastic Wall plate anchor Select a location to install your remote control Screws system transmitter. You can replace an existing wall switch or, install the transmitter on ANY flat surface. Holder Option 1: Install the remote control system using an existing wall switch outlet box.
-
Page 13: Operating Your Transmitter 10
The Reverse switch is located on the motor Restore power to ceiling fan and test for proper Installing the battery housing. Slide the switch to the Left for warm operation. weather operation. Slide the switch to the Right Remove the back cover on the transmitter and for cool weather operation. - Page 14 Blade balancing WARNING TO REDUCE THE RISK OF PERSONAL INJURY, All blades are grouped by weight. Because natural DO NOT BEND THE BLADE HOLDERS woods very in density, the fan may wobble even WHILE INSTALLING, BALANCING THE though the blades are weighed equally. BLADES, OR CLEANING THE FAN.
-
Page 15: Care Of Your Fan 12
Here are some suggestions to help you maintain your 3. Cover small scratches with a light application of shoe polish. 1. Because of the fan's natural movement, some There is no need to oil your fan. The motor has connections may become loose. permanently lubricated bearings. -
Page 16: Troubleshooting
Problem Solution 1. Check circuit fuses or breakers. Fan will not start. 2. Check line wire connections to the fan and switch wire connections in the switch housing. CAUTION: Make sure main power is off. 3. Check to make sure the dip switches from the transmitter and receiver are set to the same frequency. 1. -
Page 17: Specifications 14
2533.31 18.52 21.67 2.31' 54" 0.57 64.54 4371.51 High These are approximate measures. They do not include Amps and Wattage used by the light kit. 2018 Progress Lighting, Inc. 701 Millennium Blvd., Greenville, SC 29607 All Rights Reserved Specifications 14. - Page 18 Manual de Instalación del Ventilador de Techo P2596 93099661_A...
- Page 19 Normas de seguridad ..................................Cómo desembalar el ventilador ..............................Cómo instalar el ventilador ................................Instalación del kit de luz ................................. Operando su transmisor ................................Cómo cuidar del ventilador ................................Resolución de problemas ................................Especificaciones .................................... Tabla de Contenido...
-
Page 20: Normas De Seguridad
1. Para reducir el riesgo de eléctrocución, asegurarse de que la eléctricidad se 8. Para evitar lesiones personales o da os al ventilador y otros articulos, ha desactivado en el cortacircuitos o caja de fusibles antes de comenzar. tener cuidado al trabajar cerca del ventilador o al limpiarlo. 2. -
Page 21: Cómo Desembalar El Ventilador 2
Desembalar el ventilador y revisar el contenido. Debe tener los siguientes elementos: 14. Dos bolsas de piezas pequeñas: 1. Juego de aspas (2) 7. Conjunto de motor del ventilador 2. Placa de soporte de la aspa con 8. Plato de montaje a. -
Page 22: Cómo Instalar El Ventilador
PARA SOPORTAR VENTILADOR" Y USAR LOS TORNILLOS DE MONTAJE suspención como se muestra la Figura 4 SUMINISTRADOS CON LA CAJA DE (disponible en su distribuidor Progress Lighting). DISTRIBUCION 3. Cómo instalar el ventilador... - Page 23 Paso 2. Inserte el conjunto de la aspa a través de Paso 2. Retire los tornillos de ayuda. Puede Juntar las Aspas del los dos orificios en la carcasa del motor. Inserte guardar los tornillos de ayuda para uso futuro. Ventilador con cuidado la placa de soporte de la aspa con un (Fig.
- Page 24 Paso 7. Alinee los agujeros de la parte inferior de la Colocación del ventilador barra con los agujeros del cuello en la parte superior Soporte de de la caja del motor (Fig. 10) Introduzca con cuidado Caja de eléctrica montaje RECUERDE desconectar la alimentación.
- Page 25 receptor. Conecte el alambre Anaranjado del Realizar las Conexiones ventilador al alambre Anaranjado marcado "For Eléctricas Luce arriba" del receptor. Asegure las conexiones Interruptor de con los conectores de plástico proveidos. códigos CUIDADO: Para envitar la posibilidad de un Paso 3. (Fig. 13) Conexiones del receptor a los choque eléctrico, asegurese de apagar la corriente alambres de alimentación: Conecte el alambre eléctrica desde el circuito central.
- Page 26 receptor. Conecte el alambre Anaranjado del Realizar las Conexiones ventilador al alambre Anaranjado marcado "For Eléctricas Luce arriba" del receptor. Asegure las conexiones Interruptor de con los conectores de plástico proveidos. códigos CUIDADO: Para envitar la posibilidad de un Paso 3. (Fig. 13) Conexiones del receptor a los choque eléctrico, asegurese de apagar la corriente alambres de alimentación: Conecte el alambre eléctrica desde el circuito central.
-
Page 27: Instalación Del Kit De Luz
NOTA: Antes de comenzar con la instalación, Instalación de la Placa de desconecte la alimentación apagando el circuito Montaje del automático o quitando el fusible de la caja de fusibles. Para evitar descargas eléctricas, no basta Paso 1. Quite 1 de los 3 tornillos del anillo de con apagar la alimentación utilizando el montaje y afloje los otros 2 tornillos. - Page 28 Instalación del soporte del Caja de salida Interruptor transmisor Anclajes de Placa de pared plástico Seleccione una ubicación para instalar el Tornillos transmisor de su sistema de control remoto. Puede reemplazar un interruptor de pared existente instalar transmisor CUALQUIER superficie plana. Soporte Opción 1: instale el sistema de control remoto utilizando una caja de tomacorriente de pared...
-
Page 29: Operando Su Transmisor 10
Conecte la eléctricidad a el ventilador y confirme El Interruptor de Reversa está ubicado en la Instalación de la Bateria superficie de la carcasa del motor. Desliza el que opera debidamente. Retire la cubierta posterior del transmisor e interruptor hacia a la izquierda para funcionamiento 1. - Page 30 4. Si la oscilación de las aspas todavía se puede Balanceo de las Aspas notar, el intercambio de dos aspas adyacentes (lado a lado) puede redistribuir el peso y es posible que Todas las aspas están agrupadas por peso. resulte en un funcionamiento más uniforme. Debido a que la desidad de las maderas naturales varía, el ventilador podría oscilar aún cuando el peso de las aspas esté...
-
Page 31: Cómo Cuidar Del Ventilador 12
He aqui algunas sugerencias para ayudarle el 3. Cubrir los rayones pequeños con una ligera aplicación de mantenimiento del ventilodor. betún para calzado. 1. Debido al movimiento natural del ventilador, 4. No hay necesidad de aceitar el ventilador. El algunas conexiones se podrian aflojar. Examinar las motor tiene cojinetes permanentemente lubricados. -
Page 32: Resolución De Problemas
Problema Solución 1. Revisar los fusibles o interruptores de circuitos. El ventilador no arranca. 2. Verificar las conexiones de cables de linea al ventilador y conexiones de cable del interruptor. PRECAUCIÓN: Asegurarse de que la fuente pricipal de electricidad esté desactivada. 3. -
Page 33: Especificaciones 14
18.52 21.67 2.31' (137 cm) 0.57 64.54 4371.51 Alta Estas son mediciones aproximadas. No incluyen los Amperios y vatios usado por el juego de iliminación. 2018 Progress Lighting, Inc. 701 Millennium Blvd., Greenville, SC 29607 All Rights Reserved Especificaciones 14.
Need help?
Do you have a question about the AirPro P2596 and is the answer not in the manual?
Questions and answers