Advertisement
Quick Links
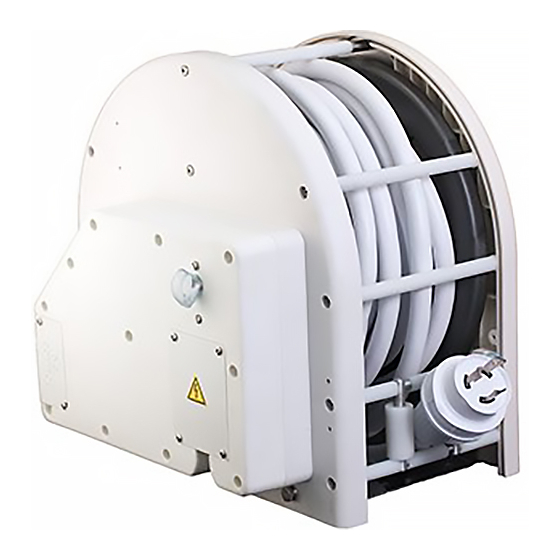
CABLEMASTER CRM-30
Circuit Breaker
(optional)
DC Control Panel
AC Control Panel
"Pigtail" (optionall)
BEFORE INSTALLING THE CABLEMASTER CRM-30™:
Before installing the mounting bracket, identify the compartment where the Cablemaster™ will be installed. The Cablemaster™ MUST BE installed in
an area that is sheltered from the elements. For proper operation of the Cablemaster™ the power cord exit MUST be centered with the center of the
reel or the power cord will wrap on one side of the reel closest to the exit and could bind during retraction. If the exit is NOT centered, you will need to
purchase additional accessories to aid in this installation. Measure the compartment to insure there is enough space for the Cablemaster™. Make sure
that a 3-1/2" space (minimum) is allowed for electrical connections on the circuit breaker side of the Cablemaster™.
STEP 1. MOUNT CABLEMASTER™ (Fig. 1)
The Cablemaster™ comes with a mounting bracket for easy installation of the
unit. Install the mounting bracket using bolts or screws (installer supplied) fas-
tening the bracket to the floor, wall or top of the compartment.
Once the mounting bracket is secured to the compartment space you may con-
nect the Cablemaster™ to the mounting bracket. Align the lock notches on the
base of the unit with the corresponding pegs on the mounting bracket. Once the
notches have been properly aligned, slide the unit locking it into place with the
mounting bracket. Attach the Cablemaster™ to the mounting bracket using the
bolts, washers and nuts supplied.
STEP 2. INSTALL HAWSE PIPE [optional] (Fig. 2)
The installation of the Hawse Pipe is optional. You may also use your existing
Hawse Pipe or any storage space door that is accessible to where you want the
power cord to exit.
If you purchased a Hawse Pipe from Glendinning, follow these instructions —
Using the template provided with the Hawse Pipe, mark the location of the Hawse
Pipe. Before drilling or cutting, check to be certain that the area behind the Hawse
Pipe is free of wires, plumbing or structural supports. Mounting surface should be
a minimum 1/2" thick. Proper thickness may be achieved by using a butt block of
marine-grade plywood behind the mounting surface.
Cut the Hawse Pipe's center hole and drill the four (4) 1/4" mounting holes. Using
INSTALLATION & OPERATION
INSTRUCTIONS
105ºC rated cordset
Reel
DIMENSIONS:
11.09" [282mm] W
14.08" [358mm] H
13.75" [350mm] D
Align peg with notches
Fig. 1
Install mounting bracket & mount unit
Fig. 2
Install Hawse Pipe (optional)
Attach unit to
mounting bracket
Use bolts or screws to
mount bracket to surface
Use template to cut / drill hole
in surface
Make sure gasket is installed
between hawse pipe flange
and exterior surface
Advertisement

Subscribe to Our Youtube Channel
Summary of Contents for Glendinning CABLEMASTER CRM-30
- Page 1 If you purchased a Hawse Pipe from Glendinning, follow these instructions — Using the template provided with the Hawse Pipe, mark the location of the Hawse Pipe. Before drilling or cutting, check to be certain that the area behind the Hawse Pipe is free of wires, plumbing or structural supports.
- Page 2 a good quality marine beading compound, secure the Hawse Pipe to the surface using four (4) 1/4” x 20 x 1” stainless steel machine screws, washers, nuts and gas- ket supplied. STEP 3. CONNECT AC POWER TO CABLE (Fig. 3) All wiring should be done in accordance with ABYC’s standards.
- Page 3 of the DC Control box and route the 14-gauge conductor wire through the hole. Attach the momentary ON power switch using the four (4) screws in the switch plate. Replace DC Control box cover removed in Step 4. Remember to re-connect the 12vDC power source that you disconnected at the start of Step 4.
- Page 4 PRODUCT(S) COVERED BY THIS LIMITED WARRANTY: CABLEMASTER™ - MODEL CRM-30 1. GLENDINNING MARINE PRODUCTS, INC. warrants to the original consumer purchaser that the Cablemaster™ - Model CRM30 will be free from defects in material and workmanship under normal use and service for a period of one (1) year from the date of purchase.

Need help?
Do you have a question about the CABLEMASTER CRM-30 and is the answer not in the manual?
Questions and answers