Advertisement
VLK Clock Includes:
CAT5 Cable
(Connects Clock to VHX
Control Box)
1/8" Clamping
Backplate
1/4" Spacer
2X 6-32 x .875"
Subpanel
Mounting Screws
VLK Installation
1. Remove the speaker bezel from the car. Set the
1/4" thick Spacer Subpanel on the back of the
clock, and slide them into the front of the
speaker as shown.
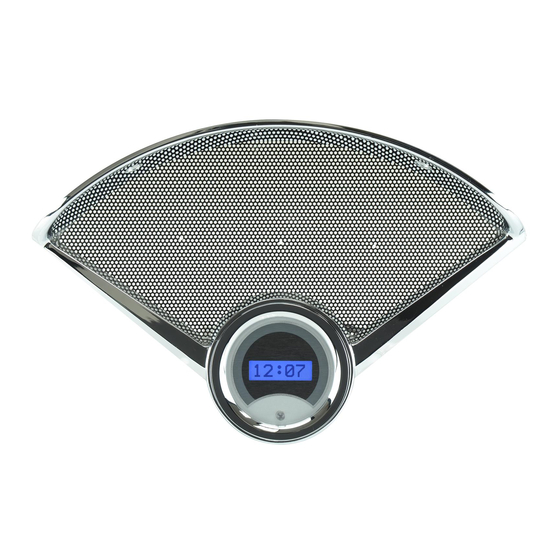
VLC/VLK-55C
Dakota Digital Clock Installation
For 1955-'56 Chevy Speaker Clocks
Installation Manuals
VLK Clock
VLC Clock
(Connects Clock to VHX
VLC Power Harness
2. Flip the bezel over. Align the 1/8" thin
Clamping Backplate on the back so the
connector is at the top, then thread the
provided screws into the two locations shown,
clamping the system together.
VLC Clock includes:
Clamping
Backplate
4X 4-24 x 5/8"
Mounting Screws
CAT5 Cable
Control Box)
Manual # 650355A
Advertisement
Table of Contents

Related Manuals for Dakota Digital VLC-55C


Summary of Contents for Dakota Digital VLC-55C
- Page 1 VLC/VLK-55C Dakota Digital Clock Installation For 1955-‘56 Chevy Speaker Clocks VLK Clock Includes: VLC Clock includes: Installation Manuals CAT5 Cable Clamping (Connects Clock to VHX VLC Clock Backplate Control Box) 4X 4-24 x 5/8” Mounting Screws 1/8” Clamping VLK Clock...
- Page 2 4. Connect the CAT5 cable to the clock. Route this cable back to the control box. VLC Installation 1. Remove the speaker bezel from the car and place the VLC clock in the speaker bezel from the front. Place the clamping back plate over the rear of the VLC, and secure the clock using the four supplied screws.
Need help?
Do you have a question about the VLC-55C and is the answer not in the manual?
Questions and answers