
Related Manuals for SensorLink Radio Ohmstik


Summary of Contents for SensorLink Radio Ohmstik
- Page 1 Operators Manual Radio Ohmstik Radio Linked Micro Ohmmeter SensorLink Corporation ®...
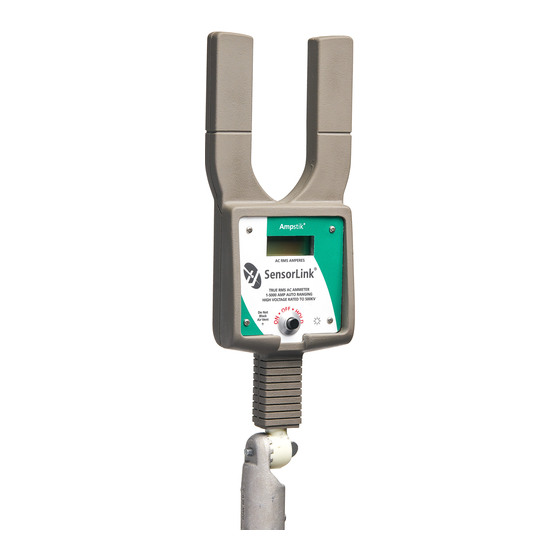
- Page 2 Model 8-182 Radio Ohmstik Transmitter Model 8-184 not pictured Model 8-180 Radio Ohmstik Display Unit Model 6-182 Radio Ohmstik Kit and Accessories...
-
Page 3: Table Of Contents
Safety Information Theory of Operation FCC and Industry Canada Statements Cleaning and Transporting Calculating Connector Resistance Ratio Ratio Conditions and Actions Radio Ohmstik Communication Software Requrements and Installation Communication with Software Communication with Display Unit Taking a Measurement Reviewing the Measurement... -
Page 4: Specifi Cations
Fused Probe or Adjustable Probe Ambient Temperature -4 to +140° F, -20 to +60° C Display Graphics LCD Software Requirements Radio Ohmstik Software System Requirements Windows XP, Vista, WIN 7, WIN 8, WIN 10 Hardware Requirements Minimum of two USB ports EEC Standards... -
Page 5: Safety Information
Safety Information Read all safety and instruction statements before using the product. Failing to follow the safety guidelines can cause severe injury or death. Ohmstiks are designed for use on live, overhead lines with 0 to 500KV. All procedures ap pro pri ate for the line voltage are to be taken, including proper work techniques, equipment, and Personal Protection Equipment. -
Page 6: Theory Of Operation
The Ohmstik is placed on a splice or connector so the connection under test is between the two electrodes. Measurement data is communicated to both the Remote Display and the Radio Ohmstik Software on the user's laptop. At the same time, the GPS device sends location data to the Software. When a valid measurement is received, the software writes the data to a comma separated (CSV) fi... -
Page 7: Fcc And Industry Canada Statements
Consult the dealer or an experienced radio/TV technician for help. Cleaning The Radio Ohmstik should be cleaned by wiping with a silicone hot stick wipe to remove dirt, sand, and salt that will degrade the urethane housing. Transporting There are no special considerations for transporting this device. -
Page 8: Calculating Connector Resistance Ratio
Calculating Connector Resistance Ratio: Resistance ratio is calculated by comparing the resistance of the fi tting over the resistance of the conductor. Factors effecting the readings may include line tension and wire condition (heavily birdcaged or other). Ratio = Connector / Conductor All fi... -
Page 9: Ratio Conditions And Actions
Ratio Conditions and Actions Evaluating any necessary actions can be completed once the ratios for the connector are calculated. The following table shows the suggested action based on maintaining the present load rating of the asset. Resistance Ratio Condition of fi tting Action 0.3 to 1.0 Normal Connection: Serviceable... -
Page 10: Radio Ohmstik Communication
Softlink Installation Step 1: Softlink Installer is available at www.sensorlink.com/products/ohmstik. Save the fi le to the desired location. The Radio Ohmstik .exe fi le will automatically begin the download when clicked. Step 2: You must agree to the licensing agreement to proceed with the download. -
Page 11: Communication With Software
Note: The default File Name is a date and time code for the date and time the application is opened. Step 4: Select Save; the Radio Ohmstik Dashboard will load and is ready for measurments Page 11... -
Page 12: Communication With Display Unit
See Safety Information on page fi ve. In the event of mak ing a phase to phase or phase to ground con nec tion, the Probe will break the connection. Step 2: Press the function button on the Radio Ohmstik sensor. The LED will fl ash green when powered on. -
Page 13: Taking A Measurement
Taking a Measurement: Step 1: Place the Radio Ohmstik on a conductor as depicted below. It is essential to make contact between the conductor and the voltage sensor, which is the V-shaped plate between the jaws, as well as the voltage probe. -
Page 14: Reviewing The Measurement
Press and hold the Function Button on the Display Unit until the LCD goes blank or Press and hold the Function Button on the Radio Ohmstik until the LED goes off. Either of these actions will power off itself and the accompanied device. The Radio Ohmstik will power off by itself if left inactive for 20 minutes. -
Page 15: Troubleshooting
“Unable To Measure” The Radio Ohmstik uses logic to know when it is on a conductor by looking for a stable load: Hold the Radio Ohmstik fi rmly on the line for at least fi ve seconds. The Ohmstik samples the line three times every 100 milliseconds. -
Page 16: Battery Replacement
The Radio Ohmstik is not specifi ed to measure above 1400A. Battery Replacement The Radio Ohmstik system is powered by two 9V batteries, one in the Radio Ohmstik and one in the Display. The expected battery life for both units is 6 to 8 hours at 68°... -
Page 17: Probes & Accessories
Standard Probes and Ac ces so ries 7-081 and 7-081XT Accessory Kits Include: (1) Standard Probe (1) Contactor Attachment (1) Wire Brush Contactor (1) Probe Hook (1) 4" Rod, Straight (1) 4" Rod, Bent (1) Philips Head Screw (1) Coupling Nut (4) Lock Washers (6) Hexnuts Standard Probe Confi... - Page 18 7-081 ADJ Adjustable Probe Accessory Kit Includes: The Adjustable probe is designed for any measurement where the distance to be measured is less than 12 inches. This probe will adjust from 4 to 13 inches. Adjustable Probe Kit includes: (1) Adjustable Probe (1) Wire Brush Contactor (1) Contactor Attachment (2) Hex Nuts...
-
Page 19: Warranty
Repaired, worked on, or altered, including removal of the front panel, by persons un au tho rized by SensorLink Corporation in such a manner as to injure, in SensorLink Corporation’s sole judg ment, the per for mance, sta bil i ty, or reliability of the in stru ment;... -
Page 20: Quality Assurance
Display Unit; Model Number: __________________________________ Serial Number: _______________________________________________ I hereby certify that the Radio Ohmstik listed above has passed all tests de fi ned in the Sensorlink Corporation standard. I also certify that I have reviewed the standard and test pro ce dure and that they are suffi cient in determining compliance with the stan dard.
Need help?
Do you have a question about the Radio Ohmstik and is the answer not in the manual?
Questions and answers