Table of Contents
Advertisement
Quick Links
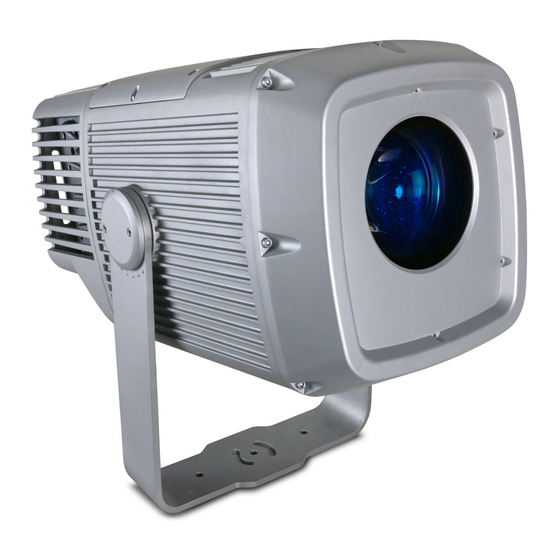
Exterior Projection 1000
User Manual
IMPORTANT! REMOVE TRANSPORT PROTECTION
BEFORE USE!
New Exterior Projection 1000 fixtures are supplied with
two cable ties fastened around internal moving parts
to protect components from damage during transport.
Before using the fixture, you must open the top cover
and remove the cable ties. See page 8.
If an Exterior Projection 1000 fixture has been used
and then correctly prepared for transport, a temporary
protection spring accessory should have been
installed around internal moving parts. Before using
the fixture, you must open the top cover and remove
the spring. See page 10.
Advertisement
Table of Contents

Related Manuals for Harman Martin Exterior Projection 1000


Summary of Contents for Harman Martin Exterior Projection 1000
- Page 1 Exterior Projection 1000 User Manual IMPORTANT! REMOVE TRANSPORT PROTECTION BEFORE USE! New Exterior Projection 1000 fixtures are supplied with two cable ties fastened around internal moving parts to protect components from damage during transport. Before using the fixture, you must open the top cover and remove the cable ties.
-
Page 2: Dimensions
Martin, HARMAN and all other trademarks in this document pertaining to services or products by HARMAN International Industries, Inc. or its affiliates and subsidiaries are registered as the property of HARMAN International Industries, Inc. -
Page 3: Table Of Contents
Table of contents Dimensions ......................2 Safety information ....................5 Introduction ......................8 Before using for the first time ................8 Transporting the fixture ..................10 Fixture overview ....................11 Physical installation .................... 12 Protection from the sun ................12 Cooling ..................... - Page 4 Service and maintenance ................... 34 Firmware ....................34 Cleaning ....................34 Managing humidity ................... 35 General ..................... 35 Seals and sealing surfaces ..............35 Pressure relief valves ................35 Removing and reinstalling the top cover ..........36 Replacing a rotating gobo ................ 38 Installing a glare shield accessory ............
-
Page 5: Safety Information
Martin® distributor. For technical support in North America, please contact Harman Professional Technical Support by e-mail: HProTechSupportUSA@harman.com or by phone: (844) 776-4899. For technical support outside North America, please contact your national distributor. Exterior Projection 1000 User Manual... - Page 6 User documentation Install, operate and service Martin products only as directed in their user manuals or you may create a safety hazard or cause damage that is not covered by product warranties. Keep this user manual for future use. Before installing, using or servicing this fixture, check that you have the latest version of the user manual, available on the fixture’s Tech Docs/Support page on the Martin website at http://www.martin.com.
- Page 7 Protection from eye injury Do not stare directly into the light output. Ensure that persons are not looking directly into the lamp when the fixture lights up suddenly. This can happen when power is applied, when the fixture receives a DMX signal, or when certain control menu items are selected.
-
Page 8: Introduction
Introduction Congratulations on purchasing an Exterior Projection 1000 from Martin®. This product is a high- quality lighting fixture that combines a powerful 440 W LED engine, advanced dynamic effects and rugged weatherproofing. It gives clean, bright projections of images such as corporate logos and patterns in indoor or outdoor environments. - Page 9 6. See illustration on right. Avoid dropping cable ties or other items into the fixture. Using scissors or cutting pliers, cut and remove the two cable ties (arrowed). 7. See illustration on right. If you unclipped the top cover safety cable, reattach it so that it will catch the top cover and prevent it from falling.
-
Page 10: Transporting The Fixture
Transporting the fixture Important! If you need to transport the fixture after you have removed the temporary cable ties that new fixtures are supplied with to protect them during delivery (see point 6. in the previous section), you must open the top cover and install a temporary protection spring inside the fixture. Installing the spring locks the frost car at the back of its movement range so that components are protected from damage caused by movement during transport. -
Page 11: Fixture Overview
Fixture overview 1. Control panel display (shown with cover removed) 2. Control buttons: Activate the menu mode functions, or MENU Return to the previous level of the menu structure, or Press and hold to exit the menus DOWN (▼) Go down a menu branch UP (▲) Go up a menu branch ENTER... -
Page 12: Physical Installation
Physical installation Read ‘Safety information’ on page 5 before installing the fixture. Protection from the sun Important! The fixture’s optical system can focus rays from the sun inside the fixture, causing internal damage and presenting a fire hazard. Make sure that the sun will not shine into the front of the fixture at any time. -
Page 13: Installing On A Rigging Truss
or the fixture’s cooling airflow will be affected, leading to excessively high fixture temperature and reduced light output. Sides of fixture not vertical: Not OK Sides of fixture vertical: OK Do not stand the fixture freely on a surface or leave it where it can be moved or fall over. Ensure that the installation surface or structure and all fasteners used can safely bear at least 10 times the weight of all the fixtures and equipment they will support. -
Page 14: Safety Cable Attachment
Mounting yoke base Safety cable attachment If a secondary attachment is required for reasons of safety (in entertainment venues, onboard marine vessels or in temporary installations, for example), you must install a safety cable: 1. See illustration on right. Loop a safety cable that is approved for the weight of the fixture through the safety cable attachment point (arrowed) in the fixture and attach the safety cable to a secure anchoring point so... - Page 15 To adjust the aim of the fixture: 1. Set the fixture to a gobo with a sharply defined pattern. You can select the image remotely either via DMX or by using the MANUAL TEST menu in the fixture’s control panel. 2.
-
Page 16: Ac Power
AC power Read ’Safety information’ on page 5 before connecting the fixture to AC mains power. Lock out power to the entire installation before working on cables and connections. Electrical installation must be carried out by qualified professionals only. For protection from dangerous electric shock, the fixture must be grounded (earthed). The AC power distribution system must be fitted with current overload and ground-fault (earth- fault) circuit breakers as well as a means to isolate fixtures from power and lock out power during service. - Page 17 2. Connect the conductors in the power cable to the distribution circuit as follows: a) Connect the green wire (US models) or yellow/green wire (EU models) to ground (earth). b) Connect the white wire (US models) or blue wire (EU models) to neutral. Connect the black wire (US models) or brown wire (EU models) to live (one phase of a three-phase system).
-
Page 18: Control Data Link
Control data link A DMX512 data link is required in order to control the fixture via DMX (and manage fixtures via RDM, if used). Your Martin supplier will be happy to help if you need advice or assistance in planning the link. Follow these guidelines when creating a DMX data link: •... - Page 19 The pair of wires with a green sleeve is for data input from the control device or previous device in the daisy chain. The pair of wires with a brown sleeve is for data output (throughput) to the next device in the daisy chain. Exterior Projection 1000 DMX data cable Connect the data cable as shown in the table below.
-
Page 20: Fixture Setup
Fixture setup Read ’Safety information’ on page 5 before operating the fixture. Using the control menus This section explains the fixture settings and utilities that are available using the control panel and display that are located on the side of the fixture. You can find a full map of the control menus in ’Control menus’... -
Page 21: Programming A Standalone Show
3. The fixture’s current DMX address is displayed. Press UP or DOWN to scroll to the DMX address that you want to give to the fixture. 4. Press ENTER to store the DMX address in the fixture. 5. Press MENU to exit. Programming a standalone show You can program a standalone show –... -
Page 22: Display Settings And User Password
Manual test / manual single scene display The manual test commands let you display a single scene (i.e. a single combination of effects) manually, either for test purposes or to control the fixture without a DMX controller. To set up the scene: 1. -
Page 23: Fixture Status
To set display behavior: 1. Select DISPLAY AUTO OFF and press ENTER. 2. Select NO to keep the display illuminated, or YES to have the display turn off automatically after 1 minute. 3. Press ENTER to confirm. Display intensity To adjust the brightness of the control panel display: 1. - Page 24 master. Every time the master changes to its next pre-programmed scene, the slave fixtures change to their next pre-programmed scene at the same time. Note the following: • Although scene changes in master and slave fixtures all occur at the same time, scenes do not have to be identical.
-
Page 25: Setting Effect Offsets
• BLACK OUT (default): Fixture blacks out. - If the fixture is set to MASTER and it does not receive a control signal, it will black out until it receives a control signal. - If the fixture is set to SLAVE, it will always black out if it does not receive a control signal. The three options listed above also determine the fixture’s behavior if the fixture is receiving a control signal but that signal is suddenly lost. -
Page 26: Effects
Effects Strobe / shutter The strobe / shutter effect provides instant open and blackout as well as variable speed regular and random strobe effects. Electronic dimming Overall intensity can be adjusted 0-100%. 16-bit dimming resolution is available using two DMX channels. -
Page 27: Gobos
Gobos The fixture contains a rotating gobo wheel with the seven rotating glass gobos shown below installed as standard. The gobo wheel below is viewed from the front glass side (front of the fixture): Rotating gobo wheel Gobo 1: Grass Lines Gobo 5: Ripple Texture Glass Gobo 2: Organic Delight Gobo 6: Lined Effect Glass... - Page 28 Gobo rings can be ordered in a set of 10 as an accessory from your Martin supplier. Ask for P/N MAR-91611851. The ring must be glued to the gobo using a silicone adhesive sealant that bonds to glass and metals and that is suitable for use in temperatures from -55° C to 200° C continuous operation. See page 38 for instructions on replacing rotating gobos.
-
Page 29: Animation Effect
Animation effect The gobo animation effect is designed to be combined with a rotating gobo and color filter to create a moving image of flames, grass blowing in the wind, water, etc. Animation effect Adjust the speed and direction of the gobo rotation, the speed and direction of the animation effect and fixture focus to give the most realistic animation. - Page 30 Animation Horizontal 90 ° Animation Horizontal 135° Animation Horizontal 156° Exterior Projection 1000 User Manual...
-
Page 31: Prism
Prism The fixture has one 4-facet linear rotating and one 3-facet radial rotating prism. Either prism can be deployed to obtain rotating split beam effects. Each prism can be set to an indexed position or rotated with variable speed and direction. Frost The frost filter softens the light output, giving a diffuse beam. -
Page 32: Operation
Operation Thermal conditions The Exterior Projection 1000 is designed for use in ambient temperatures between -30° C (-22° F) and 45° C (113° F). For instant wake-up with no warm-up mode, we recommend that you keep power applied constantly in ambient temperatures below 0° C (32° F). If the fixture’s temperature rises above its normal operating range, it regulates its light output in order to protect components from heat damage. - Page 33 Wide zoom setting (44°) Distance to 10 m 20 m 30 m 40 m 50 m projection surface (33 ft.) (65.6 ft.) (98 ft.) (131 ft.) (164 ft.) Projection diameter in 7.0 m 14.0 m 21.0 m 28.0 m 35.0 m meters (ft.) (23 ft.) (46.0 ft.)
-
Page 34: Service And Maintenance
Service and maintenance Read ‘Safety information’ on page 5 before servicing the fixture. Important! Opening the fixture can allow moisture to enter and cause condensation on the front glass. Read ‘Managing humidity’ below and follow the guidelines in this user manual carefully. -
Page 35: Managing Humidity
4. Wash the aluminum housing and front glass using warm water with a little mild detergent and a soft brush or sponge. Do not use abrasive cleaners. 5. Rinse with clean water and wipe dry. Managing humidity Martin Exterior fixtures are IP66-rated and are designed to resist water and moisture in environments with widely varying climate, temperature and humidity conditions. -
Page 36: Removing And Reinstalling The Top Cover
• Replace a valve with a new item if it shows any signs of contamination or is not in perfect condition. • Replace valves after an extended period of use. Intervals for valve replacement depend on the installation environment. • Consult your Martin dealer about a suitable valve replacement schedule. •... - Page 37 2. See illustration on right. If you unclipped the top cover safety cable, reattach it with its carabiner hook (arrowed) so that it will catch the top cover and prevent it from falling. 3. Place the top cover loosely over the top of the fixture so that air can enter and leave the fixture but debris cannot enter.
-
Page 38: Replacing A Rotating Gobo
Replacing a rotating gobo Gobos are user-replaceable, and you can replace them with custom gobos made to your own design. Gobos 1 – 4 and gobo 7 are printed/coated glass and share the same specifications, but gobos 5 and 6 are textured glass and have different specifications to the others. See ‘Gobos’ on page35. When replacing the textured glass gobos in goboholder 5 and 6 with standard glass gobos, you must use the long spring. - Page 39 2. See illustrations below. Position the alignment mark (arrowed) in each goboholder at a reference point such as the midpoint between the end of the motor mounting plate and multi- connector. Remove and reinstall goboholders with alignment marks in the same position so that you keep gobos in the same orientation..
- Page 40 5. See illustration below. Wearing clean gloves, hold the gobo with the dark side facing up. Match up the alignment marks (arrowed) in the gobo and goboholder. Lay the new gobo flat in the goboholder. Gobos 5 and 6 only Gobos 5 and 6 are textured glass and require a thrust washer.
- Page 41 2. Hold the goboholder up to the rotating gobo wheel in its original position. Rotate it until the alignment mark in the goboholder lines up with the reference point as shown in Step 3. 3. See illustrations below. Push the goboholder into position, sliding the tongue that sticks out from the goboholder into position (arrowed) behind the gobo activation cog, pressing against the gobowheel.
-
Page 42: Installing A Glare Shield Accessory
Installing a glare shield accessory A glare shield is available from Martin as an optional accessory for the Exterior Projection 1000 (see ‘Accessories’ on page 54). The shield reduces stray light and is also recommended to help protect the fixture from damage caused by the sun shining on the front of the fixture. The glare shield can be installed in seconds. -
Page 43: Remote Device Management (Rdm)
Remote Device Management (RDM) The Exterior Projection 1000 features Remote Device Management (RDM) capability. RDM lets you get information from the fixture and change settings in the fixture remotely over the DMX data link. To communicate with the fixture via RDM, use an RDM-compatible DMX controller. Before you can communicate with fixtures, you must send a scan command (‘Disc Unique Branch’) from the RDM controller to detect the devices on the data link. - Page 44 IDENTIFY DEVICE RESET DEVICE The commands that execute the PIDs in the table above are displayed differently on different RDM controllers. The Exterior Projection 1000 sends warnings and error message codes via RDM if you send a command from the RDM controller.
-
Page 45: Dmx Protocol
DMX protocol Fade Channel Value Function Default Value Status Strobe 0 - 19 Shutter closed 20 - 49 Shutter open Snap 50 - 200 Strobe (slow → fast) 201 - 210 Shutter open 211 - 255 Random strobe (slow → fast) Dimmer Fade 0 - 65335... - Page 46 Gobo selection Indexing 0 – 4 Open gobo 5 – 9 Gobo 1 indexing 10 – 14 Gobo 2 indexing 15 – 19 Gobo 3 indexing 20 – 24 Gobo 4 indexing 25 – 29 Gobo 5 indexing 30 – 34 Gobo 6 indexing 35 –...
- Page 47 Prism indexed position If channel 14 set to DMX value 6-15 0 – 255 Indexed position (0° index at 128) Prism rotation If channel 14 set to DMX value 16-25 Fade 0 – 2 No rotation (prism indexed at 0°) 3 –...
-
Page 48: Control Menus
Control menus To access the control menus, press the MENU button and hold for three seconds. Use the UP ▲ and DOWN ▼ buttons to navigate the menus. Select menu options using the ENTER button. Exit menus using the MENU button. 1~XXX Set fixture’s DMX address Address... - Page 49 Fixture acts as master or slave in master/slave operation Master/Slave Master/Slave Set only one fixture to be master! When no DMX signal is present, fixture runs Run show standalone show Fixture Config When no DMX signal is present, fixture displays the last effect it was displaying before the DMX Offline mode DMX last state...
-
Page 50: Warnings And Error Messages
Warnings and error messages The Exterior Projection 1000 monitors its own operation and is capable of self-diagnosis. If an operating parameter such as ambient temperature is exceeded or if an error occurs, the fixture displays a warning or error message in its onboard LCD display. If the fixture displays a warning or error message, it can also send a four-character code to an RDM controller. -
Page 51: Troubleshooting
Troubleshooting This section provides some suggestions for solving possible problems: Symptom Potential cause Remedies No light from fixture Power supply issue such as Ensure that mains supply is faulty connector or damaged connected and supplying cable. power to the fixture. Check all power connections and cables. -
Page 52: Specifications
Specifications Physical Length (head horizontal) ..................702 mm (27.7 in.) Width ........................417 mm (16.5 in.) Height (head horizontal) ..................618 mm (24.4 in.) Height (head vertical) ..................771 mm (30.4 in.) Weight ........................50 kg (110 lbs.) All figures include mounting yoke Dynamic Effects Color mixing ................ - Page 53 Control and Programming Control options ..................DMX, RDM, stand-alone Configuration, addressing and status ..Onboard control panel with OLED display or via RDM 8-bit control ........CMY, color selection, gobo selection, prism, frost, animation 16-bit control ..........Gobo indexing and rotation, zoom, focus and intensity DMX channels ..........................
- Page 54 Connections Power cable entry ....................IP66 cable gland Power connection .............. 1.8 m (5.9 ft.) cable tail with bare ends Power cable type ............EU models: H07RN-F 450/700 V, Ø 10 mm US models: SJTW 14AWG, 300 V, Ø 9.3 mm (0.37 in.) Data cable entry ....................
- Page 55 Related Items Martin Companion software suite ........Free download from www.martin.com Martin Companion Cable USB/DMX hardware interface ........P/N 91616091 Martin RDM 5.5 Splitter ................... P/N 90758150 Spare Parts Silica Gel Desiccant Bag in sealed foil pack ............P/N 37220000 Exterior Projection 1000 Goboholder with Magnet (incl.
- Page 56 Notes...
- Page 57 Notes...
- Page 58 Notes...
- Page 59 Notes...
- Page 60 www.martin.com...
Need help?
Do you have a question about the Martin Exterior Projection 1000 and is the answer not in the manual?
Questions and answers