Table of Contents
Advertisement
Quick Links
Advertisement
Table of Contents

Related Manuals for Okolab CO2-O2-UNIT-BL


Summary of Contents for Okolab CO2-O2-UNIT-BL
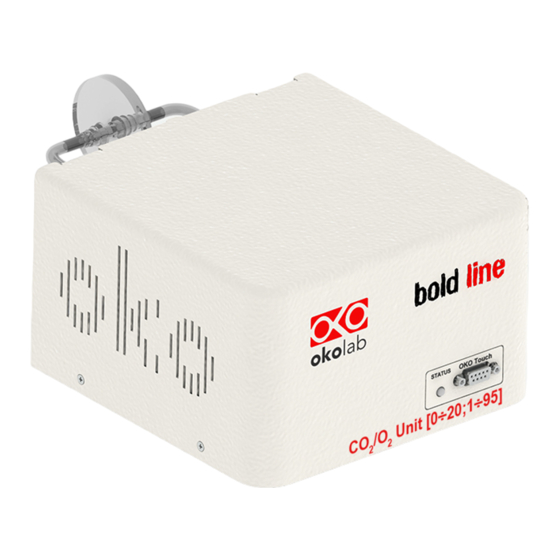
- Page 1 CO2-O2-UNIT-BL [0-10; 1-18] Gas Controller Manual IST1084_REV01 SV 3.12.3.3048...
- Page 2 This page was left Blank...
-
Page 3: Table Of Contents
SAFETY NOTES ..................................6 SUPPLIED EQUIPMENT ................................8 GAS SUPPLIED REQUIREMENTS ............................9 COMPATIBILITY ..................................9 EQUIPMENT DESCRIPTION ............................... 11 INSTALLATION ..................................12 CO2-O2-UNIT-BL [0-10; 1-18]..........................12 ETTING UP CO2-O2-UNIT-BL [0-10; 1-18] ............ 19 OW TO ASSEMBLE WITH A CONTROLLER USER INTERFACE .................................. -
Page 4: Preface
CO2-O2-UNIT-BL [0-10; 1-18] allows easily operating without N2 by setting the maximum Oxygen % value from the Touch Screen. CO2-O2-UNIT-BL [0-10; 1-18] connects to any Okolab Bold Line T controller. In this case, a single OKO- TOUCH operates both, the Bold Line T controller and CO2-O2-UNIT-BL [0-10; 1-18]. -
Page 5: Symbol Description
Symbol description This paragraph describes the symbols used in this manual and on the product label. Symbols used in this manual The following symbols identify important information to note: CAUTION or WARNING: this symbol warns you about the risk of electrical shock. CAUTION or WARNING or IMPORTANT: this symbol warns you of circumstances or practices that can affect the functionality of the instrument. -
Page 6: Safety Notes
Safety Notes In order to achieve maximum performance and to ensure proper operation of your new equipment, please read carefully the following safety notes and the instructions. If you have any question, please contact Okolab. − The equipment must only be used as intended and as described in this Manual. - Page 7 We reserve the right to make technical variations. IN NO EVENT SHALL OKOLAB S.R.L. BE LIABLE FOR ANY DIRECT, INCIDENTAL OR CONSEQUENTIAL DAMAGES OF ANY NATURE, OR LOSSES OR EXPENSES RESULTING FROM ANY DEFECTIVE PRODUCT OR THE USE...
-
Page 8: Supplied Equipment
Supplied equipment 1. CO2-O2-UNIT-BL [0-10; 1-18], main box. 2. PTFE filter (x2). One to be installed on the rear of CO2-O2-UNIT-BL [0-10; 1-18] and one as spare replacement. 3. TUBE-C (x1). Polyurethane 130cm long blue rigid tube 6mm OD with connected a 4mm ID Silicon transparent tube 150 cm long plus PTFE filter in the middle. -
Page 9: Gas Supplied Requirements
Air. Air must be available at 1.4 barg, with a connector for 6mm OD rigid silicon tube. Note ► An alternative to the compressed air, OKO-AIR-PUMP-BL allows to use background Air. Compatibility CO2-O2-UNIT-BL [0-10; 1-18] is compatible with: • OKO-TOUCH (required), including: −... - Page 10 • DATA-LOG. Software used to log, view, and store data from a PC. It may be used to change parameters of the controllers via PC. Data can be exported in .xlsx format. Figure 3. DATA LOG software. • SM-BL Smart Box. To store data, to operate the controllers via web/smartphone/tablet and to allow remote assistance for service.
-
Page 11: Equipment Description
2. RS232 connector. Connector for OKO-TOUCH. Figure 4. CO2-O2-UNIT-BL [0-10; 1-18] front panel. A detailed description of CO2-O2-UNIT-BL [0-10; 1-18] rear is provided in the following list, which refers to the pointers in Figure 5: 1. Filter Out. To connect the PTFE filter. -
Page 12: Installation
1. Install the pressure Gauge for the CO2 and N2 lines between the CO2/N2 tanks and CO2-O2-UNIT-BL [0- 10; 1-18]. Follow the arrow on the rear of the Pressure Gauge for the correct Gas In-Out (see Figure 6). - Page 13 GAS IN GAS OUT Figure 6. Input and Output gas ports. See symbol on the rear of Pressure Gauge On the bottom of the Pressure Gauge there is an automatic purging valve. Close it before operating the Pressure Gauge. To close the purging valve, looking at the regulator vertically from the top knob, pull it down and rotate it counterclockwise (see A and B in Figure 7).
- Page 14 Figure 8. Pressure gauge using 2. Install the PTFE filter on the rear panel of CO2-O2-UNIT-BL [0-10; 1-18]. It filters the mixed gas before it enters in contact with CO2-O2-UNIT-BL [0-10; 1-18] gas sensors. Connect the PTFE filter with the Filter In and Filter Out connectors on the rear panel of CO2-O2-UNIT-BL [0-10;...
- Page 15 3. Connect CO2 and N2 supply to the corresponding push to fit connectors on the rear panel of CO2-O2-UNIT-BL [0-10; 1-18] by using TUBE-A (see Figure 10 a). Tip ► Make sure to push the tubes all the way into the connectors thus avoiding any gas leak.
- Page 16 Air Tanks connections to the back panel of the CO2/O2 Controller Tip ► If you have ordered OKO-AIR-PUMP-BL, you have to connect TUBE-B between the Air Pump and the connector labeled “Air” on the rear panel of CO2-O2-UNIT-BL [0-10; 1-18] (see Figure 12).
- Page 17 Tanks and Air Pump connections to the back panel of the CO2/O2 Controller 4. Connect the TUBE-C to the gas port labeled “Gas output” on the rear panel of CO2-O2-UNIT-BL [0-10; 1-18] and the other side of the TUBE-C to your device, as shown in Figure 13.
- Page 18 Figure 13. Gas Output connections. Note ► If you purchased CO2-O2-UNIT-BL [0-10; 1-18] with H201-T-UNIT-BL or H101-T-UNIT-BL, use the TUBE-Y supplied to connect CO2-O2-UNIT-BL [0-10; 1-18] gas output to the cage incubator (see Figure 14). TUBE Y Figure 14. Gas Output connections with a Cage Incubator.
-
Page 19: How To Assemble Co2-O2-Unit-Bl [0-10; 1-18] With A Bold Line Tcontroller
6. Connect the power adapter to CO2-O2-UNIT-BL [0-10; 1-18] (see pointer 8 in Figure 1). To switch CO2-O2-UNIT-BL [0-10; 1-18] on use the power button on OKO-TOUCH. The Status LED (1 in Figure 4) on the front of CO2-O2-UNIT-BL [0-10; 1-18] will turn green. - Page 20 Figure 16. CO2-O2-UNIT-BL [0-10; 1-18] and H301-T-UNIT-BL PLUS (a – b). CO2-O2-UNIT-BL [0-10; 1-18] must stack on top of the Bold Line T controller by lining up the bus ports located on the top and bottom surface of each unit. When the units are properly connected the Temperature and parameters will appear on the OKO-TOUCH Touch Screen interface Home page.
-
Page 21: User Interface
If you have CO2-O2-UNIT-BL [0-10; 1-18] and a Bold Line T controller, it is essential to read both this manual and the Bold Line T controller User Manual to familiarize yourself with the functions and the operation of the devices before use. -
Page 22: How To Enter The Set Point
Cancel to undo. Tip ►After any change in the Setpoint value, CO2-O2-UNIT-BL [0-10; 1-18] enters into a transient regime, the Status Indicator and the TOP LED (see Figure 23) turn yellow (see paragraph 9.2). During the transient regime, CO2-O2-UNIT-BL [0-10;... - Page 23 AIR (a – b) Figure 22. How to set AIR (a). CO2-O2-UNIT-BL [0-10; 1-18] Homepage operated without N Note ► When running the system without N2, keep in mind that in this operation mode Oxygen is obviously NO more a parameter that you can regulate, that’s why you will see displayed AIR in place of the Setpoint on...
-
Page 24: Controller Status: Colours Led And Meaning
The YELLOW color indicates that the controller is in transient regime. The Yellow light will appear after the controller is turned on and after any Setpoint change. The system is working properly, it is not in alarm and no action is needed. As soon as CO2-O2-UNIT-BL [0-10; 1-18] reaches the CO and/or O composition, CO2-O2-UNIT-BL [0-10;... -
Page 25: Settings
Settings 9.3.1 Press on Settings icon to enter the Settings menu, as shown in the Figure 24 a. Figure 24. Gas Settings (a – b). To enter the Gas Settings Submenu, press the Gas Icon Figure 24 b). Then the page shown in (see Figure 25 appears. - Page 26 Figure 26. Air Source page (a - b) To connect the air pump (OKO-AIR-PUMP-BL) to CO2-O2-UNIT-BL [0-10; 1-18], see Figure 12. In the case you are using OKO-AIR-PUMP-BL please note that it can be turned on/off only via the Touch Screen interface (OKO-TOUCH).
-
Page 27: Calibrations
Tip ►Reducing the air pump speed will lead to a lower emitted noise from the air pump, while rising the air pump speed will help if you cannot reach your desired flow rate set-point. 9.3.1.2 Calibrations Press on Calibration icon to enter in the Calibration Menu, as shown in Figure 29. - Page 28 3. Put the cap on LEO Gas Input port labeled with icon (2 in Figure 32). 4. Start a Gas Single Point measurement in Diffusion Mode on LEO (please refer to LEO User Manual). CO2-O2-UNIT-BL [0-10; 1-18] LEO (not supplied) TUBE-C TUBE-A (supplied with LEO) Figure 32.
-
Page 29: Sensors (With Calibration Gas)
This function allows performing a calibration using a Span Gas or Air or pure N2 Tank. Before starting the instrument calibration, make sure you have the Gas Tank connected to the port labeled “Air Input” on the rear panel of CO2-O2-UNIT-BL [0-10; 1-18], then press the Sensors icon , as shown in Figure 36 a. At this point several options are available (see Figure 36 b). -
Page 30: Span Settings
Press on View icon to visualize the latest calibration. Figure 37.View Sensor calibration status (a – b). 9.3.1.2.2.2 Span Settings Press on Span Settings icon to access to the span gas settings (see Figure 38 a) and insert the exact gas composition of your span gas tank (see Figure 38 b). -
Page 31: Start Span
Figure 39. Factory Reset Menu (a – b) 9.3.1.2.2.4 Start Span Press the Start Span icon and the controller will perform a new Gas Calibration for the CO2 and O2 using a span gas (see Figure 40 a). After clicking, a pop-up message will appear warning about the pause of the control during the calibration routine (see Figure 40 b). -
Page 32: Start Air
Figure 42. Start Zero calibration (a – b) After clicking “OK”, the controller will ask for connecting N2 at 0.5 barg to the Air Input, located on the rear panel of the CO2/O2 Controller (see Figure 43 a). The Zero Calibration will start after pressing “OK” and the progress bar will appear (see Figure 43 b). -
Page 33: Factory Reset
Figure 45.Air calibration running (a – b) 9.3.1.2.3 Factory Reset If you are unsure about the calibration you have just performed or if for any reason you want to reset to the factory calibration, press on Factory Reset icon (see Figure 46 a). A pop-up message appears (see Figure 46 b). - Page 34 Figure 50. Setting the flowrate at 0.0 l/min. Note ► When using the Air Pump, the gas flowrate is available in the range 0.2÷0.4 l/min. Note ► When operating CO2-O2-UNIT-BL [0-10; 1-18] without N , the gas flowrate is available in the range...
-
Page 35: Gas Cycles
9.3.1.4 Gas cycles This function allows switching between two different CO concentrations. Press the Gas cycle icon to set a gas concentration cycle (see Figure 51 a). Figure 51. CO % Cycles Subpage (a – b) You can decide whether setting a new gas cycle (New, as shown in Figure 51 b) or load a previously saved one (Load). - Page 36 Figure 53. Set the duration of the Gas Cycle. 4. Once you have adjusted the settings, the Cycle Summary page will be displayed (see Figure 54 a). Press Save As if you want to save the CO Cycle program to be recalled for future experiments. Note ►You can save up to 4 different CO Cycles programs.
-
Page 37: Status
Status Press the Status icon to check CO2-O2-UNIT-BL [0-10; 1-18] performance (see Figure 58 a). Figure 58. Status page (a – b). Note ► The Status page contains advanced technical data. You may be asked to read these data in case of technical assistance with Okolab engineers. -
Page 38: Touch Screen Configuration
Figure 59. Digital input. Figure 60. CO2 Setpoint with Digital input. 9.3.2 Touch Screen configuration Press on Settings icon to enter the Settings menu, as shown in the Figure 61 a. To enter the Touch Screen configuration menu, press on the icon , as shown in Figure 61 b. -
Page 39: Touch Screen Brightness
To insert the time frame, press the + / - icons or scroll the Chart history length bar (1 in Figure 62 b). Note ► The chart history value length is pre-set at 5 minutes. Note ► Recommended value for the chart history length is 60 or 120 minutes. To change the sound frequency, press the + / - icons or scroll the Buzzer frequency bar (2 in Figure 62 b), then press Save (4 in Figure 62 b) to confirm. -
Page 40: Date & Time
Never, the Top LED will never illuminate, if you select On Alarm, the TOP LED will illuminate only when CO2-O2-UNIT-BL [0-10; 1-18] is in Alarm Status (see paragraph 9.2), if you select Always, the TOP LED will always illuminate. - Page 41 3. Insert the Gas Time by scrolling the bar (2 in Figure 67) or pressing the +/- icons. Note ►The Gas Time value defines the time for which the CO2 / O2 composition may remain outside the allowed tolerance before CO2-O2-UNIT-BL [0-10; 1-18] triggers in alarm. Note ►The alarm time range is 5-20 minutes.
-
Page 42: Data Logging
9.3.2.6 Data Logging CO2-O2-UNIT-BL [0-10; 1-18] touch screen interface, OKO-TOUCH (see Figure 2), is equipped with on- board memory for data logging and storage. A simple routine allows downloading data to USB drive or to PC. In order to log and then download the logged data, connect a USB drive (not supplied) to OKO-TOUCH, using MINI-USB-OTG cable (provided), as shown in Figure 68. - Page 43 Figure 70. Logging. (a) How to enter in the logging menu; (b) logging in internal memory. Figure 71. How to access the Logging page from the Homepage. 3. Press on the icon to insert the Time Interval i.e. the frequency with which you want to record a data point, as shown in Figure 72.
- Page 44 5. Write the file name suffix to be reported in the downloaded files by pressing on the keyboard icon , see Figure 73 a. Press Save, see Figure 73 b. Tip ►With the selections as in Figure 72 and in Figure 73, the data will be downloaded on the USB drive as shown in Figure 74.
-
Page 45: Overview
Figure 76. Download to USB. You can activate the logging also on the USB drive, by flagging on USB drive, see Figure 77 a. Figure 77. Logging on USB flash drive. (a) USB drive selection; (b) Reminder to connect the USB drive. In this case, OKO-TOUCH warns you that a USB drive must be connected to the USB port, see Figure 77 b, and will store the data on the USB drive. -
Page 46: Icon And Glance Mode View
Press the icon to access the Info Page, as shown in Figure 81. This page contains the information related to the OKO-TOUCH (as shown in Figure 82 a) and to CO2-O2-UNIT-BL [0-10; 1-18] version (as shown in Figure 82 b). - Page 47 Figure 82. Info page OKO-Touch (a) and CO2-O2-UNIT-BL [0-10; 1-18] (b). Tip ►Please have this information handy when contacting Okolab for support...
-
Page 48: Touch Screen Calibration
Touch Screen Calibration Keep pressed the ON/OFF button on OKO TOUCH for 7 seconds to start the Touch Screen Calibration (see Figure 83). While holding the button, the pop-up message shown in Figure 84 a appears. Then tap blue calibration dots until the calibration is complete (see Figure 84 b). -
Page 49: Cleaning & Maintenance
Liquids should not be entered inside CO2-O2-UNIT-BL [0-10; 1-18]. Maintenance − Verify periodically the status of all hoses/tubing. If some hoses/tubing is damaged, contact Okolab to receive assistance. − After 2 years, disconnect all polyurethane tubing, cut the last 1 cm of the tubing and reconnect them. -
Page 50: Support
To contact one of our engineers please write to support@oko-lab.com or contact us through the live chat in www.oko-lab.com. You can request a remote support session anytime. Please, do not hesitate to contact Okolab should you need any further commercial information or technical support. HARDWARE SUPPORT: sibillo@oko-lab.com Phone... -
Page 51: Technical Specifications
Technical Specifications CO2-O2-UNIT-BL [0-10; 1-18] – Technical Specifications Range: 0-10% Step size: 0.1% Accuracy:± 0.1%@ 5.0% Sensor: 10 year-life, Non Dispersive InfraRed (NDIR) dual wave length detector Recommended Calibration Interval: 1 year Range: 1-18% Step size: 0.1% Accuracy:± 0.1%@ 5.0%... -
Page 52: Troubleshooting
Troubleshooting We have collected in the table below some frequently asked questions, please contact Okolab if you need support. Symptom Probable cause Remedy No power supplied to Unit Power plug is disconnected Connect plug securely Check gas tanks and/or compressed lines... - Page 53 Figure 21. How to change the O set point as AIR (a – b) ............................... 23 Figure 22. How to set AIR (a). CO2-O2-UNIT-BL [0-10; 1-18] Homepage operated without N (b) ............23 Figure 23. Status Indicator and TOP LED....................................24 Figure 24.
- Page 54 Figure 80. Display modalities. (a) Icon Mode; (b) Glance Mode ..........................46 Figure 81. Info page selection ........................................46 Figure 82. Info page OKO-Touch (a) and CO2-O2-UNIT-BL [0-10; 1-18] (b)......................47 Figure 83. How to enter in Touch Screen Calibration..............................48...
-
Page 55: Manual Revision Table
Manual Revision Table Revision Number Additions or changes Date Edited new form factor User Manual January 2019 Equipment Correction May 2019 Cleaning & Maintenance January 2020... - Page 56 LIMITATION OF LIABILITY: the total liability of Okolab S.r.l. shall not exceed the purchase price of the component upon which liability is based. In NO event shall Okolab S.r.l. be liable for consequential, incidental or special damage.
Need help?
Do you have a question about the CO2-O2-UNIT-BL and is the answer not in the manual?
Questions and answers