Table of Contents
Advertisement
Quick Links
TRANSLATION OF THE ORIGINAL INSTRUCTIONS
We advise you to read this manual carefully, which contains all the instructions for
maintaining the appliance's aesthetic and functional qualities.
For further information on the product: www.smeg.com
Contents
34
34
38
39
40
41
41
42
44
44
45
45
50
51
53
54
55
55
55
55
55
56
57
57
58
58
60
61
33
Advertisement
Table of Contents

Subscribe to Our Youtube Channel
Related Manuals for Smeg SI4642B


Summary of Contents for Smeg SI4642B
-
Page 1: Table Of Contents
5.4 Mounting 5.5 Instructions for the installer TRANSLATION OF THE ORIGINAL INSTRUCTIONS We advise you to read this manual carefully, which contains all the instructions for maintaining the appliance’s aesthetic and functional qualities. For further information on the product: www.smeg.com... -
Page 2: Instructions
Instructions 1 Instructions • Keep children under the age of 8 away from the appliance when it 1.1 General safety instructions is in use. • Cleaning and maintenance must Risk of personal injury not be carried out by • During use the appliance and its unsupervised children. - Page 3 Instructions • Do not place metal objects, such • Installation and servicing should as dishes or cutlery, on the hob be carried out by qualified surface during use as they may personnel in accordance with overheat. current standards. • Do not insert pointed metal •...
- Page 4 Instructions • Fire hazard: Never leave objects • Do not use rough or abrasive on the cooking surfaces. materials or sharp metal scrapers. • DO NOT FOR ANY REASON • Do not use cleaning products USE THE APPLIANCE AS A containing chlorine, ammonia or SPACE HEATER.
- Page 5 Instructions • Use cables that can withstand • Activate the controls lock when temperatures of at least 90°C. you have children or pets which could reach the hob. • The tightening torque of the screws of the terminal supply • After use the cooking zones wires must be 1.5 - 2 Nm.
-
Page 6: Appliance Purpose
Instructions • Let the cooking surface cool 1.3 Manufacturer’s liability down before closing the cover. • The manufacturer declines all liability for damage to persons or • People who have pacemakers property caused by: or other similar devices fitted must make sure that the operation •... -
Page 7: Disposal
Instructions 1.6 Disposal • Deliver the appliance to the appropriate recycling centre for This appliance conforms to the electrical and electronic WEEE European directive equipment waste, or return it to the (2012/19/EU) and must be retailer when purchasing an disposed of separately from other equivalent product, on a one for waste at the end of its service life. -
Page 8: How To Read The User Manual
Instructions 1.7 How to read the user manual This user manual uses the following reading conventions: Instructions General information on this user manual, on safety and final disposal. Description Description of the appliance and its accessories. Information on the use of the appliance and its accessories, cooking advice. -
Page 9: Description
Description 2 Description 2.1 General Description 60 cm with straight edge 60 cm with bevelled edge 75 cm with straight edge Maximum absorbed power (Watt) table H x L (mm) Level 9 Booster Zones 1 - 3 160 x 160 1400 2100 Zones 2 - 4... -
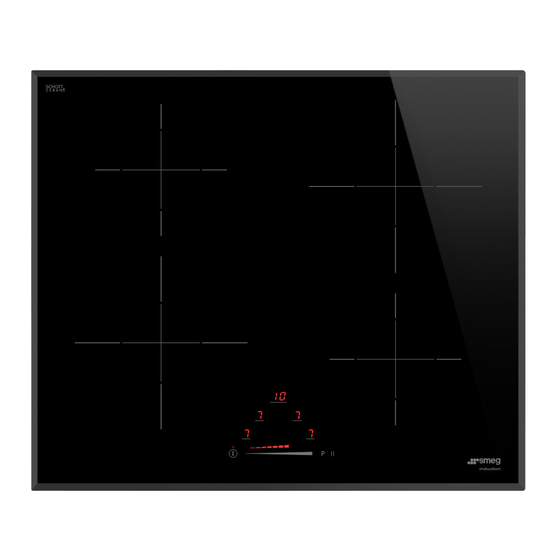
Page 10: Control Panel
Description 2.2 Control panel 1 On/Off button 4 Pause button 2 Scroll bar 5 Cooking zones selection area 3 Booster function button 6 Timer setting area Advantages of induction cooking • Energy saving thanks to the direct transmission of energy to the pan The appliance is equipped with (suitable magnetisable cookware is an induction generator for each... - Page 11 Description Power control List of symbols The hob is fitted with a power control On/Off button: turns the hob on or off. module that optimises/limits consumption. If the overall set power level exceeds the Booster function button: activates maximum limit permitted, the electronic maximum power.
-
Page 12: Use
3 Use Improper use Risk of damage to surfaces 3.1 Instructions High temperature • Do not use the hob if the pyrolytic cycle is taking place inside any oven installed Danger of burns below. • Never place pans with bases which are •... -
Page 13: Preliminary Operations
3.2 Preliminary operations 3.3 Using the hob In order to remove any moisture that could Switching on the hob for the first time have accumulated during the manufacturing process and for the electronic circuits and On first connection to the electrical control keypad to work properly: mains, an automatic check will be 1. - Page 14 Suitable cookware: Make sure that the pans do not • Enamelled steel cookware with thick cover the control panel. bases. • Cast iron cookware with an enamelled Limiting the cooking duration base. The hob has an automatic device which • Cookware in multilayer stainless steel, limits the duration of use.
- Page 15 Advice on energy-saving Power levels • The diameter of the base of the pan must The power in the cooking zone can be not exceed the width of the silk-screened adjusted to various levels. The table shows cooking zone. the levels suitable for various types of cooking.
- Page 16 Switching on the cooking zone 2. Move your finger to the left or right on the automatically scroll bar to select the power level from The hob is provided with an automatic pan sensing system. After switching on the hob: •...
- Page 17 Cooking guidelines Quick selection The table below shows the power values This function allows you to quickly which can be set, together with the set the cooking zones to the corresponding type of food. Settings may required power. vary depending on the amount of food and consumer taste.
-
Page 18: Special Functions
3.4 Special functions Booster function Pause function Improper use Danger of burns This function pauses the operation of all the cooking zones. • Do not use the Booster functions to heat fats or oils as they could catch fire. To activate the Pause function: 1. -
Page 19: Additional Functions
3.5 Additional functions Rapid heating Controls lock This function is not available for power level 9 or the Booster This function allows you to disable function. all the buttons of the appliance, The rapid heating function heats one except for the button. - Page 20 3. Pressing again will cause the digit on the Warming Function left to flash. It is now possible to set the This function allows you to keep cooked food warm or to keep minutes using the scroll bar (e.g. water on the boil. 4.
-
Page 21: Deactivating The Hob Power Limitation
2. Follow the same procedure as for a 2. Press the pause button immediately minute minder timer. to restore the functions that were previously active. • The symbols appear in the corners of the timer setting area to indicate that the This function restores the cooking zones are timed. -
Page 22: Error Codes
4. Press the right of the scroll bar to 3.7 Error codes decrease the power and the left to If the appliance malfunctions or operates increase it. incorrectly, the associated error code appears on the cooking zones display. The error codes always begin with “E..” or “Er..”, followed by a number. -
Page 23: Cleaning And Maintenance
Cleaning and maintenance 4 Cleaning and maintenance 4.3 Ordinary weekly cleaning Clean and maintain the hob once a week 4.1 Instructions using an ordinary glass cleaning product. Always follow the manufacturer’s Improper use instructions. The silicon in these products Risk of damage to surfaces creates a protective, water-repellent membrane which also resists dirt. -
Page 24: What To Do If
Cleaning and maintenance Changes in colour do not affect the The cooking results are unsatisfactory: operation and stability of the glass. These • Make sure that the cooking temperature are not alterations to the material of the hob is not too high or too low. but just residues which have not been The hob smokes: removed and have then carbonised. -
Page 25: Installation
Installation 5 Installation The appliance can be connected as follows: 5.1 Electrical connection • 220-240 V / 380-415 V 2N~ Power voltage Danger of electrocution • Have the electrical connection performed by authorised technical 6 x 1.5 mm² six-core cable. personnel. -
Page 26: Safety Instructions
Installation 5.3 Section cut from the countertop Be careful when connecting additional electrical appliances. The following operation requires Connection cables must not come building and/or carpentry work into contact with hot cooking and must therefore be carried out zones. by a competent tradesman. Installation can be carried out on Testing various materials such as masonry,... - Page 27 Installation Hob seal To prevent leakage of liquid between the frame of the hob and the countertop, place the adhesive seal provided along the entire outer edge of the hob before assembly. Do not use silicone to secure the hob. This would make it impossible to remove the hob, if necessary, without damaging it.
-
Page 28: Mounting
Installation 5.4 Mounting On top of an empty kitchen unit or drawers Over built-in oven unit If there are other pieces of furniture (lateral walls, drawers, etc.), dishwashers or fridges If installed on top of an oven, the under the hob, a double-layer wooden latter must be equipped with a base must be installed at least 20 mm from cooling fan. -
Page 29: Instructions For The Installer
Installation Ventilation Spring clips The illustrations below show two examples To ensure the hob is fixed and centred as of installation suitable for proper ventilation accurately as possible, the clips provided and one example of incorrect installation to must be positioned as described below: be avoided. - Page 30 Installation Position of slot for clips...
Need help?
Do you have a question about the SI4642B and is the answer not in the manual?
Questions and answers