Steelcase RoomWizard II Installation Manual
Scheduling system
Hide thumbs
Also See for RoomWizard II:
- System manager's manual (127 pages) ,
- User manual (52 pages) ,
- Manual (12 pages)
Table of Contents
Advertisement
Quick Links
Advertisement
Table of Contents

Related Manuals for Steelcase RoomWizard II


Summary of Contents for Steelcase RoomWizard II
- Page 1 RoomWizard ® Scheduling System...
- Page 2 Information in this document is subject to change without notice. Reproduction in any manner without written permission of Steelcase Corporation is forbidden. Steelcase Corporation reserves the right to make changes in product design, or detail, and to discontinue any product or material without notice.
-
Page 3: Table Of Contents
CONTENTS WELCOME HOW TO INSTALL Preparing to install Drywall mounting Glass mounting Universal mounting COMPLETING INSTALLATION TECHNICAL SUPPORT INDEX RoomWizard INSTALLATION MANUAL |... - Page 4 RoomWizard | INSTALLATION MANUAL...
-
Page 5: Welcome
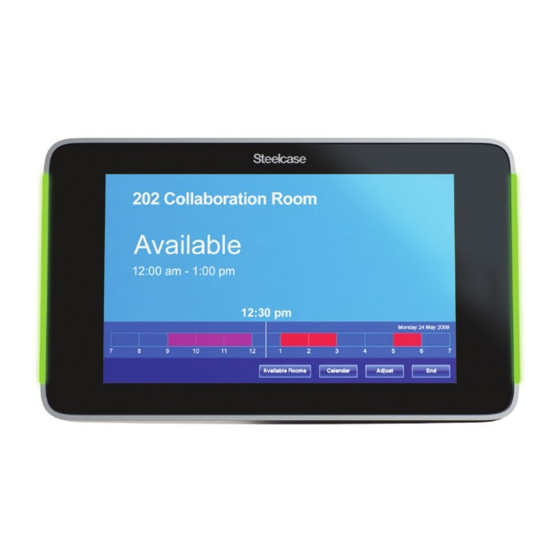
WELCOME Schedule meetings faster and easier with RoomWizard ® The RoomWizard is an interactive touch-screen device mounted near a meeting room entrance or open group area. It’s a web-based room reservation system you can access from any computer on the web. RoomWizards are easy to install and maintain. -
Page 6: How To Install
HOW TO INSTALL PREPARING TO INSTALL POWER AND DATA REQUIREMENTS Each RoomWizard requires a Power-over-Ethernet (PoE) 802.11af/t • switch or a network connection with a Power Injector. 10baseT or 100baseT Ethernet • A web browser is required to access the web-based room •... - Page 7 RECOMMENDED ROOMWIZARD INSTALLATION HEIGHTS ADA Accessibility Guidelines require that the highest point of interaction not exceed 54 inches (137cm). For RoomWizard, this highest point of interaction is the top edge of the touch screen. These installation instructions meet this 54-inch (137cm) target height.
-
Page 8: Drywall Mounting
TOOLS AND EQUIPMENT YOU WILL NEED Measuring tape Power drill or driver 1" (25mm) hole saw Level (drywall mount only) Pencil ¼ " (6mm) bit (drywall mount only) " (10mm) bit Ethernet cable, (glass mount only) Category 5 or 6 with ½... - Page 9 DRYWALL MOUNTING STEPS 1 Drill a hole 1 inch (25mm) in diameter 52 inches (132cm) above the floor. 1 " " ( 1 f l o 2 Route the PoE network cable through the wall to the hole. 3 Center and level the mounting puck over the hole using the level. 4 Mark the locations of the four wall anchors using the mounting puck as a template.
- Page 10 6 Using a #2 Phillips head screwdriver, slowly screw the four wall anchors into the pre-drilled holes. 7 Align the mounting puck over the four wall anchors and fasten it to the wall using the four provided screws. 8 Draw the PoE network cable through the mounting puck and insert it into the back of the RoomWizard.
-
Page 11: Glass Mounting
GLASS MOUNTING These instructions guide you through installing a RoomWizard directly to glass. The PoE cable can be routed inside an adjacent doorframe or other extrusion. Mount the RoomWizard within 18 inches (45cm) of the frame if you wish to use the included mesh cable manager to disguise the cable. - Page 12 2 Remove the paper backing from the adhesive on the back of the mounting disk. Center and level the bottom of the mounting disk 51¼ inches (130cm) above the floor using the level. 3 Attach the mounting puck to the mounting disk using the four provided screws and a #2 Phillips head screwdriver.
-
Page 13: Universal Mounting
7 Align and attach the glass-mount cover to the inside glass surface to hide the adhesive on the back of the mounting disk. UNIVERSAL MOUNTING These instructions guide you through installing a universal mounting bracket. The RoomWizard is then attached to the bracket. This method may be used if you wish to attach the RoomWizard to a doorframe or other extrusion. - Page 14 1 mounting puck • 4 puck attachment screws • 1 RoomWizard unit • 2 mounting screws • UNIVERSAL BRACKET MOUNTING STEPS 1 Position the universal mounting bracket over the extrusion with the bottom of the bracket 50¾ inches (129cm) above the floor. 2 Mark the locations of the three holes using the mounting bracket as a template.
- Page 15 5 Route the PoE cable through the extrusion and out through the center hole. 6 Route the PoE cable through the center hole on the backside of the universal mounting bracket, and position the bracket over the hole. 7 Attach the mounting bracket to the extrusion using the provided T-anchors in the top and bottom holes in the bracket.
- Page 16 9 Attach the cover and the mounting puck to the bracket using the four provided screws and a #2 Phillips head screwdriver. 10 Route the PoE network cable though the mounting puck and insert it into the RoomWizard. The RoomWizard will power on once an active network cable is connected to the unit.
- Page 17 11 Using a #2 Phillips head screwdriver, attach the RoomWizard to the mounting puck using the two provided screws. Use the level to level the RoomWizard before tightening the screws. RoomWizard INSTALLATION MANUAL |...
-
Page 18: Completing Installation
A RoomWizard can accommodate a Braille sticker indicating the name of the room on the aluminum frame below the touch screen. For more information on how to create and apply Braille stickers, email Steelcase technical support at techsupport@steelcase.com. RoomWizard | INSTALLATION MANUAL... -
Page 19: Technical Support
TECHNICAL SUPPORT In the USA and Canada, contact Steelcase USA Technical Support: Phone: 1.800.334.4922 (24-hour support Monday through Friday) • Email: techsupport@steelcase.com • www.steelcase.com URL: • Outside North America, contact Steelcase Europe/Asia Technical Support: Phone: +33 3 88 13 36 36 (Support available in English, French, •... -
Page 20: Index
INDEX Americans with Disabilities Powering on and off 8, 10, 14 Act (ADA) 5 Securing a RoomWizard 16 Braille sticker 16 Technical support 17 Cable routing 4 Ventilation 6 Ethernet (PoE) 3, 4 Groups of rooms 3 Mounting 4, 6, 9, 11 RoomWizard | INSTALLATION MANUAL...
Need help?
Do you have a question about the RoomWizard II and is the answer not in the manual?
Questions and answers