
Related Manuals for Moeller XC-CPU101 Series


Summary of Contents for Moeller XC-CPU101 Series
- Page 1 Modular PLC XC-CPU101...(-XV) Hardware, Engineering and Functional Description 03/05 AWB2724-1453GB T hink future. Switch to green.
- Page 2 No part of this manual may be reproduced in any form (printed, photocopy, microfilm or any other process) or processed, duplicated or distributed by means of electronic systems without written permission of Moeller GmbH, Bonn. Subject to alteration without notice.
- Page 3 Warning! Dangerous electrical voltage! Before commencing the installation • Disconnect the power supply of the device. • Ensure a reliable electrical isolation of the low voltage for the 24 volt supply. Only use power supply units complying with • Ensure that devices cannot be accidentally restarted. IEC 60364-4-41 (VDE 0100 Part 410) or HD 384.4.41 S2.
-
Page 5: Table Of Contents
03/05 AWB2724-1453GB Contents About this manual List of revisions Abbreviations and Symbols Advanced documentation Layout of the XC100 CPU with PSU and local inputs/outputs 24 V PSU with local inputs/outputs – Function – Assembly – Connecting interrupt inputs – Local bus expansion with XIOC-BP-EXT –... - Page 6 03/05 AWB2724-1453GB Contents Programreset – Warm reset – Cold reset – Full reset Program parameterization – Maximum program cycle time – Start behaviour at Power-On Creating and transferring boot project Updating the operating system (OS) – Transferring the operating system from the PC into the –...
- Page 7 03/05 AWB2724-1453GB Contents Establishing a PC – XC100 connection Establishing a connection via the RS232 interface (XC100) – Programming cable – XSoft software Create sample project Task Procedure – Set up target system – Configure the XC100 – Create program Programming via CANopen network (Routing) Prerequisites Notes...
- Page 8 03/05 AWB2724-1453GB...
-
Page 9: About This Manual
03/05 AWB2724-1453GB About this manual List of revisions Edition date Page Subject Modified Omitted 10/02 “External filter: If required” 04/03 „Warm start“ „Direct peripheral access“ „Updating the operating system (OS)“ „Interrupt processing“ „Data access to the multimedia card“ „Browser commands“ “Routing”... -
Page 10: Abbreviations And Symbols
AWB2700-1437GB). All manuals are available in PDF format. If for some reason the manual is not supplied on the product CD, it is available for download as a PDF file. In order to find the document quickly go to http://www.moeller.net/support: Enter the document number as a search term. -
Page 11: Cpu With Psu And Local Inputs/Outputs
24 V PSU with local inputs/outputs The latest versions of specific manuals can be found at The power supply unit provides the operating voltages required by http://www.moeller.net/support: Search item: AWB2725- the processor unit and the inputs/outputs (local and 1452GB decentralized). -
Page 12: Assembly
03/05 AWB2724-1453GB Layout of the XC100 Assembly Table 1: Limitations which apply when using the XC100-CPU and the XIOC-Signal modules in an ABS plastic enclosure Fitted in: Installation Current rating of the 5 V location system voltage of the internal I/O bus temperature: 8 DI... -
Page 13: Connecting Interrupt Inputs
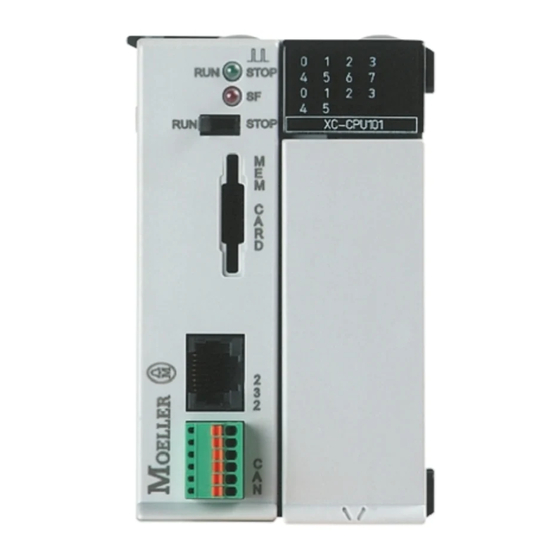
03/05 AWB2724-1453GB 24 V PSU with local inputs/outputs Terminal assignments LED indicators The LEDs indicate the signal status for the inputs and outputs. An LED that is ON indicates a H-level signal on the corresponding terminal. I 0.0 I 0.1 Inputs 0.0 to 0.3 I 0.2 I 0.3... -
Page 14: Local Bus Expansion With Xioc-Bp-Ext
03/05 AWB2724-1453GB Layout of the XC100 In accordance with the size of the application program, the If an XC100 PLC is replaced by an XC200 PLC, the following memory values apply: interrupt inputs are connected to other physical input addresses! XC-CPU101-..(-XV) Local bus expansion with XIOC-BP-EXT The XIOC-BP-EXT backplane enables expansion of local system... -
Page 15: Assembly
The multimedia card is used as an optional backup medium for the (boot) project and to save recipe data. The operating system supports memory capacities up to a maximum of 128 MByte. At present, Moeller offers MMCs in the sizes 16 and 32 MByte, with the type designations XT-MEM-MM16M and XT-MEM-MM32M. -
Page 16: Programming Device Interface
03/05 AWB2724-1453GB Layout of the XC100 Programming device interface The CPU is fitted with an RS232 interface. This serial interface enables a point-to-point connection. The handshake lines are not available. Communication between the controller and the programming device takes place through this RS232 interface. Physically, the interface is an RJ45 socket. - Page 17 03/05 AWB2724-1453GB Now you will see the “Communication window”, as shown in the next diagram. Figure 12: Communication parameters Use a double-click to select the field with the preset baud rate. This field now has a grey background. Select the required baud rate, e.g. 38 400 Bit/s, with further clicks in this field.
-
Page 18: Canopen Interface
03/05 AWB2724-1453GB Layout of the XC100 CANopen interface The CPUs can be connected to the CANopen bus via the electrically CAN_L CAN_H isolated ISO-11898 interface. 120 O 120 O The connector assignments are as follows: Terminal Signal Figure 14: Possible configuration of a CANopen bus with bus termination resistors CAN_L CAN_H... -
Page 19: Real-Time Clock
03/05 AWB2724-1453GB Table 3: Cable cross-section, bus length and number of bus slaves XC-CPU101-...-XV conform to ISO 11898 The XC-CPU101-...-8DI-6DO- XV units are equipped with an Cable cross-section [mm] Maximum length [m] expandable operating system. The functionality of the system permits operation of these CPUs with text displays from the XV- n = 32 n = 64... -
Page 20: Cpu Installation
03/05 AWB2724-1453GB Layout of the XC100 CPU installation Detaching the CPU Press in the catch Detailed information about the installation of the module Keep the catch pressed in, and pull the top of the CPU module racks and XI/OC modules can be found in the manual forwards “Hardware and Engineering XI/OC Signal Modules“... -
Page 21: Control Panel Layout
03/05 AWB2724-1453GB 2 Engineering Control panel layout Preventing interference The layout of the components inside the switchgear cabinet is a Cable routing and wiring major factor for achieving interference-free functioning of the Cables are divided into the following categories: plant or machinery. During the project planning and design phase, •... -
Page 22: Lightning Protection
You can find wiring examples for the XI/OC modules in separately: the manual “Hardware and Engineering, XI/OC signal , Article no.: 285316 ( Type: XT-FIL-1 Supplier: Moeller GmbH Modules” (AWB2725-1452GB). a „Dimensions“on page 72 a „Technical data“on page 76 1*) Internal jumper... -
Page 23: Switch-On Behaviour
03/05 AWB2724-1453GB 3 CPU operation completed, the operating system (OS) takes over the Switch-on behaviour communication with the XSoft programming system as well as After the supply voltage is switched on the CPU will carry out a execution and debugging of the application program. It only self-test and several CRC checks. -
Page 24: Switch-Off Behaviour
03/05 AWB2724-1453GB CPU operation Switch-off behaviour Test and commissioning Switch-off (operating mode selector switch: Run r Stop) leads to The PLC supports the following test and commissioning features: an interruption of the program run the end of the cycle. Running •... -
Page 25: Programreset
03/05 AWB2724-1453GB Programreset Programreset Creating and transferring boot project The application program can be reset to one of the following A boot project is generated by a loaded user program and saved levels: on the MMC. • Warm reset The following steps are necessary in order to create a boot project: •... -
Page 26: Updating The Operating System (Os)
With the XC100, you have the possibility of replacing the operating system (OS) supplied with the PLC by a more recent one. Moeller offers the most recent operating system version for download on the Internet. Not all of the functions of the new operating system (OS) are supported by the older XC100 versions. -
Page 27: Transferring The Operating System From The Pc Into The Mmc
03/05 AWB2724-1453GB Updating the operating system (OS) Transferring the operating system from the PC into the If an OS is loaded into the MMC, the OS and the boot project on the MMC and the user program in the PLC are deleted. The procedure is similar to the description in section “Transferring the operating system from the PC into the PLC”... - Page 28 03/05 AWB2724-1453GB...
-
Page 29: Program Processing And System Time
03/05 AWB2724-1453GB Cycle-time monitoring 4 Program processing and system time The application program is processed cyclically. The states of the System libraries, function blocks and functions inputs are read before the start of each program cycle, and the You can use various system libraries with the respective functions output states are written to the outputs at the end of the cycle. -
Page 30: Target System Specific Libraries
03/05 AWB2724-1453GB Program processing and system time Standard.lib Target system specific libraries The IEC function blocks and standard functions are contained in For the XC100 target system, the “Lib_Common” and the Standard.lib. “Lib_CPU101” libraries are required. The description of the functions and the function blocks can be found in the “XSoft”... -
Page 31: Libraries Of The "Lib_Cpu101
03/05 AWB2724-1453GB Target system specific libraries XS40_MoellerFB.lib • XC-...-XION: Connection of the XION products (AN2700K18GB) You can find the descriptions of the “XS40_MoellerFB” in the • XC-...-XC: Network variables (AN2700K19GB) “Function Blocks for XSoft” manual AWB2786-1456GB. • Coupling multiple autonomous controls (CAN-Device) via CANopen (AN2700K20GB). - Page 32 03/05 AWB2724-1453GB Program processing and system time SYSLIBCALLBACK.LIB library “VISU” library The SYSLIBCALLBACK.LIB provides defined callback functions for The “VISU” library provides functions with which process activation of run-time events (e.g. logon and logoff of the event visualisation can be implemented in the XSoft. functions).
-
Page 33: Direct Peripheral Access
03/05 AWB2724-1453GB Direct peripheral access XC100_SysLibCom.lib library XC100_Util.lib library The “XC100_SysLibCom.lib” library provides functions to operate The “XC100_Util.lib” library also provides various function blocks the RS232 interface in transparent mode. e.g., in order to integrate the following functionality's in the application: The description of the “XC100_SysLibCom.lib”... -
Page 34: Functions
03/05 AWB2724-1453GB Program processing and system time Modules I/O bit access I/O word access I/O slot Read Write Param./Module Read Write Param./Module Param. XIOC-16DO-S – 0 to 15 – 1 to 15 XIOC-12DO-R – 0 to 11 – 1 to 15 XIOC-16DX –... - Page 35 03/05 AWB2724-1453GB Direct peripheral access ReadWordDirect A word of an input module can be read directly with this function. The state of an input word is stored in the variables, which indicate to the parameterized pointer “ptr_wValue”. The pointer variable will not be changed when a fault occurs during processing.
- Page 36 03/05 AWB2724-1453GB Program processing and system time WriteBitDirect A bit of an output module can be controlled directly with this function. The respective output image is refreshed in addition to the physical output. Writing to the output is possible and not subject to limitation, for only the local 6 outputs of the XC100-CPU with slot “0”.
-
Page 37: Error Code With "Direct Peripheral Access
03/05 AWB2724-1453GB Direct peripheral access WriteWordDirect A word of an output module can be written directly with this function. At the time of access, the respective output image is also refreshed in addition to the physical output. A further refresh of the output word occurs at the end of the cycle. Figure 43: WriteWordDirect function Table 8: Parameters of the “WriteWordDirect”... -
Page 38: Interrupt Processing
03/05 AWB2724-1453GB Program processing and system time Interrupt processing In the XC100 it is possible to program and parameterize up to Frequent occurrence of an interrupt during a cycle can cause the seven interrupt events. Interrupts can be activated by: cycle time to time-out and result in a reset being initiated by the Watchdog. -
Page 39: Timer Interrupt
03/05 AWB2724-1453GB Interrupt processing Timer interrupt An interrupt channel for a timer interrupt is available in addition to the six different interrupt channels for inputs with interrupt capability. The start condition and the setpoint value definition are application related in the XSoft. The following illustration indicates the function and the parametric programming for the “Timer Interrupt”. -
Page 40: Disableinterrupt
03/05 AWB2724-1453GB Program processing and system time DisableInterrupt With this function, you disable (deactivate) a parameterized physical interrupt by accessing it from the user program. Figure 46: DisableInterrupt function EnableInterrupt With this function, the physical interrupt which was deactivated beforehand can now be re-enabled as an active interrupt. Figure 47: EnableInterrupt function... -
Page 41: Creating And Integrating An Interrupt Function
03/05 AWB2724-1453GB Interrupt processing Creating and integrating an interrupt function The formal procedure for the provision and integration of an interrupt function is described in individual steps in the following. In the example, a H-signal on input I0.0 should branch into an interrupt module and execute it. - Page 42 03/05 AWB2724-1453GB Program processing and system time Figure 49: Assign input I0.0 with interrupt 4 Changeover to the “Task configuration” and tick the box in the “System events” input field for “IO-Interrupt1”. Now stay on the same row and mark the “called POU” field with the left-hand mouse key and press function key “F2”.
-
Page 43: System Events
03/05 AWB2724-1453GB System events Select the “Interrupt_1 (PRG)” POU with a double click and then the POU “Timer_Interrupt (PRG)”. The following window appears: Figure 51: Interrupt module completed task configuration Save the program created, compile it and logon to the PLC and test the functions of the program modules which you have created. -
Page 44: Browser Commands
03/05 AWB2724-1453GB Program processing and system time Browser commands You can directly access the states/events in the XC100 with the Browser commands. The Online description in the XSoft can be found at: ‹Resources PLC-Browser›. Command Description Command Description Get a list of implemented commands. GetNodeId Output CANopen Node ID reflect... -
Page 45: Data Remanence
03/05 AWB2724-1453GB Data remanence Data remanence Operating states The controller has a memory area for remanent data a page 10. The following summary provides you with the state definitions for The variables declared with “VAR_RETAIN” are saved in this area the XC100. -
Page 46: Limit Values For Memory Usage
03/05 AWB2724-1453GB Program processing and system time Limit values for memory usage The data memory of the XC100 is divided into memory segments. In order to ensure that you use the available memory for the global The memory size of the individual segments can be found in data in an optimum and efficient manner, we recommend that you figure 53. -
Page 47: Addressing Inputs/Outputs And Marker
03/05 AWB2724-1453GB Addressing inputs/outputs and marker Addressing inputs/outputs and marker If you open the PLC configuration of a new project, you will receive “Activating Check for overlapping addresses” the current view of the default settings of the addressing. In this If the check for overlapping addresses is activated, addresses setting the addresses are automatically assigned and address which are assigned twice will be detected and an error message is... -
Page 48: Free Assignment Or Modification Of Addresses Of Input/Output Modules And Diagnostic Addresses
03/05 AWB2724-1453GB Program processing and system time Free assignment or modification of addresses of input/ output modules and diagnostic addresses Depending on the module, you can assign/modify the input, output and the diagnostics(marker) addresses: In order to make the modifications visible in the PLC configurator it is necessary to click once on the PLC Configurator or to select another module after the address has been edited. -
Page 49: Establishing A Connection Via The Rs232 Interface (Xc100)
03/05 AWB2724-1453G 5 Establishing a PC – XC100 connection This section describes the measures that are required to link a PC XSoft software to the XC100, so that the PC can be used as a programming device Use XSoft to define the communication parameters: (hardware and software). - Page 50 03/05 AWB2724-1453G...
-
Page 51: Task
03/05 AWB2724-1453G 6 Create sample project In the following example you will learn how to use the XSoft soft- Task ware. We will create a project consisting of a configuration and a Make a logical AND linkage of inputs I0.0 and I2.7 on the XC100. program, which you can then load and test. - Page 52 03/05 AWB2724-1453G Create sample project Figure 61: Select target system A double click on the target system leads to the following (see figures). The register tabs “Target platform”, Memory layout” and “General” just present information about the target system. No settings can be made in these tabbed screens.
- Page 53 03/05 AWB2724-1453G Procedure Figure 63: Target system settings – CAN network functions (1) Activate the “Support parameter manager” check box in order to view additional information concerning the index ranges. The CAN relevant Parameter manager is only required for a CAN device.
-
Page 54: Configure The Xc100
03/05 AWB2724-1453G Create sample project Figure 65: Select POU type Confirm with “OK” and save the file under “sample-1”. A window will now appear, in which you can continue with the programming or configuration: Figure 66: POU type “Program” in IL representation Configure the XC100 The example makes use of the “XC-CPU101-C64K-8DI-6DO”. - Page 55 03/05 AWB2724-1453G Procedure Figure 67: Configure XC100 controller Double-click on the directory “Controller configuration”. Another window is opened: “PLC configuration”: Figure 68: Basic configuration of the XC100 – settings Click on the register card “Additional parameters“. A window appears with the default values for the “XC-CPU101- C64K-8DI-6DO”.
- Page 56 03/05 AWB2724-1453G Create sample project Figure 69: Basic configuration of the XC100 – additional parameters To display the I/O configuration, click on the plus sign in front If you want to join up a central digital input module with 16 inputs, of the directory “XC-CPU101-C64K-8DI-6DO”.
- Page 57 03/05 AWB2724-1453G Procedure Figure 71: Configuration XC-CPU101-C64K-8DI-6DO In addition, click on the plus sign in front of the modules – “AT %IB0;Byte; (*Local Inputs*)” – “AT %QB0;Byte; (*Local Outputs*)” – XIOC-16DI (SLOT). You will now get detailed information, with the physical address area of the inputs and outputs.
-
Page 58: Create Program
03/05 AWB2724-1453G Create sample project Create program As described in the description of the task on page 47, a logical AND combination is to be made between input I0.0 and input I2.7. The result of this logical operation is to be presented at output Q0.3. -
Page 59: Prerequisites
03/05 AWB2724-1453G 7 Programming via CANopen network (Routing) “Routing” is the capability to establish an Online connection from Important a programming device (PC) to any desired (routing capable) The program download with a block size of 4 Kbyte to a control in a CAN network, without having to directly connect the PLC with an operating system version earlier than 1.03.02 programming device directly with the target PLC. -
Page 60: Notes
03/05 AWB2724-1453G Programming via CANopen network (Routing) Alternatively, you can use the BlockSizeEditor application to The following applies for the Node ID of the device func- change the block size. tion and the Node ID of the routing function: The download block size is defined in the following Registry key: XC100 with operating system <... - Page 61 03/05 AWB2724-1453G Procedure Figure 78: CAN master parameters Figure 77: CANopen routing settings The CAN baud rate depends on the operating system version: Table 12: Baud rates for CAN connection Operating system version Baud rate < V. 2.0 V2.0 10000 Figure 79: CAN device parameters 20000 50000...
-
Page 62: Plc Combinations For Routing
03/05 AWB2724-1453G Example Call up the communications parameters in the “Online” menu In the following example which is based on figure 80, the proce- once again and select the control which you want to program/ dure for access to a PLC program is explained. test. - Page 63 03/05 AWB2724-1453G 8 RS232 interface in transparent mode (COM 1/2/3) The transparent mode serves data exchange with data terminals (e.g. terminals, printers, PCs, measurement devices etc.) via the RS232 serial interface connection. The data transfer is transparent; i.e. the data is transferred without it being interpreted further. This functionality is provided on the XC100 by the “XC100_SysLibCom”...
-
Page 64: Demands Placed On The Functionality Of The Transparent Mode
03/05 AWB2724-1453G RS232 interface in transparent mode (COM 1/2/3) Demands placed on the functionality of the transparent mode “SysComOpen” function The function opens the RS232 interface for transparent mode. After the interface has been successfully opened, the function returns a value greater than 0. Enter this value for the following functions as the “dwHandle”... - Page 65 03/05 AWB2724-1453G Demands placed on the func- tionality of the transparent mode Selection of the parity Figure 84: Even/uneven parity Selection of the COM interface Figure 85: Selection of the COM interface Number of stop bits Figure 86: Stop bits...
- Page 66 03/05 AWB2724-1453G RS232 interface in transparent mode (COM 1/2/3) Parametric programming of the control lines/cables of the COM 2/COM 3 interface The operation of the control lines/cables is implemented with the “ComControl” module. This function only serves the DTR, DSR and DCD interface lines of the XIOC-SER hardware interface module.
-
Page 67: Syscomclose" Function
03/05 AWB2724-1453G Demands placed on the func- tionality of the transparent mode Figure 89: “SysComOpen” function Table 14: Parameters of the “SysComOpen” function Port Interface selection Parameters: Specified for the open interface. SysComOpen Return value 0: Opening of the RS232 interface was not successful. Return value >... -
Page 68: Syscomread" Function
03/05 AWB2724-1453G RS232 interface in transparent mode (COM 1/2/3) “SysComRead” function Data received via the RS232 interface in transparent mode can be read with this function. Figure 91: SysComRead function Table 16: Parameters of the “SysComRead” function dwHandle Return value of the “SysComOpen” function SysComClose Return value TRUE: closing the RS232 interface was successful dwBufferAddress... -
Page 69: Syscomwrite" Function
03/05 AWB2724-1453G Demands placed on the func- tionality of the transparent mode “SysComWrite” function This function allows output of data via the RS232 interface. Figure 92: SysComWrite function Table 17: Parameters of the “SysComWrite” function dwHandle Return value of the “SysComOpen” function dwBufferAddress Address under which the data to be output is stored dwBytesToWrite... -
Page 70: Syscomsetsettings" Functions
03/05 AWB2724-1453G RS232 interface in transparent mode (COM 1/2/3) “SysComSetSettings” functions Interface parameters of the RS232 interface for the transparent mode can be set with this function. Figure 93: SysComSettings function Table 18: Parameters of the “SysComSettings” function dwHandle Return value of the “SysComOpen” function ComSettings Pointer to the memory area in which the interface parameters are stored SysComSetSettings... - Page 71 03/05 AWB2724-1453G Demands placed on the func- tionality of the transparent mode Example The example opening, a text output and closing of the RS232 interface with the XC100. Figure 94: Programming example for Transparent mode...
-
Page 72: Syscomreadcontrol" Function
03/05 AWB2724-1453G RS232 interface in transparent mode (COM 1/2/3) “SysComReadControl” function With the onboard RS232 interface of the CPU101 the control cables/lines are not available. Therefore, the “SysComReadCon- trol” module is not to be used for this interface. The XIOC-SER hardware interface module avails of control/inter- face lines. -
Page 73: Syscomwritecontrol" Function
03/05 AWB2724-1453G Demands placed on the func- tionality of the transparent mode “SysComWriteControl” function With the integrated RS232 interface of the CPU101 the control cables/lines are not available. Therefore, the “SysComWriteCon- trol” module is not to be used for this interface. The XIOC-SER hardware interface module avails of control/inter- face lines. - Page 74 03/05 AWB2724-1453G...
-
Page 75: Compatibility
03/05 AWB2724-1453G Appendix Compatibility • The compatibility for older operating systems of the XC101 is guaranteed. The functional range of the XC-CPU101 is dependant on the hard- • Due to the modified control configuration with existing ware (HW), the installed operating system (BTS) and the version of projects, it might be necessary that the control configu- the programming software (XSoft). -
Page 76: Dimensions
03/05 AWB2724-1453G RS232 interface in transparent mode (COM 1/2/3) Dimensions XC-CPU101... XT-FIL-1 line filter Backplane XIOC-BP-XC XIOC-BP-XC1... -
Page 77: Technical Data
03/05 AWB2724-1453G Technical data Technical data XC-CPU101-C...K-8DI-6DO(-XV) General Standards and regulations IEC/EN 61131-2 EN 50178 Ambient temperature °C 0 to +55 Storage °C –25 to +70 Mounting position Horizontal Relative humidity, no condensation (IEC/EN 60068-2-30) 10 to 95 Air pressure (in operation) 795 to 1080 Vibration resistance 10 to 57 Hz g0.075 mm... - Page 78 03/05 AWB2724-1453G RS232 interface in transparent mode (COM 1/2/3) XC-CPU101-C...K-8DI-6DO(-XV) Supply voltage for the CPU (24 V/0 V) Mains failure bridging Dropout duration Repeat rate Input voltage V DC Permissible range V DC 20.4 to 28.8 Power consumption Up to 26 Residual hum and ripple Maximum power dissipated (without local I/O) Overvoltage protection...
- Page 79 03/05 AWB2724-1453G Technical data XC-CPU101-C...K-8DI-6DO(-XV) CANopen Maximum data transmission rate bit/s Operating system version < 2.0: maximum 250000 Operating system version = 2.0: maximum 1000000 Electrical isolation Device profile To DS301V4 PDO type Asyn., cyc., acyc. Connection Plug-in spring-loaded terminal block, 6-pole Bus termination resistors External Stations...
- Page 80 03/05 AWB2724-1453G RS232 interface in transparent mode (COM 1/2/3) XT-FIL-1 24 V DC filter General Standards and regulations IEC/EN 61131-2 EN 50178 Ambient temperature °C 0 to +55 Storage °C –25 to +70 Mounting position Horizontal/vertical Relative humidity, no condensation (IEC/EN 60068-2-30) 10 to 95 Air pressure (in operation) 795 to 1080...
- Page 81 03/05 AWB2724-1453GB Index Abbreviations ....... . 6 Address overlaps ......43 Address range .
- Page 82 03/05 AWB2724-1453GB Index Programming cable Electromagnetic contamination ....17 for RS232 interface ..... . . 45 EMPTY-SLOT .
Need help?
Do you have a question about the XC-CPU101 Series and is the answer not in the manual?
Questions and answers