
Related Manuals for Griven ACROBAT PE 1200

Summary of Contents for Griven ACROBAT PE 1200
- Page 1 MANUALE TECNICO MANUALE TECNICO ACROBA 1200 ACROBA 1200 GR0432 HMI 1200 GR0432 HMI 1200 MT0432 - Rev.0 08 Gen ‘03...
- Page 2 INDICE INDICE 1 .0 CONTENUTO DELL’IMBALLAGGIO 2.0 SICUREZZA 3.0 INSTALLAZIONE DEL PROIETTORE 3.1 Disimballo 3.2 Montaggio della Lampada 3.3 Posizionamento del Proiettore 3.4 Fissaggio del proiettore 3.5 Collegamento elettrico 3.6 Collegamento delle prese XLR 3 e 5 poli 4.0 USO DEL PROIETTORE 4.1 Pannello di Controllo 4.2 Lettura del display ed uso dei comandi 4.3 Funzionamento con DMX...
-
Page 3: Contenuto Dell'imballaggio
Dopo un eventuale intervento, la catena di sicurezza deve essere sostituita. GRADO DI PROTEZIONE IP20 - Acrobat PE 1200 è protetto contro la penetrazione di corpi solidi di dimensione superiore a 12mm. Non è protetto contro la penetrazione di liquidi, di conseguenza teme la pioggia e gli spruzzi d’acqua. - Page 4 Assicurarsi che tutte le parti per il fissaggio del proiettore siano in buone condizioni. Accertarsi della stabilità del punto di ancoraggio prima di posi- zionare ACROBAT PE 1200. Per il fissaggio del proiettore a terra, a parete, o al soffitto utilizzate la pia- stra alla base del proiettore, provvista della foratura di fissaggio mostrata in figura 2.
-
Page 5: Uso Del Proiettore
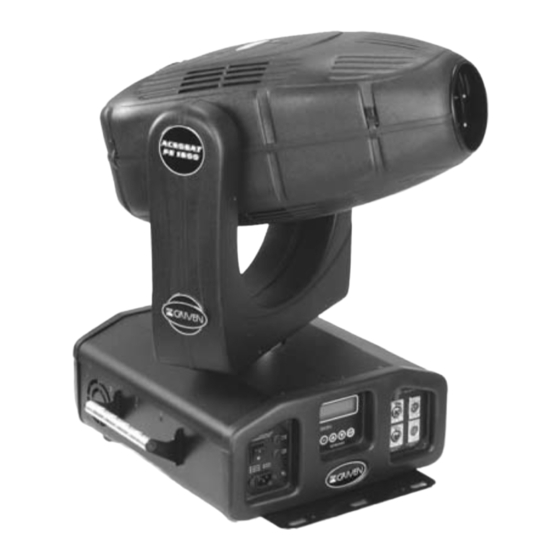
4.0 USO DEL PROIETTORE 4.1 Pannello di controllo Il pannello di controllo è posto sul ballast del proiettore. fig.7 Pannello di controllo Accendendo il proiettore, il display visualizza in successione l’indirizzo DMX del proiettore (inizialmente 001) e la presenza, o meno, del segnale DMX. - Page 6 SETTAGGIO: Premere il pulsante MENU e scorrere il menu con i pulsanti UP e DOWN finchè il display non mostra la scritta “-2 Cambia indirizzo”; premere il pulsante ENTER per entrare nel menu e selezionare l’indirizzo tramite i pulsanti UP e DOWN;...
- Page 7 Per accedere a questo menu è necessario inserire un codice di sicurezza, disponibile a richiesta. 4.3 Funzionamento con DMX Indirizzo 20 Canali Tutti i proiettori ACROBAT PE 1200 che ricevono un segnale digitale da Proiettore 1 0 0 1 una centralina di controllo devono avere correttamente settato il rispettivo...
-
Page 8: Manutenzione
4.5 Valori DMX CANALE 1 CANALE 4 CANALE 9 CANALE 13 Livello IRIDE Livello RUOTA COLORI 2 Livello RUOTAGOBO 1 Livello FOCUS+GRANDANGOLO 0-150 0-50 Movimento focus continuo Posiz. Indicizzato Bianco Bianco 0-136 151-175 10-19 (massima corsa) Chiude-Apre Vel.1 (min.) Bianco-Giallo scuro 51-101 Gobo 1 137-140... - Page 9 - sostituite tutte le parti eventualmente danneggiate; -pulite periodicamente le ventole e tutte le feritoie di raffreddamento da eventuali oggetti estranei entrati, o dalla polvere accu- mulatasi all’interno: per tali operazioni si consiglia l’uso di un pennellino o eventualmente di un aspirapolvere; evitate l’uso di cacciaviti o altri oggetti acuminati che potrebbero danneggiare le ventole o altre parti del faro.
-
Page 10: Informazioni Tecniche
Temperatura massima di esercizio °C 9.0 PARTI DI RICAMBIO Tutti i componenti del proiettore ACROBAT PE 1200 sono disponibili come parti di ricambio e la relativa vista esplosa è dispo- nibile su richiesta. 10.0 SOSTITUZIONE DI PARTICOLARI INTERNI ATTENZIONE : Prima di effettuare qualsiasi operazione di manutenzione sul proiettore, si consiglia di attendere almeno 15 minuti per il raffreddamento della lampada e di tutte le parti metalliche, e di sconnettere fisicamente il proiettore dalla linea di alimentazione. - Page 11 - n°13 morsetti dalla scheda 6 motori; - n°2 morsetti dalla scheda tasti (indicati dalla lettera E); - n°4 cavi di alimentazione: - n°1 dalla scheda 2 motori (bianco posizione k4); - n°1 dall’alimentatore (nero 50 Hz); - n°2 dal teleruttore (n°1 blu posizione 3, n°1 bianco posizione A1); - n°1 cavo di massa con faston dalla morsettiera marrone;...
- Page 12 10.4 Sostituzione della scheda 6 motori (lato forcella) fig.18 a) Smontare gli involucri in plastica della forcella svitando le 8 viti (4 per ogni involucro). b) Togliere la copertura sul lato della forcella che contiene la scheda (l’altro contiene le cinghie di rotazione tilt); c) Togliere tutti i morsetti e i cavi collegati alla scheda (figura 18);...
-
Page 13: Installation
3.3 Mounting Position The ACROBAT PE 1200 unit is equipped with a fixing plate, which allows a steady position on the floor; nevertheless, it can be mounted in any position, so long as it is kept at a distance of at least 50 cm from the wall (or from the walls) to facilitate air cir-... - Page 14 3.4 Fixing the unit pict. 2 Ensure that all parts to be used to fix the projector are in good conditions. Make sure that the hooking point is steady before positioning the ACRO- BAT PE 1200 unit. Use the fixing plate, which is located at the base of the unit, to install the projector on the floor, on the wall or at the ceiling.
-
Page 15: Use Of The Lantern
4.0 USE OF THE LANTERN 4.1 Control panel The control panel is located on the ballast of the unit. pict. 7 Control panel When switching the unit on, the display reads sequentially the DMX address (initially 001) and the presence or non-presence of the DMX signal. - Page 16 SET-UP: press the MENU key and go through the menu by using the UP and DOWN keys until the writing "-Change Address" appears on display; press the ENTER key to access the menu and select the address through the UP and DOWN keys, press ENTER to confirm.
-
Page 17: Dmx Mode
4.3 DMX Mode Address 20 Channels Every single ACROBAT PE 1200 unit must have its relevant DMX address correctly set up. Every ACROBAT PE 1200 unit uses 20 Projector 1 0 0 1 channels. Set each projector as per table on the side, in order to be... -
Page 18: Maintenance
4.5 DMX values CHANNEL 1 CHANNEL 4 CHANNEL 9 CHANNEL 13 Level IRIS Level COLOR WHEEL 2 Level GOBOWHEEL 1 Level FOCUS+WIDE-ANGLE 0-150 Indexed position White 0-50 Continuous focus movement White 151-175 0-136 Close-open Speed 1 (min.) 10-19 (up to maximum stroke) White-Dark yellow 51-101 Gobo 1... - Page 19 - replace all eventually damaged spare parts; - clean up regularly eventual foreign bodies or dust which may possibly have got into the fans and all cooling grids: it is sugge- sted to use a little brush or a vacuum cleaner; do not use any screw driver or any other acuminate object, since they might dama- ge the fans or other parts of the unit.
-
Page 20: Technical Information
Max operating temperature °C 9.0 SPARE PARTS All components for the ACROBAT PE 1200 unit are available as spare parts and the relevant exploded view is available on request. 10.0 REPLACING INTERNAL COMPONENTS CAUTION: Before performing any maintenance operation on the projector, it is suggest to wait at least 15 minutes, to allow the lamp and all mechanical parts to cool off, and to unplug the projector from the power supply line. - Page 21 - n° 13 binding clamps from the 6 motors board; - n° 2 binding clamps from the keys board (indicated by the letter E); - n° 4 power supply cables: - n° 1 from the 2 motors board (white, position k4) - n°...
-
Page 22: Troubleshooting
10.4 Replacing the 6 motors board (bracket side) pict. 18 a) Disassemble the plastic shells of the bracket by untightening the 8 screws (4 for each shell); b) Remove the cover of the bracket which the board is fitted in (the other brac- ket is fitted with the tilt movement belts);... - Page 24 WORLD LIGHTING CHALLENGE Professional Lighting Manufacturer Via Bulgaria, 16 - 46042 CASTEL GOFFREDO (MN) Telefono 0376/779483 - Fax 0376/779682 - 0376/779552 http://www.griven.com/ e-mail griven@griven.com http://www.griven.it/ e-mail griven@griven.it...
Need help?
Do you have a question about the ACROBAT PE 1200 and is the answer not in the manual?
Questions and answers