Advertisement
Quick Links
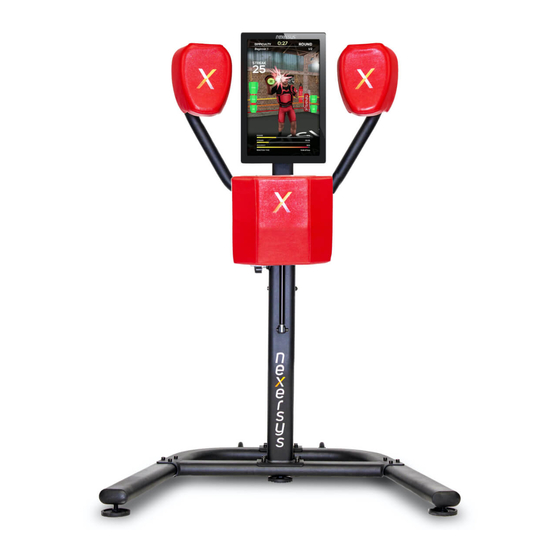
N3 Commercial Center Body Pad Conversion Instructions
June 2019
BEFORE YOU BEGIN
o Please follow the manual for the most efficient assembly
o A power drill will speed up assembly
o Estimated assembly time is 30 minutes
Parts List:
A. Center Pad
C. Allen Wrench
E. Wrench
G. Washers & Nuts (x4)
Tools Required:
Screwdriver, Pliers, Power Drill (Recommended)
XFit, LLC I 7500 Rialto Blvd Bldg. 1, STE 122 I Austin, TX 78735 I (512) 782-2940
B. Boot
D. String
F. Plate
H. Center Pad Board
1
Advertisement

Related Manuals for Nexersys N3 Commercial


Summary of Contents for Nexersys N3 Commercial
- Page 1 N3 Commercial Center Body Pad Conversion Instructions June 2019 BEFORE YOU BEGIN o Please follow the manual for the most efficient assembly o A power drill will speed up assembly o Estimated assembly time is 30 minutes Parts List: A. Center Pad B.
-
Page 2: Assembly Steps
ASSEMBLY STEPS Step 1: Unpack Parts Open the Conversion kit, remove the component and lay them out in a clear space • Step 2: Remove 3 and 5 Arm Assembly Unplug Tablet Cables from the back of Tablet • Use Allen Wrench (C.) then unscrew and remove the Handle •... - Page 3 Remove Spine Extender • Unplug Sensor chords (3)(4)(5) from AggPCB • Unscrew 4 Allen keys for the 3 and 5 Arm Assembly • Once unscrewed pull the Arm Assembly off ensuring no cables get torn or caught • XFit, LLC I 7500 Rialto Blvd Bldg. 1, STE 122 I Austin, TX 78735 I (512) 782-2940...
- Page 4 Step 3: Remove the Center Body Pad and Boot Unplug Cord 4 • In the back, tie a long string to chord 4 • Using Wrench unscrew and remove the 4 Nuts connecting the Center Strike Pad and to • the Arm Assembly.
- Page 5 Unscrew and remove the 4 Nuts connecting the Arm Assembly to Unit • Remove Arm Assembly, pulling chords and string through • Step 4: Attach Center Boot Tie off the new Boot Cable with the string from the old boot cable so that it can be fed •...
- Page 6 Use Allen Wrench (C.) to screw bolts and washers (G.) to attach Boot (B.) to unit • Using Allen Wrench, attach Plate (F.) using the 4 Washers and Nuts (G.) to backside of • unit Step 5: Attach Center Body Pad Plug cable into the sensor in the back of Center Plate Board (H.) •...
- Page 7 Use Washers and Nuts (G.) to attach center body pad to machine • Attach Cord 4 the corresponding labeled 8 pinned connection on AggPCB • Attach Micro USB into the AggPCB • Place Dust Protector over the AggPCB • XFit, LLC I 7500 Rialto Blvd Bldg. 1, STE 122 I Austin, TX 78735 I (512) 782-2940...
- Page 8 • Tuck Back into Spine Extender Place Spine Extended Cap back on unit, screw bolt and handle to spine extender, use • Allen Wrench (C.) to tighten • Plug in tablet cables XFit, LLC I 7500 Rialto Blvd Bldg. 1, STE 122 I Austin, TX 78735 I (512) 782-2940...
-
Page 9: Final Steps
Final Steps • Log in as Admin (username: admin password: 1234) • Select “Device Setup” • Select corresponding device (either N3C or N3E) Select “Consumer” or “Commercial” • Back out to main menu and begin your Workout! • XFit, LLC I 7500 Rialto Blvd Bldg. 1, STE 122 I Austin, TX 78735 I (512) 782-2940... - Page 10 Congratulations! Your Conversion is Complete! XFit, LLC I 7500 Rialto Blvd Bldg. 1, STE 122 I Austin, TX 78735 I (512) 782-2940...
Need help?
Do you have a question about the N3 Commercial and is the answer not in the manual?
Questions and answers