
Subscribe to Our Youtube Channel
Related Manuals for Allen-Bradley Rockwell Automation ClearMark Advanced

Summary of Contents for Allen-Bradley Rockwell Automation ClearMark Advanced
- Page 1 Quick Start Original Instructions ClearMark Advanced Printer Catalog Number 1492-PCMA110...
- Page 2 Important User Information Read this document and the documents listed in the additional resources section about installation, configuration, and operation of this equipment before you install, configure, operate, or maintain this product. Users are required to familiarize themselves with installation and wiring instructions in addition to requirements of all applicable codes, laws, and standards.
-
Page 3: Table Of Contents
ClearMark Advanced Printer What’s Inside Topic Topic Page Page Printer Overview ClearTools Software Installation Rating Plate USB Cable Connection Setup Operation Unpacking Starting ClearTools Software Included Items Mapping and Calibrating the Printer Installation Considerations Marker Cards Remove the Transport Restraints Touch Panel Install the Output Rail Cleaning and Maintenance... -
Page 4: Printer Overview
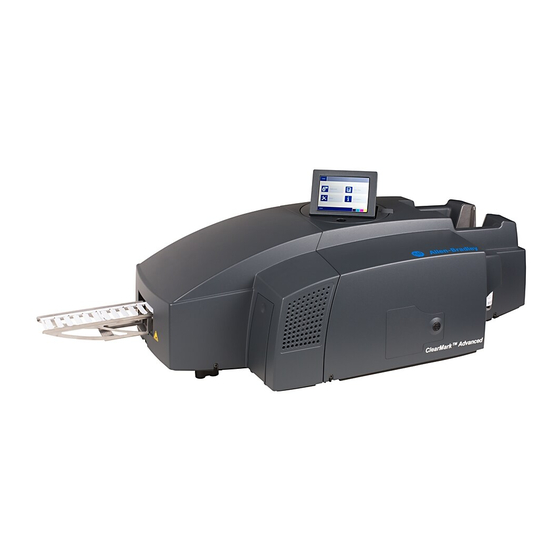
ClearMark Advanced Printer Printer Overview Figure 1 - Front view of the printer Figure 3 - Open ink tank lid Item Description Item Description Ink cartridges Touch panel Ink Collector Service cover Ink tank lid (open) Ink tank lid Output rail Figure 4 - Connectors Figure 2 - Rear view of the printer Item... -
Page 5: Setup
ClearMark Advanced Printer Setup This section provides the information necessary to setup the ClearMark Advanced printer. Unpacking IMPORTANT • Because of its weight, the printer must be carried by two people. Hold the printer at the front and rear when carrying it. •... -
Page 6: Remove The Transport Restraints
ClearMark Advanced Printer Figure 5 - Operating and Maintenance Spaces Item Clearance Distance mm (in.) 250 (9.84) 200 (7.87) output rail 100 (3.94) 250 (9.84) 100 (3.94) Remove the Transport Restraints 1. Remove the transport restraints from the touch panel. 2. -
Page 7: Install The Output Rail
ClearMark Advanced Printer Install the Output Rail 1. Install the output rail by snapping into place as shown. Position the Touch Panel The touch panel can be raised up to three rest positions. A click sound indicates that the touch panel is engaged in one of the rest positions. -
Page 8: Connect The Power Cable
ClearMark Advanced Printer WARNING: • The supply voltage must match the voltage given on the printer rating nameplate. • Only connect the device to a properly grounded and fused socket. • Do not use a socket that is already being used by devices that are turned on and off at regular intervals, such as photocopiers or fans. -
Page 9: Cleartools Software Installation
ClearMark Advanced Printer ClearTools Software Installation The marking system has been designed for the following operating systems: • Microsoft® Windows® 7 (32-bit/64-bit versions) • Windows 8 • Windows 8.1 • Windows 10 IMPORTANT Administrator rights are required for installation. You can find information about the application software in the ClearTools user manual, publication 1492-UM009. 1. - Page 10 ClearMark Advanced Printer The installation process starts automatically and the setup wizard appears. 4. Click Next. 5. Accept the terms in the license agreement and click Next. 6. Choose Typical setup type. Rockwell Automation Publication 1492-QS005D-EN-P - February 2020...
- Page 11 ClearMark Advanced Printer 7. Click Install. The installation process starts and is shown by a progress bar. 8. When the installation is completed, click Finish. Rockwell Automation Publication 1492-QS005D-EN-P - February 2020...
-
Page 12: Usb Cable Connection
ClearMark Advanced Printer USB Cable Connection Item Description USB port USB cable IMPORTANT When you have installed the ClearTools application software, connect the USB cable to the printer. The printer driver is installed automatically. 1. To add the ClearMark Advanced printer, click Add. 2. - Page 13 ClearMark Advanced Printer If a printer was found, click Add. The following dialog box appears: 3. If you want to change the printer name, click Properties. This changed printer name is then displayed in ClearTools. 4. Enter the printer name required for ClearTools, for example CMA Workplace 1 (USB1). 5.
-
Page 14: Operation
ClearMark Advanced Printer Operation Starting ClearTools Software 1. Start ClearTools software via the program icon on the desktop or via Start menu. Mapping and Calibrating the Printer A printer must be assigned for each marker card catalog number, for example: 1492-M5X5. Calibration must be carried out once for the printer, as this is a printer-specific zero point. - Page 15 ClearMark Advanced Printer 6. Click Map. 7. In the dialog box that follows choose As Printer and click OK. 8. In this dialog box choose whether you want to assign all variants of the 1492-M5X5 Marker Card to this printer. If you click Yes, all versions of the Marker Card type 1492-M5X5 are assigned to the ClearMark Advanced printer and are always output on this printer unless this setting is changed.
- Page 16 ClearMark Advanced Printer 2. Click How-to Videos 3. Click Calibration. Rockwell Automation Publication 1492-QS005D-EN-P - February 2020...
-
Page 17: Marker Cards
ClearMark Advanced Printer Marker Cards Marker Cards can be inserted directly without any prior handling. The end with the solid margin must be fed into the printer. Processing a Single Marker Card Place marker card on the conveyor belt (A) in the direction of the arrow. Processing a Stack of Marker Cards Place the stack of marker cards (A) on the holder. -
Page 18: Touch Panel
ClearMark Advanced Printer Touch Panel • View and delete print jobs • Perform maintenance • Provides ink level information and alerts when the cartridges should be changed • Set the touch panel language • Print out sample templates • Can be raised and rotated to the position you require Main Menu The printer status is shown in the bottom line. -
Page 19: Cleaning And Maintenance
ClearMark Advanced Printer Cleaning and Maintenance Printhead Cleaning Carry out printhead cleaning if the print quality deteriorates. 1. Press TOOLS in the main menu. 2. Press PRINTHEAD CLEANING in the Tools menu. if printhead cleaning should not be executed. Press NO Rockwell Automation Publication 1492-QS005D-EN-P - February 2020... -
Page 20: Printhead Flushing
ClearMark Advanced Printer 4. Press YES if printhead cleaning should be executed. Printhead cleaning takes approximately 2 minutes. The following message is displayed on the touch panel during printhead cleaning: 5. Print out a marker card. If the printing result is still not satisfactory, execute printhead flushing. Printhead Flushing If you have carried out printhead cleaning and the printing result is still not satisfactory, execute printhead flushing. - Page 21 ClearMark Advanced Printer 2. Press PRINTHEAD FLUSHING in the Tools menu. 3. Press NO if printhead flushing should not be executed. 4. Press YES if printhead flushing should be executed. Printhead flushing takes approximately 5 minutes. Rockwell Automation Publication 1492-QS005D-EN-P - February 2020...
-
Page 22: Troubleshooting
ClearMark Advanced Printer Troubleshooting A message on the touch panel indicates a printer fault or when an ink cartridge needs to be replaced. Touch [SYSTEMINFO] in the main menu of the touch panel for more detailed information about this message and to see which measures should be taken. - Page 24 Rockwell Automation maintains current product environmental information on its website at http://www.rockwellautomation.com/rockwellautomation/about-us/sustainability-ethics/product-environmental-compliance.page. Allen-Bradley, ClearMark, ClearTools, Rockwell Automation, and Rockwell Software are trademarks of Rockwell Automation, Inc. Microsoft and Windows are trademarks of Microsoft Corporation. Trademarks not belonging to Rockwell Automation are property of their respective companies.
Need help?
Do you have a question about the Rockwell Automation ClearMark Advanced and is the answer not in the manual?
Questions and answers