Table of Contents
Advertisement
Quick Links
Battery
NOTE:
To access the menu on the TiX520 or 560 you may use the F2 button or simply touch the LCD screen.
Either method will bring up the menu. To navigate the menu, you may use either the directional arrow buttons,
the touchscreen, or a combination of the two.
MEMORY:
1.
Insert SD memory card into the slot under the rubber cover on the bottom of the camera.
POWER:
2.
Insert a fully charged battery into the slot on the bottom of the camera. The slot is on the left side of the
camera near the hand strap. The battery life is indicated in the lower left corner of the LCD display. You can also press
and hold the battery symbol on the side of the battery.
START:
3.
Press the Power button until you see the LCD screen become active signaling camera startup.
Remove the lens cap from the front of the camera.
Once the camera finishes booting up, you will see the default start up screen showing a live infrared image.
To turn the camera off, press the Power button until you see the LCD screen go dark, signaling it is powering
down.
FOCUS:
4.
Focus is either manual or automatic, and is user selectable.
Manual—adjust adjust the focusing ring either clockwise (farther away) or counter clockwise (closer) to optimize
image focus.
Automatic—focus is laser enhanced. To utilize, depress the top/black button while aiming the laser at the object
of interest. While holding the camera steady, release the button. If there is too much movement of the laser during
the auto focusing operation, an Excessive Laser Movement warning may appear on the screen,
AUTO ADJUST (Level and Span):
5.
Mode, depress and hold the F1 button and the imager will change to Auto mode.
Press the Auto/Manual button located in the middle of the control panel (see above image) to select between Auto
and Manual modes.
Auto mode is additionally accessible through the menu screens. Open the menu and select Measurement. Then
select Set Level/Span. To select auto, either press the Auto button on the screen, or highlight it with the directional
buttons and then depress Select and then Done.
© 2015 The Snell Group / 322 N. Main St. / Suite 8 / Barre, VT 05641 / 800.636.9820
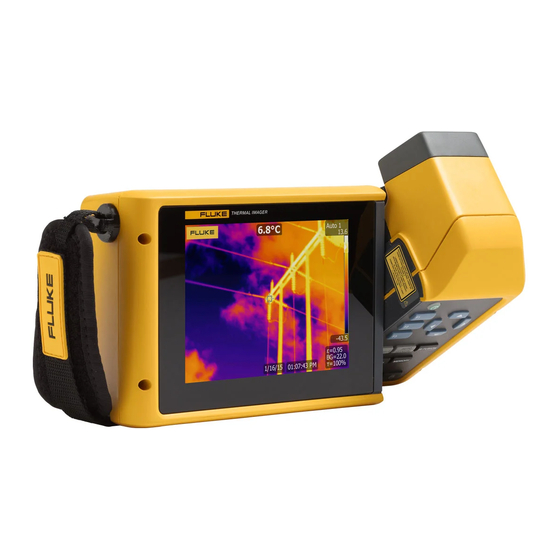
QuickStart:
F1, F2, F3
and On/Off Power
Button
Rescale
Memory
Card Slot
WiFi
Zoom
Auto Level and Span can be selected three ways. If operating in Manual
Fluke TiX 500/520/560
Directional
Arrow Keys
IR Fusion
Memory
Flashlight
Auto/Manual
Mode Select
AC Charger, HDMI out,
USB, Mini-USB
Manual
Focus
Laser
Ring
Distance
Finder
Image Capture
Button
/
www.thesnellgroup.com
Fluke TiX-500-560
Advertisement
Table of Contents

Related Manuals for Fluke TiX 500


Summary of Contents for Fluke TiX 500
- Page 1 QuickStart: Fluke TiX 500/520/560 F1, F2, F3 and On/Off Power Button Manual Focus Laser Ring Directional Distance Arrow Keys Finder IR Fusion Memory Flashlight Auto/Manual Rescale Memory Mode Select Battery Image Capture Card Slot WiFi AC Charger, HDMI out, Button...
- Page 2 QuickStart: Fluke TiX 500/520/560 MANUAL ADJUST (Level and Span): Manual Level and Span can be selected three ways. If operating in Auto Mode, depress and hold the F1 button and the imager will change to Manual mode. Press the Auto/Manual button located in the middle of the control panel to select between Auto and Manual modes.
Need help?
Do you have a question about the TiX 500 and is the answer not in the manual?
Questions and answers