Huawei PTN Series Quick Installation Manual
Packet transport platform
Hide thumbs
Also See for PTN Series:
- Quick installation manual (45 pages) ,
- Quick installation manual (16 pages)

Related Manuals for Huawei PTN Series


Summary of Contents for Huawei PTN Series
- Page 1 OptiX PTN 950 Packet Transport Platform of PTN Series Quick Installation Guide Issue: 17 Date: 2017-08-20 HUAWEI TECHNOLOGIES CO., LTD.
- Page 2 Notice The purchased products, services and features are stipulated by the contract made between Huawei and the customer. All or part of the products, services and features described in this document may not be within the purchase scope or the usage scope. Unless otherwise specified in the contract, all statements, information, and recommendations in this document are provided "AS IS"...
-
Page 3: Installation Flow
The other operations are mandatory. After you finish the installation, send the information about the bar code to Huawei Headquarters according to the Tabulation for the Feedback of Bar Codes of Equipment at Stations. - Page 4 If you need to use an outdoor cabinet other than the IMB network box, APM30H, and R01S200 for the PTN 950, contact Huawei to determine whether the outdoor cabinet meets requirements of Huawei devices on the device operating environments.
-
Page 5: Tools For Installation
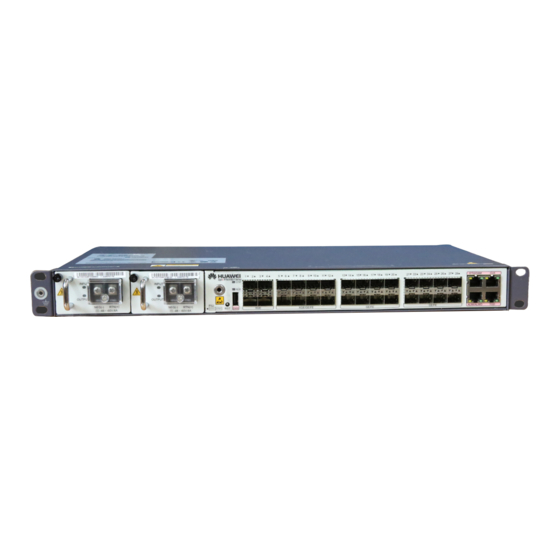
Tools for Installation Flat-head screwdriver Phillips screwdriver Level Measuring tape (M2-M6) Adjustable wrench (M2-M6) Network cable crimping Ratchet crimp tool tool Wire stripper Diagonal pliers Cable cutter Crimping tool Bayonet wrench Binding strap Needle-nose pliers Insulation tape Cleaner Multimeter COAX stripper Cable tester Heat gun Marker... - Page 6 Introduction to the Chassis Introduction to Interfaces The PTN 950 is available in two models: common chassis and extended chassis, which are 2 U and 3 U high, respectively. Installation modes of the two types of chassis are basically the same; therefore, the common chassis is used as an example to describe the installation of the PTN 950 in this document.
-
Page 7: Installing The Chassis
Installing the chassis Scenario I: Installing the Chassis in a 19-Inch Cabinet Introduction to the cable guiding frame Fixing the floating nuts Part 1 (for 19-inch cabinets, ETSI cabinets, and open racks) Part 3 (used to connect the cable tray to the chassis Mark the positions where floating nuts are to be installed on the middle installed, and install four floating nuts on both sides of... - Page 8 Scenario II: Installing the Chassis in an ETSI Cabinet with Front Columns Fixing the floating nuts Installing the mounting ears Before installing the chassis in an ETSI cabinet, adjust the mounting holes according to the cabinet type. M6 screw assembly with flat washers Mark the positions where floating nuts are to be installed, and install four floating nuts on both sides of...
- Page 9 Installing and Routing Cables Common Cables for the Chassis PGND cable Power cable Non-shielded network cable Shield network cable 120-ohm E1 cable 75-ohm E1 cable Fiber Installing the PGND Cable (Mandatory) In the scenario where the chassis is installed in an If the PGND cable is installed in the19-inch cabinet,...
- Page 10 Installing the Power Cable (Mandatory) When installing or routing cables, refer to the engineering document on site to install and connect the power cable the opposite end. 0 V power cable (black) 48 V power cable (blue) 0.22±0.03 N· M Insert the conductive part of the bare crimp Make a proper terminal for the power cable end terminal of the power cable in the DC connector,...
- Page 11 When the air breaker of the PDU is off, insert the power connector to the power interface on the chassis. After inserting the power connector, tighten the latches on both sides to prevent the connector from disconnected Among the four power cables, the upper two form one pair and the lower two the other pair. Either pair of power cables corresponds to a power supply.
- Page 12 Installing the Ethernet Service Network Cable It is recommended to connect the service cables of the same type to network interfaces from the left to right. •As the Ethernet service interfaces support the adaptive function, the network cable can be either crossover cable or straight-through cable.
- Page 13 Installing the NM Cable ETH/OAM Installing the External Clock/Time Cable a. Making the external clock and time cables according to the pin definition table Color Pin of the CLK1/TOD1 and CLK2/TOD2 Interfaces on the CXP Board 120-hm external clock External time (1PPS + time External time (DCLS) information) White/orange...
- Page 14 Expected Effect of Installation in a 19-Inch Cabinet The figure above shows expected cabling for the PTN 950 in a 19-inch open rack and it can only be used for reference. Cabling for the PTN 950 in other cabinet is similar.
- Page 15 Checking Cable Connectivity (Mandatory) Checking Connectivity of E1 Cables 1. Connect the 2M cable tester to the connector of the E1 cable on the equipment side. 2. Use the BER tester to test each pair of E1 trunk cables on the DDF in sequence.
-
Page 16: Checking The Installation
Checking the Installation Item The chassis should be installed firmly in the position specified in the engineering design document. Make sure that the chassis does not contact the front door and the cables are not pressed by the front door, when the front door is closed. -
Page 17: Powering On The Equipment
Powering On the Equipment 1 Powering On the Equipment (Mandatory) Checking the equipment before powering it on Before the equipment is powered on, you must use the multimeter to test whether a short-circuit occurs between the positive and negative terminals of the PDU. Checking the power-on status The fan is faulty. - Page 18 2 Checking Tail Fiber Connection External cable Optical power meter Fiber jumper connected to the OUT port To check tail fiber connection, you need to check the deviation of the optical power between an optical interface on the board and the peer interface on the ODF. If the optical power meter reads a value less than or equal to dB, it indicates that the tail fiber connection is correct.
- Page 19 Appendix Installing the OptiX PTN 950 (Extended Chassis) Equipment structure and interface introduction RS232/RS485 Communication interface Grounding hole Installation holes for the device for the cable tray Grounding hole for the AC power cable DC power output interface AC power Reserved Battery interface input interface...
- Page 20 Appendix Installing the OptiX PTN 950 (Extended Chassis) Precautions for installing the OptiX PTN 950 (extended chassis) cables •When installing a case-shaped OptiX PTN device in an IMB, route the power cables on the left and signal cables on the right. •If it is difficult to install and remove a cable, use a fiber extractor.
- Page 21 HUAWEI TECHNOLOGIES CO., LTD. Huawei Industrial Base Bantian Longgang Shenzhen 518129 People’s Republic of China www.huawei.com...
Need help?
Do you have a question about the PTN Series and is the answer not in the manual?
Questions and answers