Bosch HBL 74 Series Use & Care Manual
Single and double built-in ovens
Hide thumbs
Also See for HBL 74 Series:
- Service manual (59 pages) ,
- Use and care manual (44 pages) ,
- Installation instructions manual (21 pages)

Related Manuals for Bosch HBL 74 Series


Summary of Contents for Bosch HBL 74 Series
- Page 1 Use & Care Manual Single and Double Built-in Ovens Models HBL 73.. / 74.. / 75.. / 76.. and HBN 74.. / 75.. / 76.. © 2002 BSH Home Appliances Corp.
- Page 2 Adherence to these instructions and procedures will assure that you realize the full potential of your new Bosch oven as well as maintain it for years of dependable use. Thank you and good cooking,...
-
Page 3: Table Of Contents
View Clock ... 30 Default Data ... 30 Oven Care and Cleaning ... 31-34 Self-Cleaning the Oven ... 31 Preparing the Oven for Self-Clean ... 31 Setting the Self-Clean Mode ... 32 General Oven Care ... 33 Oven Finishes/Cleaning Methods ... 34 Do-It-Yourself Maintenance ... -
Page 4: Safety Precautions
If the fan does not operate, do not use the oven. Call an authorized service center. 9. Never use the oven to warm or heat a room. This can damage the oven parts. 10. For personal safety, wear proper clothing. Loose fitting or garments with hanging sleeves should never be worn while using this appliance. -
Page 5: Important (Safety Instructions In French)
• The trim on the top and sides of the oven door may become hot enough to cause burns. • Use care when opening the door. Open the door slightly to let hot air or steam escape before removing or replacing food. -
Page 6: Les Instructions De Sécurité
L’utilisation de produits chimiques corrosifs pour le chauffage ou le nettoyage peut endommager l’appareil. Bosch HBL7 / HBN7 Oven Use and Care Manual pour four et appareil en général • Dans le cas où des vêtements ou des cheveux prennent feu, SE LAISSER TOMBER AU SOL ET SE ROULER IMMÉDIATEMENT pour éteindre les... - Page 7 Ne pas toucher aux éléments chauffants. Ne pas utiliser de serviettes ou autres chiffons. Bosch HBL7 / HBN7 Oven Use and Care Manual SÉCURITÉ POUR LE FOUR AUTO- NETTOYANT •...
-
Page 8: Cooking With The Bosch Convection Oven
Cooking with the BOSCH Convection Oven In a conventional oven, the heat source cycles on and off to maintain an average temperature in the oven cavity. As the temperature gradually rises and falls, gentle air currents are produced within the oven. This natural convection tends to be inefficient because the currents are irregular and slow. -
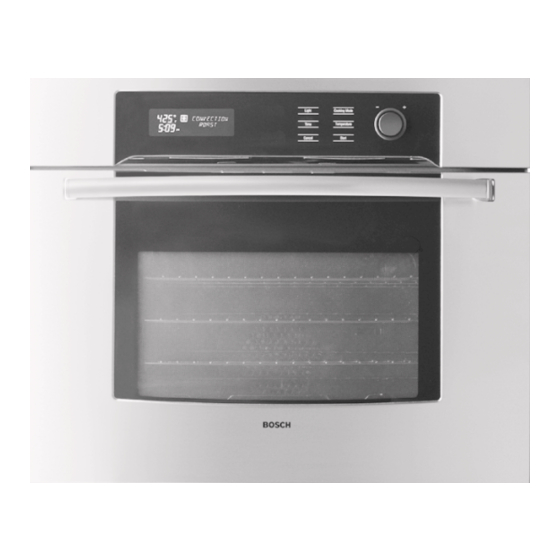
Page 9: Features Of Your Oven
Rack Levels Model & Serial # Plate Bake Element (not visible) Oven Rack Back Oven Rack Front Broiler Pan Racks Bosch HBL7 / HBN7 Oven Use and Care Manual Halogen Lights Broil Element – Upper Cancel Light Cooking Mode Time Temperature... -
Page 10: The Control Panel
Double Oven Control Panel The control panel allows you to program either the upper or lower oven. As you touch the pads and turn the control knob, words and numbers appear in the display window. Touch only one pad at a time. -
Page 11: Oven Modes
CONVECTION BAKE and DEHYDRATE Convection Bake cooks with heat from a third element behind the back wall of the oven. The heat is circulated throughout the oven by the convection fan. Dehydrating is similar to convection cooking and holds... -
Page 12: General Oven Information
Before using your Bosch oven for the first time remove all packing and foreign materials from the oven(s). Any material of this sort left in the oven(s) may melt and/ or burn when the oven(s) is(are) used. Flashing Symbols or Numbers Signals an incomplete setting and calls for another step or START to be touched. -
Page 13: Oven Operation
Insulated baking pans may increase the length of cooking time. • Do not cook with the empty broiler pan in the oven, as this could change cooking performance. Store the broil pan outside of the oven. -
Page 14: Setting The Clock
Always set the clock immediately after installation or after a power failure. Once power returns to the oven, the clock displays the time of day when the power was turned off or lost. • The clock time will appear during all oven operations except when the timer or a timed cooking operation is running. •... -
Page 15: Using Oven Timer
3. Touch TIME. 4. Timer is now cleared and clock time appears in display. 5. If TIME pad is not touched, oven will beep and CLEAR TIMER will continue to flash in display. Using Oven Lights is touched. Oven lights will turn off automatically when the oven mode is cancelled. -
Page 16: Selecting The Oven Mode
7. To select a different temperature, touch TEMPERATURE and turn knob to the right or left. Temperature can be changed by 5°F. 8. If START is not touched, oven will beep as a reminder and PRESS STARTwill appear in display and temperature will flash. -
Page 17: Time Oven Mode Operation
ROAST 7:09 STOPTIME Bosch HBL7 / HBN7 Oven Use and Care Manual 3. Use knob to enter the time of day the oven will stop cooking or turn off. 4. Touch START. 5. The clocktime will be displayed and DELAY appears in the display. -
Page 18: Bake Tips And Techniques
Bake Tips and Techniques Baking is cooking with heated air. Both upper and lower elements in the oven are used to heat the air but no fan is used to circulate the heat. Follow the recipe or convenience food directions for baking temperature, time and rack position. -
Page 19: Bake Cook Chart
Scratch, Step 2 Frozen Fruits and Vegetables Apples, Baked (4) Potatoes, Baked (4) 6 to 8 oz. each Bosch HBL7 / HBN7 Oven Use and Care Manual Bake Cook Chart Oven Temperature Rack Position 450°F (232°C) 375°F (190°C) 400°F (205°C) 375°F (190°C) -
Page 20: Convection Bake Tips And Techniques
Use the regular Bake mode for these foods. • Multiple rack cooking for oven meals is done on rack positions 1, 2 and 3. All four racks can be used for cookies, biscuits and appetizers. •... -
Page 21: Convection Bake Chart
Scratch Frozen Specialty Breads Popovers * This chart is a guide. Follow recipe or package directions and reduce temperatures appropriately. Bosch HBL7 / HBN7 Oven Use and Care Manual Oven Temperature* Rack Position 425ºF (219º C) 350°F (177°C) 375°F (190°C) 350°F (177°C) -
Page 22: Convection Roast Tips And Techniques
2. Make sure the probe is not touching fat, bone, the roast rack or the pan. 3. Place roasting pan with meat in cold oven on recommended oven rack. Plug probe into the probe receptacle. The probe symbol will appear in display. - Page 23 8. To select roasting temperature, rotate knob. Roasting temperature can be changed by 5°F increments. 9. Touch START. If START is not touched, oven will beep as a reminder to touch START and roasting temperature will flash in display. PRESS START will appear in display.
-
Page 24: Convection Roasting With The Probe
Turn the knob to desired temperature and press START. NOTE: The probe symbol will remain in display, as a reminder to remove it from oven when roasting is complete. Do not leave probe attachment in oven when using oven for other cooking applications or during self- clean. -
Page 25: Convection Roast Chart
325°F (163º C) Veal: Loin (bone in) 2 to 4 lbs. 325°F (163º C) * The minimum safe temperature for stuffing in poultry is 165°F (74º C) Bosch HBL7 / HBN7 Oven Use and Care Manual Rack Cook Probe Time Temperature Minutes Per lb. -
Page 26: Broil Tips And Techniques
Place rack in the required position needed before turning on the oven. • Start broiling with a cool oven and broiler pan. There is no need to preheat oven for broiling. • Broil with the oven door positioned at the Broil door stop (open door broiling). -
Page 27: Convection Broil
Oven Operations • Place rack in the required position needed before turning on the oven. • Use Convection Broil mode with the oven door closed (closed door broiling). • Oven can be preheated for Convection Broil. • Use the 3-piece broil pan for Convection Broil. -
Page 28: Dehydrate Tips And Techniques
By using paper towels, some food moisture can be absorbed before dehydrating begins (such as with sliced tomatoes or sliced peaches). Warming Tips and Techniques • Call on your oven Warming mode to keep foods hot until you are ready to serve them. • The Warming mode default temperature is preprogrammed at 170°F (75°C). •... -
Page 29: Special Features
Special Features The Special Features function can be used to select the following 10 special oven features: 1. LOCK KEYS (Child Lockout) 2. SABBATH MODE (for religious faiths with “no work” requirements on the Sabbath) 3. OVEN OFFSET 1 (upper oven – used to calibrate the oven temperature) 4. -
Page 30: (For Religious Faiths With "No Work" Requirements On The Sabbath)
3. Touch TEMPERATURE if a different temperature is needed and turn knob to select temperature. 4. Touch START and oven will begin operating in the Sabbath mode. • Oven lights will remain on or off as previously set, even if the door is open or closed. • PREHEAT will not show in display. -
Page 31: Language (Select English, Spanish, Or French)
6. Touch START to accept a language change. FEATURE #6 - ° SELECT UNITS • The oven has been preset to the Fahrenheit temperature scale. • The feature allows you to switch between Fahrenheit and Centigrade temperature. TO CHANGE THE TEMPERATURE SCALE 1. -
Page 32: Beep Volume
Special Features Special Features, FEATURE #8 – BEEP VOLUME • The volume of the oven beep can be changed from 1(softest) to 3 (loudest). • The oven default for beep volume is 2. TO CHANGE THE BEEP VOLUME 1. Select Special Features. -
Page 33: Oven Care And Cleaning
Do not rub the gasket on oven. Hand-clean the oven door window. Rinse all areas thoroughly then dry. 5. Be sure oven interior lights are turned off and the light bulbs and lens covers are in place. See Pages 13 and 37. Hand clean frame... -
Page 34: Setting The Self-Clean Mode
Rotate knob to select number of hours. CLEAN 4:00 5. Touch START pad and REMOVE RACKS appears in the display as a reminder to remove oven racks. REMOVE RACKS 4:00 6. Touch START again. Do not attempt to open the door while the door is locking. -
Page 35: General Oven Care
Side Trim Control Panel Trim Control Panel Oven Cooling Vents Oven Front Frame Oven Cavity Mesh Gasket Bosch HBL7 / HBN7 Oven Use and Care Manual General Oven Care Steel Part Oven Interior Oven Door Door Handle Door Cooling Vent... -
Page 36: Oven Finishes/Cleaning Methods
, Comet Cleaners (cold oven formula) can be used, but may cause darkening and discoloration. Racks may be cleaned in the oven during the self-clean mode. However, they will lose their shiny finish and permanently change to a metallic gray. -
Page 37: Do-It-Yourself Maintenance
Do-It-Yourself Maintenance Do-It-Yourself Maintenance WARNING • Make sure oven is cool and power to the oven has been turned off before removing the door. Failure to do so could result in electrical shock or burns. • The oven door is heavy and fragile. Use both hands to remove the oven door. - Page 38 2. Open the door completely. 3. Lift up the hinge bracket (1, Figure C) into the slot (2, Figures C and D) above. Bosch HBL7 / HBN7 Oven Use and Care Manual continued Figure E 4. Hold the door firmly on both sides using both hands and partially close the door.
-
Page 39: Replacing An Oven Light
Each oven is equipped with two halogen lights located in the back wall of the oven. • The lights are switched on when the door is opened or when the oven is in a cooking cycle. • The oven lights are not illuminated during SELF- CLEAN. -
Page 40: Solving Problems
With either Bake or Convection Bake, poor results can occur for many reasons other than a malfunction of the oven Check the chart below for causes of the most common problems Since the size, shape and material of baking utensils directly affect the baking results, the best solution may be to replace old baking utensils that have... -
Page 41: Solving Operational Problems
The fan turns off automatically when the electronic components have cooled sufficiently. Turn the oven off at the circuit breaker and wait 5 minutes. Turn breaker back on. The oven should reset itself and will be operable. Check the circuit breaker or fuse box to your house. Make sure there is proper electrical power to the oven. -
Page 42: Model Warranty
The location of the serial tag on the product can be seen when the oven door is opened. It is located on the left side, centered vertically just inside the oven cavity. - Page 43 Notes...
- Page 44 5551 McFadden Avenue, Huntington Beach, CA 92649 • 800/735-4328 09BH0270 • © 2002 BSH Home Appliances Corp. • Litho Date: 1/02 Bosch is a registered trademark of the Robert Bosch Corporation Genuine European Convection is a trademark of BSH Home Appliances Corporation. All other trademarks are property of their respective owners.