Fluke 712B Calibration Manual
Rtd/thermocouple calibrator
Hide thumbs
Also See for 712B:
- User manual (40 pages) ,
- Quick reference manual (2 pages) ,
- User manual (38 pages)

Related Manuals for Fluke 712B


Summary of Contents for Fluke 712B
- Page 1 712B/714B RTD/Thermocouple Calibrator Calibration Manual March 2015 © 2015 Fluke Corporation. All rights reserved. Specifications are subject to change without notice. All product names are trademarks of their respective companies.
- Page 2 Fluke authorized resellers shall extend this warranty on new and unused products to end-user customers only but have no authority to extend a greater or different warranty on behalf of Fluke. Warranty support is available only if product is purchased through a Fluke authorized sales outlet or Buyer has paid the applicable international price.
-
Page 3: Table Of Contents
Verify mV Measure ................17 Verify TC Measure (Type K) .............. 18 Verify TC K Source ................18 Verify mA Measure ................19 712B Calibration Adjustment ..............21 Enter Manual Calibration Mode ............21 Adjust Ohms Source................21 Adjust 50 Ω Source................ 22... - Page 4 Adjust External Trigger for Ohms Source .......... 30 Adjust 0.1 mA External Trigger ............31 Adjust 1 mA External Trigger............31 Save Data and Reset the 712B System ..........32 714B Calibration Adjustment ..............32 Enter Calibration Mode..............32 Use 8508A to Adjust the 5522A Output ..........33 Adjust mV Source................
- Page 5 Table Title Page Symbols..................... 2 Required Equipment for 712B Verification and Calibration Adjustment ..10 Required Equipment for 714B Verification and Calibration Adjustment ..10 712B Ohms Source Limits ................. 12 712B 4-Wire Ohms Measure Limits ............13 712B 3-Wire Ohms Measure Limits ............14 712B mA Measure Limits ................
- Page 6 712B/714B Calibration Manual...
- Page 7 Connect the 714B to the 8508A ..............33 Adjust 714B mV Measure ................34 Connect the 714B to the Fluke 9101-256 ..........36 Use Lag Bath to Adjust Cold Junction Temperature ......... 37 714B and 5522A mA Channel Connections..........38 User-Replaceable Parts and Accessories for 712B ........
- Page 8 712B/714B Calibration Manual...
-
Page 9: Introduction
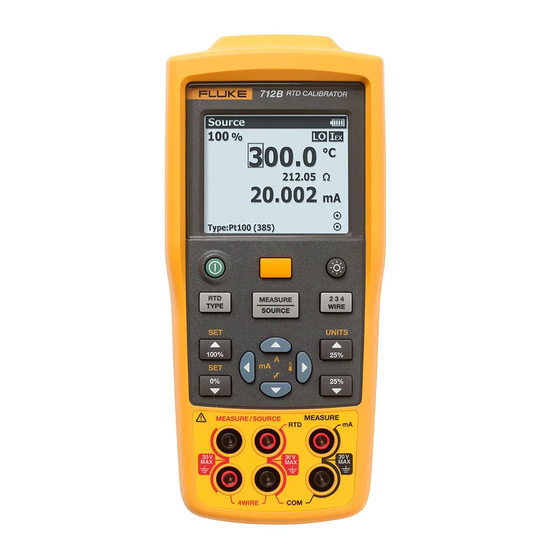
Introduction The Fluke 712B/714B RTD/Thermocouple Calibrator (the Product) is a handheld, battery-operated instrument that measures and sources a variety of RTDs/thermocouples. It also has an isolated channel to measure 4-20 mA. Contact Fluke To contact Fluke, call one of the following telephone numbers: •... -
Page 10: Symbols
Product Category: With reference to the equipment types in the WEEE Directive Annex I, this product is classed as category 9 "Monitoring and Control Instrumentation" product. Do not dispose of this product as unsorted municipal waste. Go to Fluke’s website for recycling information. -
Page 11: 712B Specifications
RTD/Thermocouple Calibrator 712B Specifications 712B Specifications Specifications are based on a one year calibration cycle and apply from +18 °C to +28 °C unless stated otherwise. All specifications assume a 5 minute warmup period. DC mA Measurement Accuracy (% of Reading + Floor) -
Page 12: Rtd Input And Output
712B/714B Calibration Manual RTD Input and Output Measure (°C) Source (°C) RTD Type Range (°C) Source (α) 1 Year 2 Year 1 Year 2 Year Current -200 to 100 1 mA 10 Ω Pt(385) 100 to 800 1 mA -200 to 100 1 mA 50 Ω... -
Page 13: General Specifications
RTD/Thermocouple Calibrator General Specifications Maximum voltage applied between any terminal and earth ground or between any 30 V two terminals: -10 °C to 50 °C Operating temperature -20 °C to 60 °C Storage temperature Operating altitude 2,000 meters Storage altitude 12,000 meters Non condensing 90 % (10 °C to 30 °C) -
Page 14: 714B Specifications
712B/714B Calibration Manual 714B Specifications Specifications are based on a one year calibration cycle and apply from +18 °C to +28 °C unless stated otherwise. All specifications assume a 5 minute warmup period. Thermocouple mV Input Accuracy (% of Reading + Floor) - Page 15 RTD/Thermocouple Calibrator 714B Specifications -20 to 0 0 to 200 200 to 1400 1400 to 1767 0 to 800 800 to 1200 1200 to 1800 1800 to 2316 -200 to -100 -100 to 800 800 to 900 -200 to 0 0.9.
-
Page 16: General Specifications
712B/714B Calibration Manual General Specifications Maximum voltage applied between any terminal and earth ground or 30 V between any two terminals: -10 °C to 50 °C Operating temperature -20 °C to 60 °C Storage temperature Operating altitude 2,000 meters Storage altitude... -
Page 17: Maintenance
RTD/Thermocouple Calibrator Maintenance Maintenance Replace the Batteries Warning To prevent false readings, which could lead to possible electric shock or personal injury, replace the batteries as soon as the low battery indicator appears. Figure 1 shows how to replace the batteries. hnh38.eps Figure 1. -
Page 18: Required Equipment
Calibration Manual Required Equipment The equipment listed in Table 2 is necessary to do the calibration and test for the 712B. The equipment listed in Table 3 is necessary to do the calibration and test for the 714B. Note Fluke 5522A and Fluke 8508A need an 8-hour warmup period before the calibration starts. -
Page 19: 712B Performance Verification
Push as necessary to enter Source mode. 4. Set the 712B to output the resistance values at the first column in Table 4. 5. Wait approximately 10 seconds until the 8508A shows a stable reading, and verify that the 8508A readings are within the appropriate limits in Table 4. -
Page 20: Verify 4-Wire Ohms Measure
1. Push to set the 712B to Ohms Measure mode. 2. Push until 4W shows on the screen. 3. Make the connections between the 712B and the 5522A, as shown in Figure 3. 4. Set the 5522A to output the Ohms value at the second column in Table 5. -
Page 21: Verify 3-Wire Ohms Measure
1. Push to set the 712B to Ohms Measure mode. 2. Push until 3W shows on the screen. 3. Make the connections between the 712B and the 5522A, as shown in Figure 4. 4. Set the 5522A to output the Ohms value at the second column in Table 6. -
Page 22: Verify Ma Measure
20 mA and the resolution of DCI measurement mode to 7 1/2-digits. 3. Adjust the mA source output of 5522A and make that 8508A shows as the first column in the Table 7, and verify that the 712B readings are within the limits shown. - Page 23 Fluke 8508A Fluke 5522A 5522A CALIBRATOR Fluke 712B hwp004.eps Figure 5. Verify 712B mA Measure Table 7. 712B mA Measure Limits DC Current 1 Yr. Lower Limit 1 Yr Upper Limit 2 Yr. Lower Limit 2 Yr Upper Limit Display from...
-
Page 24: 714B Performance Verification
712B/714B Calibration Manual 714B Performance Verification Verify that the 714B performance is within the 1 or 2 year specifications as desired. Turn the 714B on and let it warm up for 5 minutes. Verify mV Source 1. Make connections between the 714B and the 8508A with copper wire, as shown in Figure 6. -
Page 25: Verify Mv Measure
RTD/Thermocouple Calibrator 714B Performance Verification Verify mV Measure 1. Make connections between the 714B and the 5522A with copper wire, as shown in Figure 7. Fluke 5522A 5522A CALIBRATOR Fluke 714B Pure Copper Cables Pure Copper TC Miniplug hwp007.eps Figure 7. -
Page 26: Verify Tc K Source
712B/714B Calibration Manual 7526A Fluke 714B 7526A PRECISION PROCESS CALIBRATOR VOLTS RTD/ 100 mA MAX OUTPUT OUTPUT 100V MAX INPUT/OUTPUT 20V PK 4 W RTD/ INPUT 20 V PK CURRENT SENSE 20V PK K Type TC Miniplug hwp015.eps Figure 8. Verify Type K Measure 4. -
Page 27: Verify Ma Measure
3. Set the 5522A to source and make sure that 8508A shows the first dc current in Table 12. 4. Output the dc current values in Table 12 and verify that the 714B readings are within the limits shown. Fluke 8508A Fluke 5522A 5522A CALIBRATOR Fluke 714B hwp010.eps... -
Page 28: 712B Calibration Adjustment
Before the calibration adjustment, set the 8508A to 4-Wire Ohms measurement mode, set the resolution of Ohms measurement mode to 7 1/2-digits or above, and use two sets of banana plug patch cords to connect the 712B and the 8508A, as shown in Figure 10. -
Page 29: Adjust 50 Ω Source
Adjust 50 Ω Source 1. Set the range of 8508A 4-Wire measurement to 2 kΩ. 2. Push on the 712B to enter the 50 Ω Source calibration mode. 3. Wait approximately 10 seconds until the 8508A shows a stable reading. -
Page 30: Adjust 500 Ω Source
1. Set the range of 8508A 4-Wire measurement to 20 kΩ. 2. Push to enter 500 Ω Source calibration mode. 3. Wait approximately 10 seconds until the 8508A shows a stable reading. 4. Input the reading into the 712B. 5. Confirm the input. hwp04.jpg Adjust 3500 Ω... -
Page 31: Adjust Trigger Current For Ohms Measure
Before the calibration adjustment, set the 8508A to DCI measurement mode, set the resolution of DCI measurement mode to 7 1/2-digits, and use one set of banana plug patch cords to connect the 712B and the 8508A, as shown in Figure 11. -
Page 32: Adjust 0.25 Ma Trigger Current
Calibration Manual Adjust 0.25 mA Trigger Current 1. Push on the 712B to enter 0.25 mA trigger current calibration mode. 2. Wait approximately 15 seconds until the 8508A shows a stable reading. 3. Input the reading into the 712B. -
Page 33: Adjust 1 Ma Trigger Current
Adjust Ohms Measure Before the calibration adjustment, set the 5522A to Ohms source output mode, and use two sets of banana plug patch cords to connect the 712B and the 5522A, as shown in Figure 12. Fluke 5522A 5522A... -
Page 34: Adjust 50 Ω Input
3. Confirm the reading on the 712B. hwp10.jpg Adjust 350 Ω Input P ush on the 712B to enter 350 Ω input calibration mode. 2. Set the 5522A to output 350 Ω. Wait approximately 10 seconds for a stable output of the 5522A. -
Page 35: Adjust 500 Ω Input
3. Confirm the reading on the 712B. hwp12.jpg Adjust 3500 Ω Input P ush on the 712B to enter the 3500 Ω input calibration mode. 2. Set the 5522A to output 3500 Ω. Wait approximately 10 seconds for a stable output of the 5522A. -
Page 36: Adjust Ma Measure
Calibration Manual Adjust mA Measure Before the calibration adjustment, set the 5522A to mA (dc) source output mode, and use one set of banana plug patch cords to connect the 712B and the 5522A, as shown in Figure 13. Fluke 5522A... -
Page 37: Adjust 24 Ma Input
Adjust External Trigger for Ohms Source Before the calibration, set the 5522A to mA (dc) source output mode, and use one set of banana plug patch cords to connect the 712B and the 5522A, as shown in Figure 14. Fluke 5522A... -
Page 38: Adjust 0.1 Ma External Trigger
Adjust 0.1 mA External Trigger Set the 5522A to output 0.1 mA. Push on the 712B to enter 0.1 mA external trigger calibration mode. Wait approximately 10 seconds for a stable output of the 5522A. Confirm the reading on the 712B. -
Page 39: Save Data And Reset The 712B System
RTD/Thermocouple Calibrator 714B Calibration Adjustment Save Data and Reset the 712B System After the calibration procedure described above is done, push to confirm and store the calibration data. The 712B system is automatically reset. hwp18.jpg hwp19.jpg 714B Calibration Adjustment... -
Page 40: Use 8508A To Adjust The 5522A Output
712B/714B Calibration Manual Use 8508A to Adjust the 5522A Output To use the 8508A to calibrate the 5522A output: 1. Connect the voltage output terminals of the 5522A with the voltage input connectors of the 8508A via the pure copper cables. -
Page 41: Adjust Mv Measure
5. Input the new reading on the 8508A to the 714B. 6. Push to confirm. Adjust mV Measure 1. Connect the 714B TC mini plug to the 5522A with pure copper cables, as shown in Figure 16. Fluke 5522A 5522A CALIBRATOR Fluke 714B Pure Copper Cables Pure Copper TC Miniplug hwp007.eps... -
Page 42: Adjust Internal Cold Junction Temperature
2. After approximately 10 seconds, push to calibrate the value. hwp24.jpg Adjust Internal Cold Junction Temperature Use the Fluke 9101-256 or a lag bath to calibrate the internal cold junction temperature. Use the Fluke 9101-256 To use the Fluke 9101-256 to calibrate the internal cold junction temperature: 1. - Page 43 Fluke 9101-256 Fluke 714B J TYPE TC Sensor hwp008.eps Figure 17. Connect the 714B to the Fluke 9101-256 2. After the J type thermocouple is inserted, wait approximately 5 minutes for the temperature reading to stabilize. hwp25.jpg P ush to calibrate the cold junction temperature.
-
Page 44: Use A Lag Bath
2. After the thermocouple is inserted, wait approximately 5 minutes for the temperature reading to stabilize. 3. Record the reading on the standard sensor, and input the reading to the 714B. Push to calibrate the cold junction temperature. Fluke 1551A Ex Fluke 714B Thermometer J Type TC Sensor hwp009.eps... -
Page 45: Adjust Ma Measure
RTD/Thermocouple Calibrator 714B Calibration Adjustment Adjust mA Measure Connect the 5522A and the 714B via the Fluke-75X-8014 cable, as shown in 1. Figure 19. The 5522A outputs 0.1 mA. hwp26.jpg Fluke 5522A 5522A CALIBRATOR Fluke 714B hwp023.eps Figure 19.714B and 5522A mA Channel Connections... -
Page 46: Save Data And Reset The 714B System
712B/714B Calibration Manual Push . The 5522A outputs 24mA. hwp27.jpg Push to adjust. Save Data and Reset the 714B System After the calibration procedure described above is done, push to confirm and store the calibration data. The 714B system is automatically reset. -
Page 47: User-Replaceable Parts And Accessories
To prevent possible electrical shock, fire, or personal injury, use only specified replacement parts. User-replaceable parts for the 712B are listed in Table 13 and shown in Figure 20. User-replaceable parts for the 714B are listed in Table 14 and shown in Figure 21. - Page 48 712B/714B Calibration Manual hqu46.eps Figure 20.User-Replaceable Parts and Accessories for 712B...
- Page 49 Bail stand 4307093 Quick Reference Guide 4285039 TC plugkit, K type 773135 Not Shown Test Leads, not shown variable Alligator Clips Not Shown www.fluke.com for more information about the test leads and alligator clips available for your region.
- Page 50 712B/714B Calibration Manual hrk46.eps Figure 21. User-Replaceable Parts and Accessories for 714B...
Need help?
Do you have a question about the 712B and is the answer not in the manual?
Questions and answers