RIDGID 300 Safety Procedures
Hide thumbs
Also See for 300:
- Manual (87 pages) ,
- Operator's manual (67 pages) ,
- Operating instructions (4 pages)
Table of Contents
Advertisement
Ridgid 300 Safety Procedures
1.
PURPOSE
1.1.
To provide guidelines on the use of the Ridgid 300 pipe threader used in Trades at
Thompson Rivers University.
2.
SCOPE
2.1.
These procedures applies to contractors working on projects on TRU campus and
employees and students when working on TRU property
3.
PRECAUTIONS
POTENTIAL HEALTH & SAFETY HAZARDS
HAZARD
PINCH POINTS
There are gears and exposed
moving parts on machinery.
ELECTRICAL HAZARD
HIGH SOUND LEVELS
Sound levels exceed 85 dB
FOOT INJURY
Rings and Dangling jewelry
Revision Date: 12/22/2014
TO PROTECT YOURSELF
Use LOCK-OUT procedures when performing
maintenance or conducting any work within 12" of an
exposed pinch point.
NEVER put your hands or feet near an exposed pinch
point or gears!
Ensure that all switches, wires, and plugs are in good
operating condition.
HEARING PROTECTION
designated areas.
Approved protective footwear is needed when there is the
risk of foot injury due to slipping, uneven terrain,
abrasion, crushing potential, temperature extremes,
corrosive substances, puncture hazards, electrical shock
and any other recognizable hazard
Rings and any loose or dangling jewelry must not be
worn while operating any equipment or machines
Page 1 of 11
Number: OH&S 18.47.1
Printed copies of this document are uncontrolled.
is required when working in
Advertisement
Table of Contents

Related Manuals for RIDGID 300


Summary of Contents for RIDGID 300
- Page 1 Ridgid 300 Safety Procedures Printed copies of this document are uncontrolled. PURPOSE 1.1. To provide guidelines on the use of the Ridgid 300 pipe threader used in Trades at Thompson Rivers University. SCOPE 2.1. These procedures applies to contractors working on projects on TRU campus and...
-
Page 2: Work Area Safety
Date: 12/22/2014 Doc # 18.47.1 – Ridgid 300 Safety Procedures Printed copies of this document are uncontrolled PERSONAL PROTECTIVE EQUIPMENT Safety glasses must be worn at all times in work area! Long and Loose hair must be contained by a hat or hairnet to prevent contact with... -
Page 3: Electrical Safety
Doc # 18.47.1 – Ridgid 300 Safety Procedures Date: 12/22/2014 Printed copies of this document are uncontrolled • Guard or barricade the area when work piece extends beyond machine. A guard or barricade that provides a minimum of three (3) feet clearance around the work piece will... -
Page 4: Personal Safety
Doc # 18.47.1 – Ridgid 300 Safety Procedures Date: 12/22/2014 Printed copies of this document are uncontrolled • Keep all electric connections dry and off the ground. Do not touch plugs or tool with wet hands. Reduces the risk of electrical shock. - Page 5 Machine Safety • Power Drive is made to thread and cut pipe or bolt and to power RIDGID roll grooving equipment. Follow instructions on proper use of this machine. Do not use for other purposes such as drilling holes or turning winches.
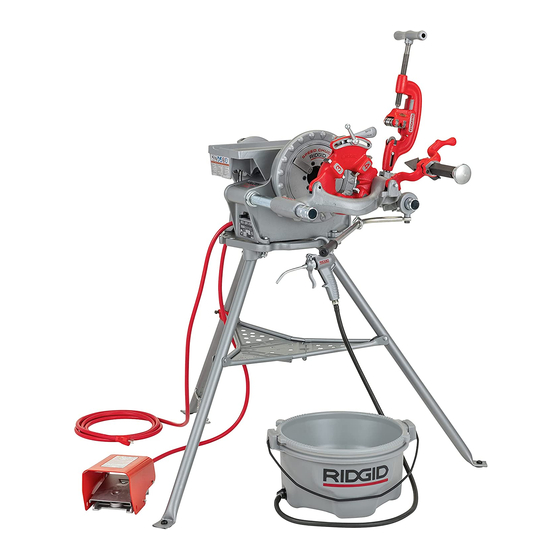
- Page 6 • Lock foot switch when machine is not in use (Figure 1). Locking will avoids accidental starting. Figure 1 – Locked Foot Switch Figure 4 – No. 300 Power Drive with 311A Carriage, 360 Cutter, 341 Reamer and Die Head Page 6 of 11...
-
Page 7: Cutting Pipe With Hand Cutter
Doc # 18.47.1 – Ridgid 300 Safety Procedures Date: 12/22/2014 Printed copies of this document are uncontrolled Operating Instructions for Using Hand Tools WARNING Do not wear gloves or loose clothing when operating Power Drive. Keep sleeves and jackets buttoned. Do not reach across the machine or pipe. -
Page 8: Reaming Pipe With Hand Reamer
7. Release the foot switch and remove your foot from the housing. 11.3 Reaming Pipe with Hand Reamer ! WARNING! To prevent serious injury, do not use self-feeding spiral reamers with the 300 Power Drive. 1. Flip the directional switch to FOR (Forward). - Page 9 ! WARNING! To avoid pinch point injuries, keep your fingers from coming between the hand threader and the support bar. 4. Apply RIDGID thread cutting oil to the end of the pipe 5. Assume the correct posture. Check to ensure directional switch is in the forward position.
-
Page 10: Maintenance Instructions
Doc # 18.47.1 – Ridgid 300 Safety Procedures Date: 12/22/2014 Printed copies of this document are uncontrolled 17. Release the foot switch and remove foot from the housing. 18. Set the threader down and if necessary, wipe oil and debris off the threads with a rag, taking care not to cut hand and fingers on any sharp debris or edges. - Page 11 Doc # 18.47.1 – Ridgid 300 Safety Procedures Date: 12/22/2014 Printed copies of this document are uncontrolled Lubrication: Proper lubrication is essential to trouble –free operation and long life of the Power Drive Grease main shaft bearing every 2 to 6 months depending upon amount of Power Drive use.
Need help?
Do you have a question about the 300 and is the answer not in the manual?
Questions and answers