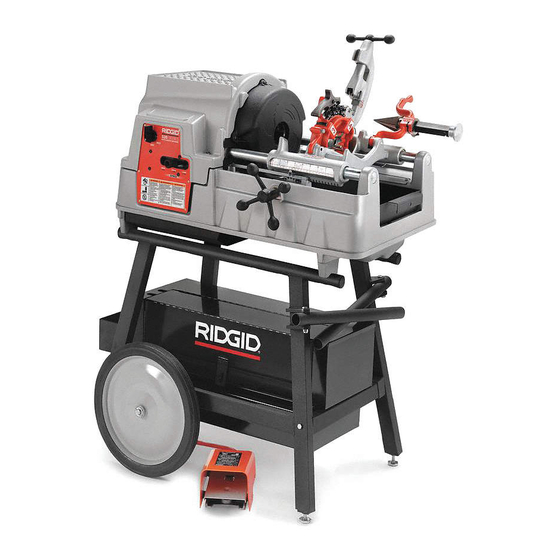
RIDGID 535 Manual Chuck Manual

RIDGID 535 Manual Chuck Manual

Threading machines
Hide thumbs Also See for 535 Manual Chuck:

Advertisement

535 Manual Chuck/535 Auto
Chuck Threading Machines
Threading Machine
Manual
99 Washington Street
Melrose, MA 02176
Phone 781-665-1400
Toll Free 1-800-517-8431
Visit us at www.TestEquipmentDepot.com

Advertisement

Table of Contents
loading

Summary of Contents for RIDGID 535 Manual Chuck

  • Page 1 Threading Machine Manual 535 Manual Chuck/535 Auto Chuck Threading Machines 99 Washington Street Melrose, MA 02176 Phone 781-665-1400 Toll Free 1-800-517-8431 Visit us at www.TestEquipmentDepot.com...
  • Page 2: Safety Symbols

    535 Manual Chuck/535 Auto Chuck Threading Machines Safety Symbols In this operator’s manual and on the product, safety symbols and signal words are used to communicate important safe- ty information. This section is provided to improve understanding of these signal words and symbols.
  • Page 3 535 Manual Chuck/535 Auto Chuck Threading Machines moving parts. Damaged or entangled cords increase Power Tool use And Care the risk of electric shock. • Do not force the power tool. Use the correct power tool for your application. The correct power tool will •...
  • Page 4: Specific Safety Information

    535 Manual Chuck/535 Auto Chuck Threading Machines Specific Safety Information • Do not use this machine if the foot switch is bro- ken or missing. The foot switch provides safe control WARNING of the machine, such as shut-off in case of entangle- ment.
  • Page 5 Label Plug Carriage Length Gauge Foot Switch Handwheel Foot Switch Carriage Handwheel Figure 2A – 535 Auto Chuck Threading Machine Figure 1A – 535 Manual Chuck Threading Machine Centering Device Serial Number Plate Serial Number Plate Figure 2B – 535 Auto Chuck Threading Machine Figure 1B –...
  • Page 6: Specifications

    This may significantly reduce the exposure level over the total working period. Standard equipment Refer to the RIDGID catalog for details on equipment supplied with specific machine catalog numbers.
  • Page 7: Machine Assembly

    535 Manual Chuck/535 Auto Chuck Threading Machines Selection of appropriate materials and instal- NOTI E Pre-operation Inspection lation, joining and forming methods is the responsibility of the system designer and/or installer. Selection of improp- WARNING er materials and methods could cause system failure.
  • Page 8: Machine And Work Area Set-Up

    11. Check the level of RIDGID Thread Cutting Oil. Remove tilated. The threading machine is not explosion the chip tray and oil pan liner; see that the filter screen proof and can cause sparks.
  • Page 9 The 535 Manual Chuck/535 Auto Chuck Threading Ma - 2. Move throwout lever to OPEN position (Figure 5). chines can be used with a variety of RIDGID Die Heads to cut pipe and bolt threads. Information is included here for...
  • Page 10 535 Manual Chuck/535 Auto Chuck Threading Machines Adjusting Thread Size Inserting/Changing the Dies 1. Install the die head move the die head into threading 1. Place the die head with numbers facing up. position. 2. Make sure the trigger assembly is released and die 2.
  • Page 11 535 Manual Chuck/535 Auto Chuck Threading Machines 4. If thread size needs to be ad - Position Blocks Change Die Cam Plate Handle Stop Lock justed, set the lock screw index Screw line slightly off the mark on size “Over”...
  • Page 12: Operating Instructions

    535 Manual Chuck/535 Auto Chuck Threading Machines 5 Securely tighten the position block screw. Follow operating instructions to reduce the risk of injury from entanglement, striking, crushing and 6 Always make sure position block type matches (Figure other causes. 15).
  • Page 13 535 Manual Chuck/535 Auto Chuck Threading Machines down onto pipe. Make sure that the pipe is centered in bolt threading, high torque applications like stainless the inserts. Use repeated and forceful counterclockwise steel and high hardness material. spins of the handwheel to secure the pipe in front •...
  • Page 14 535 Manual Chuck/535 Auto Chuck Threading Machines Cutting with No. 820 Cutter by hand. Let the cut off piece be supported by the threading machine carriage and pipe stand. 1. Open cutter by turning the feed screw counterclock- wise. Lower the cutter into cutting position. Align the cutter wheel with the mark on pipe.
  • Page 15 For reaming with the machine in reverse a Model E-863 Reamer Cone (cat# 46660) is required. 1. For 535 Manual Chuck machines: Install the left Figure 23 – Threading Pipe hand threading kit (Cat# 96517) as per the kit instruc- tions to allow oil flow in REV.
  • Page 16 535 Manual Chuck/535 Auto Chuck Threading Machines L.H. & R.H. Threading R.H. Threading Inward Outward Right Hand Thread Figure 24 – LH or RH Oil Flow Selector Rear Pivot Rod Left hand threading requires the chuck jaws to grip the Support pipe during REV rotation of the machine.
  • Page 17: Maintenance Instructions

    535 Manual Chuck/535 Auto Chuck Threading Machines 2. Firmly grip the pipe and remove from the machine. 2. Clean the chips and other debris from the chip tray. Carefully handle the pipe as the thread may still be hot Remove or secure all loose equipment and material and there may be burrs or sharp edges.
  • Page 18 Clean build up 29). Apply a small amount of grease to the exposed drive from the bottom of the reservoir. Use RIDGID Thread gear teeth. Cutting Oil for high quality threads and maximum die life.
  • Page 19 If the cutter wheel becomes dull or broken, push cutter 4. Reverse process to assemble. wheel pin out of frame and check for wear. If needed replace pin, and install new Cutter Wheel (see RIDGID Replacing Jaw Inserts (Manual Chuck catalog). Lubricate pin with light lubricating oil.
  • Page 20 WARNING To reduce the risk of serious injury, only use equip- ment specifically designed and recommended for use with the RIdGId 535 Manual Chuck/535 Auto Chuck Threading Machines. Brush Catalog Model Description...
  • Page 21: Machine Storage

    Disposal and Transportation, is included on the container Equipment and its implemen tation into nation- and SDS. SDS is available at RIDGID.com or by contacting al legislation, electrical equipment that is no Ridge Tool Technical Service Department at (800) 519- longer usable must be collected separately and disposed 3456 in U.S.
  • Page 22: Troubleshooting

    535 Manual Chuck/535 Auto Chuck Threading Machines Troubleshooting PRoBLeM PoSSIBLe ReASoNS SoLuTIoN Torn threads. Damaged, chipped or worn out dies. Replace dies. Incorrect cutting oil. Only use RIDGID ® Thread Cutting Oil. Dirty or contaminated oil. Replace the RIDGID ®...
  • Page 23 Visit us at www.TestEquipmentDepot.com ©2013, 2018, RIDGID, Inc. Printed 6/18 The Emerson logo and RIDGID logo are registered trademarks of Emerson Electric Co. or RIDGID, Inc. in the U.S. and other countries. 999-998-086.10 EC42263 All other trademarks belong to their respective holders.

This manual is also suitable for:

535 auto chuck

Table of Contents