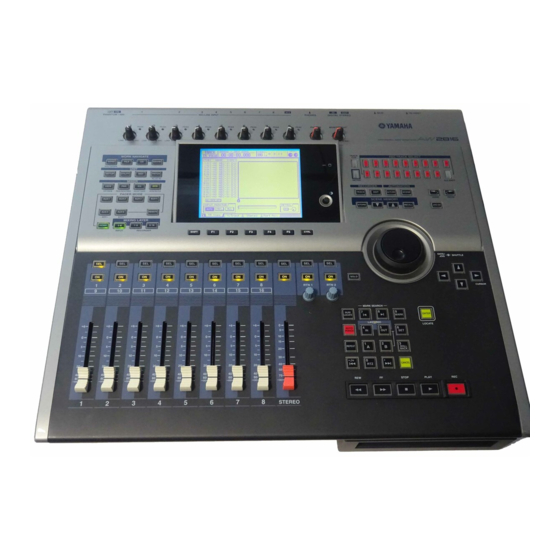
Yamaha AW2816 Manual
Professional audio workstation, recording101
Hide thumbs
Also See for AW2816:
- Owner's manual (420 pages) ,
- Service manual (120 pages) ,
- Tutorial (31 pages)

Related Manuals for Yamaha AW2816


Summary of Contents for Yamaha AW2816
- Page 1 Recording101 Yamaha Corporation of America 6600 Orangethorpe Ave. Buena Park, CA 90620 USA Customer Support: 714-522-9000 Yamaha Solutions Network http://solutionsnetwork.yamaha.com/...
-
Page 2: Table Of Contents
AW2816 Recording 101 - Table of Contents Introduction AW2816 Overview Purpose of this Guide Getting Started The Musician The Instruments Acoustics The Performance Microphones Dynamic Microphones Condenser Microphones Ribbon Microphones Tube Microphones Microphone Selection & Placement Cables Unbalanced Balanced Connectors... -
Page 3: Recalling Scene
Dynamic Processors Equalizer Auxiliary Sends Bus Sends Direct Out Stereo Bus Assign Pan Pot Fader Fader Group Mute Mute Group Channel Pairing Multi-Track Recorders Analog Multi-Track Recorders Digital Multi-Track Recorders 2-Track Recorders Conclusion Step-by-Step Procedures Recalling Scene 00 Saving Mixer Settings as a Scene Routing an Input to a Track Using a Bus Routing a Monitor Channel to an Internal Effects Processors Routing an Input Channel to the Internal Effects Processors... -
Page 4: Introduction
AW2816 may seem very complex. There are no instant shortcuts to learn how to use the AW2816 proficiently. It will take time and energy but in the end the satisfaction that is achieved when you are able to record your own music from start to finish will make it worth the effort. -
Page 5: Getting Started
CD player. The AW2816 is a mixing console, multi-track recorder, and CD recorder all in one unit. The only other things needed to capture the musical performance and record it onto a CD are the... -
Page 6: The Musician
The Musician The Instruments All good recordings start at the source so it is very important that the musical instruments used in the recording are in tune and that you have the best possible quality of sound. If necessary, put new strings on the guitars, new heads on the drums, etc. -
Page 7: Dynamic Microphones
Three common microphone types are dynamic, condenser, and ribbon. Each type has different characteristics and as a result will be used for different applications. Dynamic Microphones The most common type of microphone is the dynamic microphone. This microphone is made up of a flexibly mounted diaphragm that is coupled to a coil of fine wire. -
Page 8: Ribbon Microphones
AW2816 should only be turned on when a microphone that requires phantom power is connected to input 1 or 2. Caution is required when using phantom power on the AW2816 as it is possible to damage older ribbon microphones and equipment with unbalanced outputs if they are connected to input 1 or 2 with the phantom power switch turned to ON. -
Page 9: Tube Microphones
Construction of a Ribbon Microphone Ribbon microphones typically have very good sonic quality and are very smooth and natural sounding. However, ribbon microphones can be very fragile. This is especially true of older ribbon microphones. Newer ones are much less fragile than older ones but are still not as sturdy as a dynamic microphone. - Page 10 vocalists do use dynamic microphones for recording vocals a large diaphragm condenser or tube microphone is more common. Acoustic Guitar For mono recording, a small condenser microphone placed 8-12 inches from the guitar at about the 12 fret will give a nice bright acoustic guitar sound. For a more open sound use a large diaphragm condenser or tube microphone placed 8-12 inches directly in front of the guitar.
- Page 11 (The phase of a microphone can be reversed on the View screen of the AW2816.) Toms – If close miking the toms, the same approach as the snare can be used. It is uncommon to mike the bottom of the toms but can be done if desired.
-
Page 12: Cables
The most common types of connectors used with unbalanced cables are phone plugs (also referred to as ¼”) and phono (also referred to as RCA). On the AW2816 the only unbalanced inputs are the Hi-Z input on channel 8 and the Stereo Digital In. The only unbalanced outputs are the Omni Outs. -
Page 13: Balanced
The XLR connector is a 3-prong connector that was originally introduced by Canon. For this reason it is also sometimes referred to as a Canon connector. The XLR connector is the most common connecter used with balanced cables. Only inputs 1 and 2 of the AW2816 use XLR connectors. -
Page 14: 1/4 Inch Balanced (Trs)
Inputs 3–8 of the AW2816 use TRS connecters. In order to connect microphones with XLR outputs to inputs 3-8 of the AW2816, a XLR to TRS cable should be used. There is no need for balancing transformers as inputs 3-8 are balanced. -
Page 15: The Mixing Console
The only input on the AW2816 that uses a RCA connector is the Digital Stereo Input. The outputs of the AW2816 that use RCA connectors are the Stereo Outputs and the Digital Stereo Input. The Mixing Console The mixing console is the heart of the recording studio. It is where all of the audio signals are connected and ultimately mixed down to a stereo audio signal so that it can be recorded onto a 2- track recorder such as a CD or cassette recorder. -
Page 16: Mixing Layers
This comes to a total of 28 channels. Since the AW2816 obviously does not have 28 physical channels the AW2816 uses “mixing layers” to control the 28 channels. The Mixing Layers The AW2816 has 3 mixing layers. Depending upon which mixing layer is selected, different channels will be used. -
Page 17: Channel Strip Overview
Channel Strip Overview The figure below shows what an input channel strip for the AW2816 would look like if it was an analog mixing console. -
Page 18: Phantom Power
Digital Converter and an input meter after the converter. The peak meter shows whether or not the input signal is too high. The peak meter on the AW2816 lights up 3 dB before clipping. It is acceptable to have the peak light come on periodically but if it stays on the input level is to high and the gain trim should be turned down. -
Page 19: Dynamic Processors
Digital mixers and expensive analog recording consoles will typically have some sort of dynamic processing available on each individual channel. A dynamic processor simply provides control of the signals level. Here are the different types of dynamics processors in the AW2816 and what they do: Compressor: A compressor does just what the name it implies;... -
Page 20: Equalizer
Don’t expect to learn all about dynamic processors overnight but don’t be afraid to experiment either. The AW2816 has 40 presets that are very useful for getting started. Use the presets as starting points until more familiarity with dynamic processors is gained. A good resource is a document entitled “Inside the 01V”... - Page 21 The equalizer is used to either boost or cut the signal at a set frequency. The frequency range in which the equalizer can be set is called the bandwidth. Each channel of the AW2816 has a 4 band parametric equalizer. 4 bands means that the signal can be boosted or cut at 4 different frequencies.
-
Page 22: Auxiliary Sends
The AW2816 has six auxiliary sends. By default Aux Sends 5 and 6 are connected to the two internal effects processors of the AW4416. The remaining Aux Sends can be used to route signal to external effects devices or for headphone mixes. -
Page 23: Direct Out
The AW2816 has 8 bus sends. By default, they are connected to the tracks of the internal hard disk recorder of the AW2816. Here is how they are assigned by default: Bus Send Track Bus 1 Tracks 1 and 9... -
Page 24: Stereo Bus Assign
On the AW2816, the recording source of the 16 tracks can be changed in the Recorder Track Input Assign section of the Patch In screen. To view this screen, press the [PATCH] button Then press the [F1] button. Stereo Bus Assign On each channel, there is a switch to assign it to the stereo bus. -
Page 25: Mute
Mute The mute switches the channel on and off. On the AW2816 it is the ON button directly above the fader. Mute Group The mute group on the AW2816 allows the mutes of channels to be grouped together. When any channel within the mute group is turned off or on, the rest of the channels in the mute group will do the same. -
Page 26: Digital Multi-Track Recorders
Software applications such as Pro-Tools by Digidesign offer advanced digital audio editing capabilities. As with any hard disk based system, good housekeeping is important on the AW2816. This means that since a hard drive is being used, the drive should be periodically defragmented. -
Page 27: 2-Track Recorders
AW2816. This CDR can then be played back on any commercial CD player. Conclusion So there you have it, a basic guide to the recording process and how it relates to the AW2816. Once again, this is not a definitive guide to recording nor was it intended to be. If you have never recorded before this guide should get you pointed in the right direction. -
Page 28: Step-By-Step Procedures
Recalling the Initial Data Scene on an AW2816 All of the internal settings on an AW2816 can be stored in the internal memory as a ''scene''. Scene 00 in the AW2816 is the ''Initial Data'' setting. Recalling Scene 00 on the AW4416 sets the Mixer back to its default settings. - Page 29 'UTILITIES: Prefer 1. page'. Saving Mixer Settings: 1) Configure the AW2816 with ALL of the desired parameter settings for the beginning of the selected Song. 2) Press the [SCENE] button in the 'AUTOMATION' section above the (DATA/JOG) dial.
-
Page 30: Saving Mixer Settings As A Scene
Routing an Input Channel via Busses to a Recording Track on an AW2816 One way to route Input Channels to Recording Tracks Bus-to-Track Relationships is via the eight (8) Busses. The ''Bus-to-Track'' Recording Tracks relationships are listed in the following table:... -
Page 31: Routing An Input To A Track Using A Bus
Routing a Monitor / Playback Channel to an Internal Effects Processor Any or all Tracks can be routed through the two Effects Processors in the AW2816. Since all Tracks ''share'' the two Effects Processors, it is not possible to have each Track routed to a different, or dedicated, Effect simultaneously. -
Page 32: Routing A Monitor Channel To An Internal Effects Processors
Bouncing Tracks when Recording on a AW2816 If more Tracks are needed in the AW2816 for recording it is possible to bounce several Tracks to either a single Track, or to two separate Tracks for a stereo mix. For this to happen the destination Track(s) must be selected and set to record from a Bus.