Table of Contents
Advertisement
Advertisement
Table of Contents

Related Manuals for Daewoo DDW-M1212


Summary of Contents for Daewoo DDW-M1212
- Page 1 LAVAVAJILLAS MODELO: DDW-M1212...
- Page 2 CONTENTS Introduction..................2 Specification ..................2 Control Panel Features ..............2 Component Locator Views ..............3 Dishwasher Components ..............4 Control Panel ....................4 Electronic controller ..................5 Outer Door ..................... 6 Dispenser ....................... 6 Outside panel ....................8 Door Assembly .................... 10 Bottom Board....................
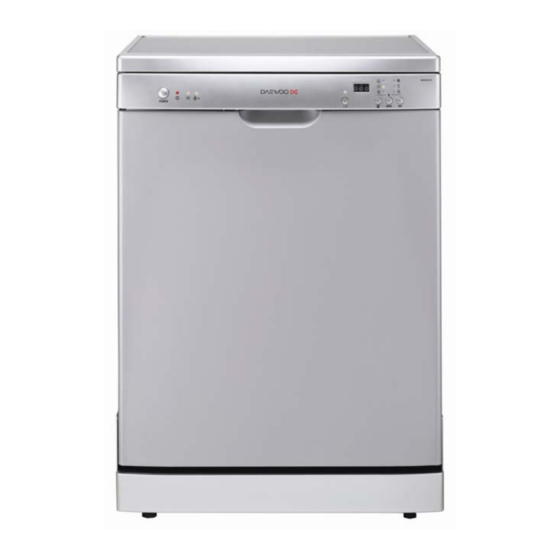
- Page 3 Introduction It is a freestanding electrical dishwasher offers good washing performance to satisfy every washing requirement. Its electronic control is easy and convenient to operate. The upper and lower racks can hold up to 12 sets of dishes. The size (W: 0.6m, H: 0.85m, D: 0.58m) can easily fit in any corner of the kitchen, and it’s recommended to locate at which the water hose connection is accessible.
- Page 4 Start /Pause Button: Press this button to start or pause the dishwasher, the process pilot lamp will come on when starting. Program indicator light. Component Locator Views Front View Interior View (With Basket) Upper basket Control panel Right Lower basket side Panel Dispenser...
- Page 5 Interior View of Basin (With Basket Removed) Filter Assembly Lower Sprayer Micro-filter Back side view Drain Hose Inlet Hose Dishwasher Components Throughout this manual, features and appearance may vary from your model. Control Panel WARNING: Always turn off the electric power supply before servicing any electrical component, making ohmmeter checks, or replacing any parts.
- Page 6 Note: All voltage checks should be made with a volt meter having a full scale range of 250 volts or higher. After service is completed, be sure all safet y grounding circuits are complete, all electrical connections are secure, and all access panels are in place. Removal and Installation 1.
- Page 7 3. Unscrew 1screw and open the electronic controller box cover. 4. Unscrew 1screw and disconnect the wire terminals for replace PCBs. Screw 5. Reverse the above procedure to install. Outer Door The outer door covers the door to the dishwasher and protects the detergent dispenser. Removal and Installation 1.
- Page 8 The first time the dispenser is activated (1), the lever slides up the right-hand path of the connecting rod. This action moves the cover catch (2) and releases the detergent cover. When deactivated (3), the lever resets to rest under the notch in the center of the connecting rod.
- Page 9 4. Remove the 3 screws and top mounting bracket. 5. Remove the dispenser from door assembly. Dispenser Outside panel Removal and Replacement 1. Disconnect power. 2. Remove the filter assembly, upper and lower basket. 3. Remove the outer door. 4. Remove the 2 screws that connect the top panel 2 cover to the dishwasher.
- Page 10 Left side Right side Baseboard baseboard baseboard 8. Open the door and remove the 4 screws that connect side panels to tub. 9. Remove the 4 screws in the front. 10. Remove the 8 screws at the back. 11. Remove the screws which are fixed to the left and right side panel. 12.
- Page 11 16. Take off the tub insulat ion over the dishwasher tub. 17. Reverse the above procedure to install. Door Assembly Removal and Replacement 1. Disconnect power. 2. Remove the Outer Door. 3. Remove the 6 screws that connect the control panel cover to the dishwasher door.
- Page 12 Bolt, Nut, and Ground Wire wire harness Note: There is a door hinge assembly on both the left and right sides of the dishwasher. Both door hinge assemblies must be removed in order to remove the door. The procedure to remove the right- side door hinge assembly is outlined in steps 12 through 21.
- Page 13 a new set of star washers. 18. Remove the star washer from the dishwasher door hinge. Caution: The star washer is easily damaged and should not be reused. Star washer 19. Remove the hinge pin from the dish- washer door hinge. 20.
- Page 14 Bottom Door Seal The bottom door seal prevents water leakage. The seal is fitted in a pinched metal groove at the bottom of the dish- washer door. Removal and Replacement 1. Remove the Outer Door. 2. Remove the Door Assembly (see Door assembly). 3.
- Page 15 Dishwasher Tub Seal The dishwasher tub seal prevents water leakage. The seal is fitted in a seal channel that lines the rim of the dishwasher tub. Removal and Replacement 1. Open the dishwasher door. 2. Grab one end of the dishwasher tub seal and peal it away from the seal channel 3.
- Page 16 Air inlet: it is installed to the right side of tub, whose assembly is similar to air breaker assembly. But it should be that the clear plastic air tube is looped around that the air inlet that protrudes into the dishwasher tub and mates with the air inlet nut. 6.
- Page 17 Water softener The water softener is equipped with a special softener that uses a salt specifically designed to eliminate lime and minerals from the water. If hard water is used in the dishwasher, deposits will form on the dishes and utensils. Removal and Replacement 1.
- Page 18 Water Valve The water valve is electrical controlled and solenoid operated. The flow of water is controlled by a rubber flow washer capable of maintaining a flow Water valve of 4±15% liters per minute with incoming water pressure of 0.04~1MPa.The water valve is mounted to the back hinge support of the dishwasher.
- Page 19 Removal and Replacement 1. Disconnect power. 2. Remove the top panel, left side panel, right side panel, baseboard and bottom board (see outside panel). 3. Remove the capillary tube from the pressure switch. 4. Turn the pressure switch clockwise to align the mounting tab vertically with the mounting hole and remove the pressure switch from the dishwasher frame.
- Page 20 5、remove the pump by rotating the pump for 30°counterclockwise 6、Reverse the above procedure to install Sump Assembly The sump assembly consists of the filter assembly, micro-filter, sump clamping nut, sump gasket, and sump. The filter assembly prevents large particles from reaching the micro-filter, and the micro-filter prevents all small particles from flowing back to the cycle water.
- Page 21 4、remove the interconnect hose connected with the sump Interconnect Hose Motor Pump Assembly The motor pump assembly is located under the tub behind the sump assembly. This dishwasher model uses a capacitor start induction motor. The motor rotates clock- wise and draws approximately 0.6 amp Removal and Replacement 1.
- Page 22 7. Remove the clamp from the motor washer arm interconnect hose. Note: Do not attempt to remove the bolt and locknut that connects the motor mount to the dishwasher frame. interconnect hose clamp 8. Remove the screw and disconnect the ground wire from the wash pump motor assembly.
- Page 23 (see outside panel). 3. Remove the pressure switch hose from the sump. Pressure switch hose Sump 4. Remove the clamp from the hose that connects the sump to the wash pump motor hose. Note: The sump clamping nut turns counterclockwise and may be difficult to remove. It may be necessary to insert a screw driver or other tool between the clamping nut tabs to enable you to apply sufficient torque to break the factory seal.
- Page 24 Turn Clampin g nut 10. Remove the sump gasket (not shown) and sump. 11. Reverse the above procedure to install.
- Page 25 Troubleshooting 1. Error code troubleshooting Symptom Check for the following Solution The water supply is turned off Turn the water supply on The pipe was snapped Put the pipe in the right way Low water pressure Minimum water pressure of 0.04MPa Defective water fill valve Replace the water fill valve ERROR001(E1)
- Page 26 2. Malfunction Table Malfunction Symptom Reference Solution Code Connect the water pipe and open the No water fill in water supply Water pipe bending Put the water pipe at the right place Inlet valve failure Replace it Make sure the water pressure is ≥ Low water pressure 0.04MPa Remove the inlet pipe and inlet valve...
- Page 27 Tighten heater element mounting Loose heater element nuts Loose sump Tighten the sump Loose axis of the lower spray arm Tighten the axis Loose softener Tighten the softener 4.10 Damaged or defective wiring Repair the wiring 4.11 Defective the electric control Replace the electric control The wiring be wrong connected with Right connected with the micro...
- Page 28 13.3 Capacitor malfunction Replace the capacitor 13.4 Motor axis is stick totally Replace the motor Washing cycle 14.1 Controller malfunction Replace it does not stop 15.1 Water drain up Make sure water drain up 15.2 Sump or filter is blocked Clean the sump or filter 15.3 Suds leak out...
- Page 29 CODIGOS DE ERROR...
- Page 35 MODELO: DDW-M1211 Part Code Descripción FOTO 1 FOTO 2 FOTO 3 $0,76 External pipe 1001 673000900249 1002 NO DISPONIBLE O Ring I 31.5X3.55 Guide casing 1003 NO DISPONIBLE External pipe nut 1004 NO DISPONIBLE $0,34 Water dispenser 1005 673001900016 $2,52 Upper sprayer 1006 673000300067...
- Page 36 $0,10 Upper sprayer pipe 1007 673000900089 $0,02 Upper sprayer holder block 1009 673001300041 $0,09 1010 673002300002 Float holder Screw ST2.9x22 1011 NO DISPONIBLE...
- Page 37 $0,04 Float 1012 673002300003 $0,52 Micro switch 1013 674000300053 $0,66 Micro filter 1016 673002500072 $0,15 Sump nut 1017 673001600008...
- Page 38 $0,16 Sump gasket 1018 673001500016 $1,12 Sump 1019 673000700065 Clamp 12.7×1.8 1020 NO DISPONIBLE 1022 NO DISPONIBLE PVC hose $5,79 1027 674000600074 Drain pump...
- Page 39 $0,22 Salt filler 1029 673002200043 $0,12 Softener cover assembly 1030 673002800050 $0,03 Softener cover gasket 1031 673001700053 $0,04 Softener nut 1032 673001600039...
- Page 40 $0,06 Softener gasket 1033 673001700001 $7,55 Softener 1034 674000700021 Clamp 14.5×1.8 1036 NO DISPONIBLE 1037 NO DISPONIBLE Drain hose hook Drain hose holder 1038 NO DISPONIBLE $1,92 Drain hose 1039 673000900185...
- Page 41 $2,60 Power cord 1042 674000000198 $10,09 1045 673000900270 Inlet hose assembly $0,30 Regeneration hose 1046 673000900026 $0,02 Air breather nut 1051 673001600002...
- Page 42 $3,95 Air breather assembly 1054 673002700005 $2,49 Lower sprayer 1064 673000300069 $23,49 Washing pump 1070 674000600041...
- Page 43 $0,17 Motor insulation pan 1073 673002400066 $0,09 Connect hose 1074 673000900182 Bend connect hose 1083 673000900045...
- Page 44 $0,05 Heating element support 1085 673001400025 $9,51 Heating elements 1086 674001100039 $0,05 Water inlet nut 1088 673001600024 $0,06 1089 673001500019 Water inlet gasket...
- Page 45 $0,20 Water inlet 1091 673002600035 $0,98 Sensing device 1093 674000900038 $2,06 1113 673002500070 plane filter $0,31 Scran collection 1114 673001300137...
- Page 46 $2,57 1115 674000300079 Pressure switch $0,03 power cord clasper 1116 673001400083 $1,96 switch assembly for heating 1117 674000300067 Door edge guard piece 2001 NO DISPONIBLE...
- Page 47 $16,79 Inner door 2002 672002200079 $0,11 Dispenser bracket 2004 672001700011 $6,95 Dispenser 2005 674000800039 $5,55 wiring assembly 2006 674000100697...
- Page 48 Ring Φ6 2008 NO DISPONIBLE $1,59 2009 672001300029 Left gemel assembly Dowel 2010 NO DISPONIBLE $1,59 Right gemel assembly 2011 672001300030 $2,02 Door gemel assembly 2012 672001300024...
- Page 49 $0,16 Door spring 2013 672000100000 Door spring bolt 2014 672001100001 2017 672001800306 Outer door $2,22 2018 673005100541 Control panel...
- Page 50 $1,09 Handle assembly 2023 673001800135 $0,87 Power switch 2027 674000300065 Red pilot lamp 2028 NO DISPONIBLE 2033 NO DISPONIBLE Indicator cover $18,50 Control board as 2034 + 2036 674001030000...
- Page 51 Control board box 2036 673002400095 Window 2039 NO DISPONIBLE $0,02 2950 673000800584 Power button $0,02 2951 673000800598 Program key...
- Page 52 $0,02 Start/Pause key 2952 673000800599 delay key 2954 NO DISPONIBLE Half load key 2957 NO DISPONIBLE 3001 NO DISPONIBLE Left side panel Back cover board 3002 NO DISPONIBLE Upright left assembly 3003 NO DISPONIBLE $10,48 673000200051 Ceiling board 3004 Upper rear crosspiece 3005 NO DISPONIBLE $0,06...
- Page 53 $0,17 Door lock 3007 672001400034 $0,02 3008 673001300003 Top clamp block Upper front crosspiece 3009 NO DISPONIBLE $1,92 Tank gasket 3010 673001700057 Upright right assembly 3011 NO DISPONIBLE Right panel 3012 NO DISPONIBLE...
- Page 54 $0,23 Upper basket cup holder 3013 673001300102 $8,63 3017 672000800210 Lower basket $10,29 3018 672000800209 Upper basket...
- Page 55 $0,19 Right washboard 3020 673001100024 $0,02 Rail block 3021 673001300066 $0,73 Rail 3022 672001700001...
- Page 56 Rail support assembly 3023 673001400049 $1,06 Washboard 3024 673001100019 Feet support assembly 3026 NO DISPONIBLE 3027 Lower front crosspiece NO DISPONIBLE Tray assembly 3029 NO DISPONIBLE $0,19 Left side baseboard 3030 673001100023 Lower rear crosspiece 3033 NO DISPONIBLE Middle rear crosspiece 3034 NO DISPONIBLE...
- Page 57 $0,04 Measurable spoon 3035 673002200079 Orientation pole 3039 NO DISPONIBLE $0,13 3 in 1 tablet container 3079 673002200091 $0,24 1035+1047 673000900224 Softener pipe...
- Page 58 $0,37 Washing motor support 1071+1072 672000200054 $0,99 Cutlery basket 3014 673002200055 $0,25 Adjustable foot (front) 3025-a 673001100180 $0,13 3025-b 673001100156 Adjustable foot(back)
- Page 59 $0,08 Rinsing agent cup C5004 673006200004 OTK 175 OTK 175 NO DISPONIBLE OTK 175 OTK 175 NO DISPONIBLE OTK 286 OTK 286 NO DISPONIBLE $0,07 OTK 310 OTK 310 672000700001 $0,07 OTK 396 OTK 396 672000700007...
Need help?
Do you have a question about the DDW-M1212 and is the answer not in the manual?
Questions and answers