Table of Contents
Advertisement
Available languages
Available languages
Quick Links
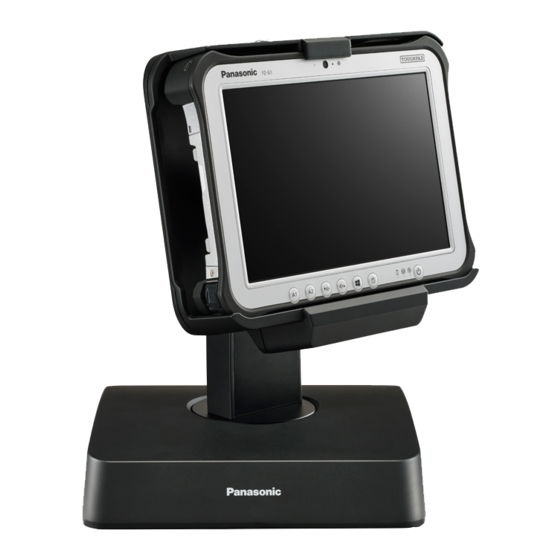
POS Cradle (Model No. FZ-VEBG12 series)
Names and Functions of Parts
Connecting/Disconnecting the Computer
Adjusting the angle
Using powered serial device
Names and Functions of Parts
The cradle allows your peripheral devices to function exactly as if they were connected directly to the computer. (Refer to "Description of Parts" in the
"Operating Instructions" accompanying the computer.)
Do not touch the expansion bus connector or pins of the cradle.
n
Turn off the computer when disconnecting the devices.
n
<Front>
A. Latch lock keyhole
With the Latch lock key, you can lock the latch.
B. Latch
C. Expansion Bus Connector
This connects to the expansion bus connector on the bottom of the computer.
<Rear>
C A U T I O N
(014_16)
Advertisement
Table of Contents

Related Manuals for Panasonic FZ-VEBG12 Series


Summary of Contents for Panasonic FZ-VEBG12 Series
- Page 1 POS Cradle (Model No. FZ-VEBG12 series) (014_16) Names and Functions of Parts Connecting/Disconnecting the Computer Adjusting the angle Using powered serial device Names and Functions of Parts The cradle allows your peripheral devices to function exactly as if they were connected directly to the computer. (Refer to “Description of Parts” in the “Operating Instructions”...
- Page 2 D. Terminal Cover E. Security Lock A Kensington cable can be connected. For more information, read the manual that comes with the cable. F. HDMI Port Connector for HDMI compatible digital display. It is not compatible with the analog display. The display specifications of the maximum resolution, etc.
-
Page 3: Connecting/Disconnecting The Computer
Connecting/Disconnecting the Computer C A U T I O N Make sure to turn the computer off for connection/disconnection. Do not connect or disconnect the cradle while the computer is powered on or in the sleep or hibernation mode. Connecting 1. - Page 4 If the computer malfunctions while the cradle is attached, disconnect the cradle and check to see if the computer operates normally. If the computer operates normally, the cradle may be malfunctioning. Contact Panasonic Technical Support.
-
Page 5: Adjusting The Angle
Disconnecting 1. Turn off the computer. 2. Disconnect the computer. 1. Move the latch upwards while pressing latch lock button. 2. Pull the computer to the front. 3. Hold and lift up the computer. Adjusting the angle C A U T I O N Keep hands and fingers away from all moving parts when adjusting screen angle. - Page 6 1. Adjust the screen angle with both hands. Rotating the screen Pivot 90 degrees counterclockwides. Vertically Tilt from 20 degrees to 80 degrees vertically. Horizontally Swivel 270 degrees horizontally. Using powered serial device Serial ports of this product support the powered serial devices. C A U T I O N Attention Customers Don't open the jumper switch cover by yourself.
- Page 7 4. Change the position of PINs. (1) (JP1201 side) : Serial Port (B) (2) (JP1202 side) : Serial Port (A) Item Settings +12V Compatible for +12V devices Compatible for +5V devices Not support power supply(Default setting) 5. Close the Jumper switch cover. C A U T I O N When using a "+12V"...
-
Page 9: Nom Et Fonction Des Pièces
Station d'accueil POS (Numéro de modèle série FZ-VEBG12) (014_16) Nom et fonction des pièces Connexion/Déconnexion de l’ordinateur Réglage de l’angle Utilisation de périphérique série alimenté Nom et fonction des pièces La station d’accueil permet à vos périphériques de fonctionner exactement comme s’ils étaient directement connectés à l’ordinateur. (Consultez la sec- tion “Description des pièces”... - Page 10 D. Couvercle Terminal E. Verrouillage de sécurité Il est possible de connecter un câble Kensington. Pour obtenir de plus amples informations, veuillez lire le manuel qui est fourni avec le câble. F. Port pour HDMI Port pour HDMI standard compatible avec écran numérique. N'est pas compatible avec l'afficheur analogique. Les spécifications d'affichage telles que la résolution maximale, etc.
-
Page 11: Connexion/Déconnexion De L'ordinateur
Connexion/Déconnexion de l’ordinateur A T T E N T I O N Pensez à mettre l’ordinateur hors tension avant de le connecter/déconnecter. Abstenez-vous de connecter/déconnecter la station d’ac- cueil tandis que l’ordinateur est sous tension, en veille ou en veille prolongée. Connecion 1. - Page 12 à ce que l'ordinateur ne tombe pas du station d'accueil. Si l'ordinateur fonctionne mal tandis que la station d'accueil est connecté, retirez ce dernier et vérifiez que l'ordinateur fonctionne nor- malement. Si c'est le cas, le problème provient peut-être de la station d'accueil. Contactez le service technique Panasonic.
-
Page 13: Réglage De L'angle
Déconnexion 1. Mettez l’ordinateur hors tension. 2. Déconnectez l'ordinateur. 1. Déplacez la fermeture vers le haut en appuyant sur le bouton de verrouillage de la fermeture. 2. Tirez l'ordinateur vers l'avant. 3. Maintenez et soulevez l'ordinateur. Réglage de l'angle A T T E N T I O N Éloignez les mains et les doigts des parties mobiles lorsque vous réglez l'angle d'affichage. - Page 14 1. Réglez l'angle d'affichage en déplaçant l'écran à deux mains. Rotation de l’écran Pivotez de 90° vers la gauche. Verticalement Inclinez de 20 à 80 degrés à la verticale. Horizontalement Pivotez de 270° horizontalement. Utilisation de périphérique série alimenté Les ports série de ce produit prennent en charge les périphériques série alimentés. A T T E N T I O N Mise en garde pour les clients Ne pas ouvrir le couvercle du cavalier par vous-même.
- Page 15 4. Changez la position de PINs. (1) (JP1201 côté) : Port Serial (B) (2) (JP1202 côté) : Port Serial (A) Articles Paramètres +12V Compatible pour les appareils + 12V Compatible pour les appareils + 5V Non en charge l'alimentation (réglage par défaut) 5.
Need help?
Do you have a question about the FZ-VEBG12 Series and is the answer not in the manual?
Questions and answers