Chapters
Table of Contents

Related Manuals for LIVARNO LUX 276249


Summary of Contents for LIVARNO LUX 276249
- Page 1 LED LIGHTSTRIP KIT LED LIGHTSTRIP KIT Operation and Safety Notes SÚPRAVA LED SVETELNÝCH LÍŠT Pokyny pre obsluhu a bezpečnostné pokyny LED-LICHTLEISTEN-SET Bedienungs- und Sicherheitshinweise IAN 276249...
- Page 2 Operation and Safety Notes Page Pokyny pre obsluhu a bezpečnostné pokyny Strana DE / AT / CH Bedienungs- und Sicherheitshinweise Seite...
- Page 4 ca./approx. 20 cm MAX.
-
Page 5: Table Of Contents
Introduction .....Page 6 Intended use ....Page 6 Description of parts ..Page 7 Technical details ....Page 7 Included items ....Page 8 Safety information ....Page 8 Safety advice for installation ..Page 12 Installation ....Page 12 Mounting the product on a cupboard ....Page 13 Mounting the product on a wall ......Page 13 Operation... -
Page 6: Introduction
LED lightstrip kit Introduction We congratulate you on the purchase of your new product. You have chosen a high quality product. The instructions for use are part of the product. They contain important information concerning safety, use and disposal. Before using the product, please familiarise yourself with all of the safety information and instructions for use. -
Page 7: Description Of Parts
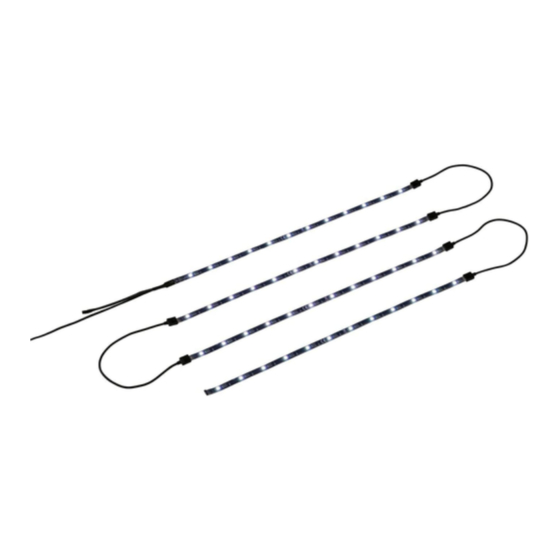
Description of parts LED light strip Connection lead Fastening clip Dowel Screw Connector In-line switch Mains adapter Technical details LED light strip + Mains adapter: Total power consumption: approx. 3 W LED light strip: Operating voltage: 12 V 2.3 W Bulbs per strip: 9 x 0.1 W LED Note: the bulbs cannot be replaced... -
Page 8: Included Items
Mains adapter (Model No. YNQST120025VL) TÜV / GS tested. Included items 3 LED light strip sets 1 Mains adapter 3 Interconnection cables 6 Dowels 6 Fastening clips 6 Screws 6 Double-sided adhesive tapes 1 End cap 1 Operating instructions Safety information DANGER OF DEATH AND... - Page 9 This appliance can be used by children aged from 8 years and above and persons with reduced physical, sensory or mental capa- bilities or lack of experience and knowledge if they have been given supervision or instruction concerning use of the appliance in a safe way and understand the hazards involved.
- Page 10 CAUTION! RISK OF OVER- HEATING! Do not operate the light fitting while it is still in the packaging or rolled up. This lamp is only intended for use indoors. Avoid the danger of death from electric shock! Before use, ensure that the mains voltage available is the same as the required operating voltage for the device...
- Page 11 Always remove the mains plug from the socket before installing, dismantling or cleaning. Never touch the mains plug or the product with moist or wet hands. Only connect the light strip to supply adaptor. Use the lighting product with only the components described in these operating instructions.
-
Page 12: Safety Advice For Installation
Safety advice for installation The product can be mounted with the supplied fastenings on to all surfaces officially classified as being of “normal flammability”. CAUTION! RISK OF ELECTRIC SHOCK! Ensure that you do not strike any elec- trical cables, gas or water pipes in the vicinity of where you are drilling. -
Page 13: Mounting The Product On A Cupboard
Mounting the product on a cupboard Note: Thoroughly clean the surface on to which you intend to install the product. The surface must be clean, dry and free of grease. Otherwise the self-adhesive foil may not stick properly. 1. Using a pencil, mark the position on the wall on to which you intend to attach the LED light strip... -
Page 14: Operation
2. Insert the dowels into the drilled holes (Fig. E). 3. Fix the fastening clips to the wall with the screws 4. Connect the LED light strip to the mains adapter (Fig. F) or connect the LED light strip to the connection lead connect it to an additional light (Fig. -
Page 15: Disposal
Disposal The packaging is made entirely of recyclable materials, which you may dispose of at local recycling facilities. Contact your local refuse disposal authority for more details of how to dispose of your worn-out product. To help protect the envi- ronment, please dispose of the product properly when it has reached the... - Page 16 materials or manufacture within 3 years from the date of purchase, we will repair or replace it – at our choice – free of charge to you. The warranty period begins on the date of purchase. Please keep the original sales receipt in a safe loca- tion.
- Page 17 Úvod ......Strana 18 Používanie v súlade s určeným účelom ..Strana 18 Popis častí ....Strana 19 Technické údaje ..Strana 19 Obsah dodávky ..Strana 20 Bezpečnostné upozornenia ..Strana 20 Bezpečnostné upozornenia týkajúce sa montáže ....Strana 24 Montáž...
-
Page 18: Úvod
Súprava LED svetelných líšt Úvod Blahoželáme Vám ku kúpe Vášho nového výrobku. Rozhodli ste sa pre veľmi kvalitný výrobok. Návod na obsluhu je súčasťou tohto výrobku. Obsahuje dôležité upozornenia tý- kajúce sa bezpečnosti, používania a likvidácie. Skôr ako začnete výro- bok používať, oboznámte sa so všetkými pokynmi k obsluhe a bez- pečnosti. -
Page 19: Popis Častí
Popis častí Svetelná lišta s LED-diódami Spojovací kábel Upevňovacia svorka Hmoždinka Skrutka Prípojka Šnúrový vypínač Sieťový adaptér Technické údaje Svetelná lišta s LED diódami + Sieťový zdroj: Príkon: cca. 3 W Svetelná lišta s LED diódami: Prevádzkové napätie: 12 V 2,3 W Počet osvetľovacích prostriedkov na... -
Page 20: Obsah Dodávky
Sieťový zdroj: Sieťové napätie primárne: 100–240 V∼, 50 - 60 Hz Sieťové napätie sekundárne: 12 V 0,25 A, 3 W Trieda ochrany: Sieťový diel (model č. YNQST120025VL) s certifikátom TÜV / GS. Obsah dodávky 3 svetelné lišty s LED-diódami 1 sieťový adaptér 3 spojovacie káble 6 hmoždiniek 6 upevňovacích svoriek... - Page 21 nebezpečenstvá. Držte deti vždy v bezpečnej vzdialenosti od výrobku. Tento výrobok nie je hračka, nepatrí do rúk deťom. Deti nedokážu rozoznať nebezpe- čenstvá, ktoré vznikajú pri manipulácii s výrobkom. Tento prístroj môžu používať deti od 8 rokov ako aj osoby so zníženými psychickými, sen- zorickými alebo duševnými schopnosťami alebo s nedostat-...
- Page 22 Na výrobok neupevňujte žiadne dodatočné predmety. Osvetľovací výrobok po použití opäť uschovajte do obalu, aby ste predišli nechceným poško- deniam. Zabezpečte, aby bol osvetľovací výrobok položený tak, aby oň nemohol nikto zakopnúť ani po ňom behať. POZOR! NEBEZPEČEN- STVO PREHRIATIA! Osvet- ľovací...
- Page 23 vedenia je potrebné výrobok znefunkčniť a správnym spôso- bom zlikvidovať. Tento výrobok neobsahuje diely, ktoré môže udržiavať spotrebiteľ. Osvetľovacie prostriedky sa nedajú vymeniť. Nikdy neotvárajte elektrické prevádzkové prostriedky, ani do nich nestrkajte cudzie predmety. Výrobok chráňte pred ostrými hranami, mechanickým zaťaže- ním a horúcimi povrchmi.
-
Page 24: Bezpečnostné Upozornenia Týkajúce Sa Montáže
výkon, pokiaľ sa sieťový diel nachádza v zásuvke. Pre úplné vypnutie vytiahnite sieťový diel zo zásuvky. Osvetľovací prostriedok nie je možné vymeniť. Ak osvetľovací prostriedok na konci svojej životnosti vypadne, je potrebné vymeniť celé svie- tidlo. Bezpečnostné upozornenia týkajúce sa montáže Výrobok možno pomocou prilo- ženého upevňovacieho materiálu pripevniť... -
Page 25: Montáž
Montáž Svetelnú lištu s LED-diódami možné zapojiť pomocou spojova- cieho kábla (obr. B) alebo bez spojovacieho kábla (obr. C). Montáž skrinky Upozornenie: Plochu, na ktorú chcete výrobok namontovať, dôkladne očistite. Plocha musí byť čistá, suchá a nemastná. V opačnom prípade môže byť... -
Page 26: Montáž Na Stenu
Montáž na stenu 1. Navŕtajte upevňovacie otvory (obr. E). POZOR! Dbajte na to, aby ste nepoškodili vedenia položené v stene. 2. Umiestnite hmoždinky navŕtaných otvorov (obr. E). 3. Upevniťe upevňovacie svorky pomocou skrutiek na stene. 4. Spojte svetelnú lištu s LED-dió- dami so sieťovým adaptérom (obr. -
Page 27: Likvidácia
Nepoužívajte rozpúšťadlá, ben- zín a pod. Prístroj by sa pritom poškodil. Na čistenie používajte len su- chú handričku, ktorá nepúšťa vlákna. Likvidácia Obal sa skladá výhradne z materiálov neškodiacich životnému prostrediu. Zlik- vidujte ich v miestnych recyklačných nádobách. O možnostiach likvidácie opotrebo- vaného výrobku sa dozviete na Vašej správe obce alebo mesta. - Page 28 zákonné práva voči predajcovi pro- duktu. Tieto zákonné práva nie sú našou nižšie uvedenou zárukou obmedzené. Vážený zákazník, na toto zariade- nie dostávate záruku 3 roky od dá- tumu kúpy. Záručná doba začína plynúť dátumom kúpy. Starostlivo si prosím uschovajte originálny po- kladničný...
- Page 29 Einleitung ....Seite 30 Bestimmungsgemäße Verwendung ....Seite 30 Teilebeschreibung ..Seite 31 Technische Daten ..Seite 31 Lieferumfang ....Seite 32 Sicherheits- hinweise .....Seite 32 Sicherheits hinweise zur Montage .....Seite 36 Montage .....Seite 37 Schrankmontage ...Seite 37 Wandmontage ....Seite 38 Anwendung ....Seite 38 Reinigung und Pflege ....Seite 39 Entsorgung...
-
Page 30: Einleitung
LED-Lichtleisten-Set Einleitung Wir beglückwünschen Sie zum Kauf Ihres neuen Produkts. Sie haben sich damit für ein hochwertiges Produkt entschieden. Die Bedienungsanlei- tung ist Teil dieses Produkts. Sie enthält wichtige Hinweise für Sicher- heit, Gebrauch und Entsorgung. Machen Sie sich vor der Benutzung des Produkts mit allen Bedien- und Sicherheitshinweisen vertraut. -
Page 31: Teilebeschreibung
Teilebeschreibung LED-Lichtleiste Verbindungskabel Befestigungsclip Dübel Schraube Anschluss Schnurschalter Netzadapter Technische Daten LED-Lichtleiste + Netzteil: Leistungsaufnahme: ca. 3 W LED-Lichtleiste: Betriebsspannung: 12 V 2,3 W Leuchtmittel pro Lichtleiste: 9 x 0,1 W LED Hinweis: Leuchtmittel können nicht ausgetauscht werden LED-Lichtleiste (Modell-Nr. HG01183A) TÜV / GS geprüft. -
Page 32: Lieferumfang
Lieferumfang 3 LED-Lichtleisten 1 Netzadapter 3 Verbindungskabel 6 Dübel 6 Befestigungsclips 6 Schrauben 6 doppelseitige Klebefolien 1 Endkappe 1 Bedienungsanleitung Sicherheits- hinweise LEBENS- UND UNFALLGEFAHR FÜR KLEINKINDER UND KINDER! Lassen Sie Kinder niemals unbeaufsichtigt mit dem Verpackungsmaterial. Es besteht Erstickungsgefahr durch Verpackungsmaterial. - Page 33 Wissen benutzt werden, wenn sie beaufsichtigt oder bezüg- lich des sicheren Gebrauchs des Gerätes unterwiesen wur- den und die daraus resultieren- den Gefahren verstehen. Kinder dürfen nicht mit dem Gerät spielen. Reinigung und Benutzerwartung dürfen nicht von Kindern ohne Beaufsichti- gung durchgeführt werden.
- Page 34 VORSICHT! ÜBERHIT- ZUNGSGEFAHR! Betreiben Sie den Leuchtartikel nicht in der Verpackung und nicht im aufgerollten Zustand. Diese Leuchte ist aus- schließlich für den Be- trieb im Innenbereich geeignet. Vermeiden Sie Lebensgefahr durch elektrischen Schlag! Vergewissern Sie sich vor der Benutzung, dass die vorhan- dene Netzspannung mit der benötigten Betriebsspannung des Gerätes übereinstimmt...
- Page 35 stecken irgendwelche Gegen- stände in dieselben. Schützen Sie das Produkt vor scharfen Kanten, mechanischen Belastungen und heißen Ober- flächen. Nicht mit scharfen Klammern oder Nägeln befestigen. Ziehen Sie immer den Netzste- cker vor der Montage, Demon- tage oder Reinigung aus der Steckdose.
- Page 36 Das Leuchtmittel ist nicht aus- tauschbar. Sollte das Leuchtmittel am Ende seiner Lebensdauer ausfallen, muss die ganze Leuchte ersetzt werden. Sicherheitshinweise zur Montage Das Produkt kann auf allen normal entflammbaren Ober- flächen mit dem beigefügten Befestigungsmaterial befestigt werden. VORSICHT! STROM- SCHLAGGEFAHR! Stellen Sie sicher, dass Sie nicht auf Strom-, Gas- oder Wasserleitun-...
-
Page 37: Montage
Montage Die LED-Lichtleiste kann mit Ver- bindungskabel (Abb. B) oder ohne Verbindungskabel (Abb. C) angeschlossen werden. Schrankmontage Hinweis: Reinigen Sie gründlich die Fläche, auf der Sie das Produkt montieren wollen. Die Fläche muss sauber, fettfrei und trocken sein. Andernfalls kann die Haftbarkeit der Klebefolie eingeschränkt sein. -
Page 38: Wandmontage
Wandmontage 1. Bohren Sie die Befestigungslö- cher (Abb. E). VORSICHT! Achten Sie darauf, dass Sie keine Leitungen in der Wand beschädigen. 2. Führen Sie die Dübel in die Bohrlöcher ein (Abb. E). 3. Fixieren Sie die Befestigungs- clips mittels der Schrauben an der Wand. -
Page 39: Reinigung Und Pflege
Reinigung und Pflege VORSICHT! STROM- SCHLAGGEFAHR! Ziehen Sie zuerst den Netzstecker aus der Steckdose. Benutzen Sie keine Lösungsmittel, Benzin o.ä. Das Gerät würde hierbei Schaden nehmen. Verwenden Sie zur Reinigung nur ein trockenes, fusselfreies Tuch. Entsorgung Die Verpackung besteht aus umweltfreundlichen Materialien. -
Page 40: Garantie
Garantie Das Produkt wurde nach strengen Qualitätsrichtlinien sorgfältig produ- ziert und vor Anlieferung gewissen- haft geprüft. Im Falle von Mängeln dieses Produkts stehen Ihnen gegen den Verkäufer des Produkts gesetz- liche Rechte zu. Diese gesetzlichen Rechte werden durch unsere im Fol- genden dargestellte Garantie nicht eingeschränkt. - Page 41 Teilen, z. B. Schalter, Akkus oder die aus Glas gefertigt sind. DE/AT/CH...
- Page 42 OWIM GmbH & Co. KG Stiftsbergstraße 1 D-74167 Neckarsulm Model-No.: HG01183A Version: 07 / 2016 Last Information Update Stav informácií · Stand der Informationen: 06 / 2016 Ident.-No.: HG01183A062016-SK IAN 276249...
Need help?
Do you have a question about the 276249 and is the answer not in the manual?
Questions and answers