Table of Contents
Advertisement
Advertisement
Table of Contents

Subscribe to Our Youtube Channel
Related Manuals for Yujin Robot iCLEBO O5


Summary of Contents for Yujin Robot iCLEBO O5
- Page 1 User Manual iCLEBO O5 ■ Please read "Precautions for Safety" carefully before use for correct operations. ■ The user manual includes the product warranty. ■ Product appearance and specifications are subject to change for product improvement without notice. www.iclebous.com...
-
Page 3: Table Of Contents
Contents 1. Precautions for Safety 1-1. Power-Related Issues 1-2. Preparation Before Use 1-3. Using Robot 1-4. Maintenance After Use 2. Product Composition 2-1. Components 2-2. Specific Names for Each Part 3. Preparation for Use 3-1. Side Brush Installation 3-2. Charging Station Installation 3-3. -
Page 4: Precautions For Safety
1. Precautions for Safety This is for the user's safety and to prevent property damage. Read the following carefully and use safely. We recommend keeping this manual for future reference. 1-1. Power-Related Issues Be aware that there is a risk of electric shock or fire in case of carelessness. ①... - Page 5 1-3. Using Robot Read carefully for the safe and correct use of the product. ① Be careful not to let foreign objects such as plastic bags, blades, tackles, etc get inside the area. ② If the inlet is clogged by vinyl or anything of the like, please remove the blockage immediately. ③...
-
Page 6: Product Composition
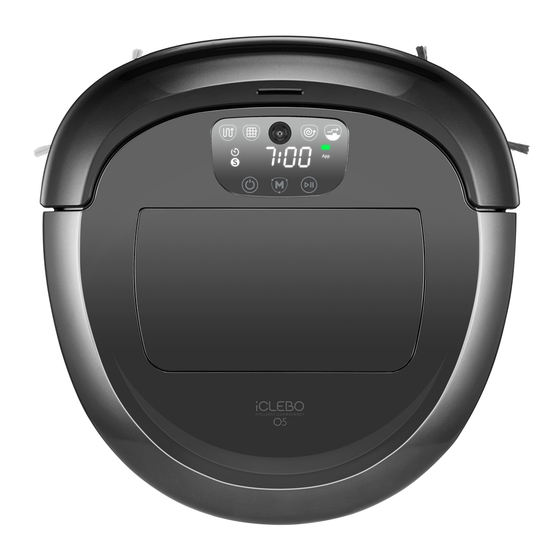
2. Product Composition 2-1. Components Cleaning Robot Charging Station Remote Control (Includes Batteries) User Ma nual iCLEBO O5 en.yujinrob ot.com User Manual Quick Guide Cleaning Brush Mop Plate Mop Pad (2) Side Brush -L, R Boundary Strip * Sold Separately Adapter *There is a risk of fire if the adapter plug is not fully assembled. - Page 7 2. Product Composition 2-2. Specific Names of Each Part Bottom Side Brush Camera Display Window Charging Pin Remote Front Wheel Control Main Brush Receiver Air Outlet Lithium Ion Battery Wheel Dust Bin Side Bumper Front Sensor Unit Manual Charging Port Power Switch Charging Station Inductive Charging Sensor...
- Page 8 2. Product Composition 2-2. Specific Names of Each Part Display Window Navi Spot Climb Mode Mode Camera Mode Mode Status Time Display Display Battery Scheduled Time Display Wi-Fi Connection Display Smart Turbo Mode Button Power Change Start/ Mode Stop Remote Control Installing the Remote Control Batteries Please assemble and use the two AAA batteries included with the remote control at the time of purchase.
-
Page 9: Preparation For Use
3. Preparation for Use 3-1. Side Brush Installation ㆍYou can reduce the scratching on the top plate by laying a soft cloth on the floor. ㆍIf the side brush is not fully seated in the groove; it may come off during cleaning. Side Brush Fixing Pin Side Brush Groove Align the side brush marked L towards the groove with the same marking (L) - Page 10 3. Preparation for Use 3-4. Charging 1) Initial Charging ㆍFully charge the product before the first usage. 1. Make sure that the switch on the side of the Main Unit is turned on. > Refer to P8 <Initial Power Switch On/Off> 2.
-
Page 11: Using Robot
4. Using Robot 4-1. To Start/Stop Cleaning Press the corresponding button on the robot or the remote control to start cleaning. Please do the same to stop cleaning. Robot Remote Control... -
Page 12: Cleaning Mode
4. Using Robot 4-2. Cleaning Mode ㆍThe “Navigation” mode is set by default if no other operation is selected. Press the MODE button on the robot or the remote control to select the desired cleaning mode. Robot Remote Control Mode Types Display Window Explanation Navi Mode... -
Page 13: Cleaning Option
4. Using Robot 4-3. Cleaning Option Option Display Window Setting Method Explanation Used in carpet or covered environments (climbs up to 15mm). ㆍClimb mode is automatically released when the mop plate is Press the CLIMB mounted. ㆍIf you cancel the Climb mode during carpet or mat cleaning, the ) button on the remote control Climb... -
Page 14: Moving/Manual Cleaning
4. Using Robot 4-5. Moving/Manual Cleaning ㆍIf you press the control button during cleaning, you can perform manual cleaning. ㆍWhen the control button is pressed in the standby mode, the cleaning robot simply moves. You can use the control buttons on the remote control to move the robot to a desired location. Forward Left Right... -
Page 15: Automatic Charging
4. Using Robot 4-6. Automatic Charging If you want to charge the robot while in use, press the BASE (charge) button on the remote control. Charge Button Remote Control ㆍWhen cleaning is complete, it automatically returns to the charging station. ㆍIf the remaining battery is low during cleaning, it automatically returns to the charging station and charges itself. -
Page 16: Mop Cleaning
4. Using Robot 4-7. Mop Cleaning ㆍBy attaching the mop pad, you can vacuum and mop at the same time. ㆍIf you install the mop plate, it cannot cross thresholds. 1. Attach the mop pad to the mop plate. Mop Pad Mop Plate 2. - Page 17 5. Care and Maintenance ㆍPlacing a soft cloth on the floor while managing the robot reduces scratches on the product. ㆍTurn off the power switch on the side of the robot for safety while managing the robot. 5-1. Empty Dust Bin and Change the Filter 1.
-
Page 18: Side Brush Care
5. Care and Maintenance 5-2. Side Brush Care 1. Place the robot, so the bottom side is facing up. 2. Hold the side brush with both hands and pull upward to disassemble. 3. Use the cleaning brush to remove dust and foreign materials. - Page 19 5. Care and Maintenance 5-3. Main Blade Care 1. Place the robot so that the bottom side is facing up and take out the side brush. 2. Unlock the fixing clip of the main brush cover and take out the cover. 3.
-
Page 20: Sensor Care
5. Care and Maintenance 5-4. Sensor Care ㆍUse a cotton swab or a soft cloth to wipe the front and bottom sensor areas of the robot. -
Page 21: Front Wheel Care
5. Care and Maintenance 5-5. Front Wheel Care 1. Flip the robot over to show the bottom side facing upward. 2. Press the tabs on the front wheel cover to remove. 3. Remove the front wheel and use the cleaning brush to clean dust and foreign materials. -
Page 22: Mop Care
5. Care and Maintenance 5-6. Mop Care After cleaning with a mop pad, wash the mop pad and dry it thoroughly before the next use. ㆍIt may smell if it is not completely dry. ㆍIf you leave the wet mop on the floor for a long time; it may soak the floor. 5-7. -
Page 23: Reset Settings
5. Care and Maintenance 5-9. Reset Settings ㆍThe robot needs to reset its settings when the Wi-Fi information near the robot changes. 1. Press and hold the M (Mode) button on the robot display window for about 5 to 6 seconds. Press for about 5-6 seconds. -
Page 24: Resolving Inspection Messages
6. Care and Maintenance 6-1. Resolving Inspection Messages ㆍPlease refer to the causes and solutions according to the Status Code on the display when an error occurs. ㆍAfter resolving the problem, press the start/pause button ( ) to continue cleaning. Status Code Cause Solution... -
Page 25: Items To Check Before Reporting A Problem
6. Care and Maintenance 6-3. Items to Check Before Reporting a Problem ㆍThe table below describes the most common "malfunctions" during use. ㆍIf you cannot resolve the problem using the information described below, please feel free to contact our Customer Support. Symptom Cause Solution... - Page 26 All exchanged parts and products replaced under this warranty will become the property of Yujin Robot Inc. During the warranty period, there will be no charge for labor or parts. A replacement of the product is solely determined by Yujin Robot’s diagnostic results. In cases where an exchange is authorized, and and no same model is available, Yujin Robot Inc.
- Page 27 7) Yujin Robot Inc. is not responsible for a product shipped to the Yujin Robot Inc. Service Center that has been scratched or damaged during transport, including but not limited to; the product, and its accessories. Products shipped to the Yujin Robot Inc.
- Page 28 Open source software A part of this product’s software component includes open source code. Yujin Robot Co., Ltd provides a complete copy of the corresponding open source code. Visit www.iclebo.com to obtain the source code. Menu Customer Service → Select Open Source Download...
- Page 32 Product Specifications Product Model YCR-M07-20W Input Power 100~240 V Standby Power Below 0.6 W Main Unit Consumption Power 53 W Battery Lithium-ion Dimension 13.9 x 13.6 x 3.4 in Weight 7.1 lbs Charging Time 240 min. Power Level 1 120 min. Usage Time Power Level 2 90 min.
Need help?
Do you have a question about the iCLEBO O5 and is the answer not in the manual?
Questions and answers