Table of Contents
Advertisement
Quick Links
Operating Instructions
for Dulcodes P and 45 D
UV systems
Please affix the rating plate here!
Please completely read through operating instructions! Do not discard!
Damages due to improper operation will invalidate the warranty!
Part No. 987739
ProMinent Dosiertechnik GmbH
69123 Heidelberg
Germany
BA DS 011 02/07 GB
•
•
Advertisement
Table of Contents

Related Manuals for ProMinent Dulcodes P


Summary of Contents for ProMinent Dulcodes P
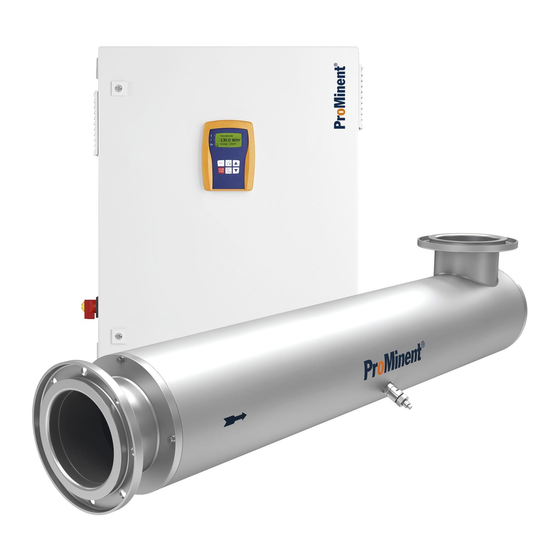
- Page 1 Operating Instructions for Dulcodes P and 45 D UV systems Please affix the rating plate here! Please completely read through operating instructions! Do not discard! Damages due to improper operation will invalidate the warranty! Part No. 987739 ProMinent Dosiertechnik GmbH...
- Page 2 IMPORTANT Damage to property may result if these safety notes are disregarded! NOTE Working guidelines. Imprint: Operating Instructions for Dulcodes P, for Dulcodes 45 D UV system © ProMinent Dosiertechnik GmbH, 2006 Address: ProMinent Dosiertechnik GmbH Im Schuhmachergewann 5-11 69123 Heidelberg Germany info@prominent.com...
-
Page 3: Table Of Contents
Replacement of the UV lamps ..................18 Calibration of the UV C sensor ................... 19 8 Troubleshooting ........................20 Dimension sheet ........................22 Terminal diagram Dulcodes P and 45 D ................. 24 Annex EU Conformity Declaration ....................25 Operating journal ........................26... -
Page 4: Application
The so-called UV C radiation guarantees a quick and safe killing of germs. The Dulcodes P and 45 D UV disinfection systems are complete and ready for connection. They are available in various versions which are determined in the Identcode. -
Page 5: Function
2 seconds after having activated the system. The standard display shows the UV C output of the UV lamp in Wm , the alarm threshold, the safety threshold as well as the lamp operating hours and the number of lamp activations. ProMinent Page 5 ®... -
Page 6: Function Keys
Before calibration, the UV C sensor signal must be stable. A changing sensor signal shows that the UV lamp has not reached its final operating temperature. Page 6 ProMinent ®... -
Page 7: Connection Of The Shut-Off Valve Or An Operating Message Unit To The Control
The maximum permissible water flow rate is described in the enclose datasheet. It is a function of the required radiation dose as well as of the minimum permissible UV transmission of the water to be disinfected. ProMinent Page 7 ®... -
Page 8: Radiation Chamber
Install an automatic shut-off valve downstream of the radiation chamber and connect it to the control! The automatic shut-off valve must close automatically such that the water flow is interrupted even in case of a possible failure of the supply voltage. Page 8 ProMinent ®... -
Page 9: Control Cabinet And Control
Remove the top gently from the bottom by pulling to the front (both parts are connected by a ribbon cable!) Insert the top with both guiding rails into the slot approx. 80mm above ProMinent Page 9 ®... - Page 10 Pull the PG7 screw fittings (4) over the cable and lock with the locknut (5) Connect the flexible wires to the terminals according to the electrical connection diagram Position unused terminals onto the pertinent strips Close the control Figure 3: Cable feed rear row PG11 screw fitting Thrust washer Gasket Page 10 ProMinent ®...
-
Page 11: Connection Of The Pre-Mounted Shut-Off Valve To The Control (Optional)
The control is to be opened (see 5.2.3) to access the function "Suppression of error message". Then, remove the jumper according to figure 5 and re-connect the control. Jumper Kurzschlussbrücke Figure 5: Detail of the control board with jumper ProMinent Page 11 ®... -
Page 12: Installation Of The Lamp Protection Tube
For lamp types equipped with O-rings for guiding in the lamp protection tube, these guiding rings must be removed before installing the lamp to prevent any overheating of the lamp. Figure 6: Lamp with O-rings for guiding in the lamp protection tube Page 12 ProMinent ®... - Page 13 9 Lamp protection tube 10 Radiation chamber 11 Mounting elements 12 Water outlet 13 O-ring 14 Connector 15 Lamp cover 16 Teflon ring * As accessories, manual values are available instead of bleed screw and water drain screw. ProMinent Page 13 ®...
-
Page 14: Commissioning
UV C sensor is no longer possible after expiry of these 5 minutes. WARNING A preliminary calibration does not replace the final calibration of the UV C sensor with a UV lamp which reached its operating temperature. Page 14 ProMinent ®... -
Page 15: Calibration Of The Uv C Sensor
Depressurise the radiation chamber before commencing any maintenance work! • UV C radiation is harmful to eyes and skin. Only commission the UV lamp when installed! Properly install the UV disinfection system before commissioning the lamp! ProMinent Page 15 ®... -
Page 16: Cleaning Of The Lamp Protection Tube
A damaged lamp protection tube may not be reinstalled. Examine the O-ring for damages; replace damaged O-ring Push the O-ring approx. 40mm over the open end of the lamp protection tube Insert the lamp protection tube into the radiation chamber Page 16 ProMinent ®... - Page 17 Open the shut-off valve downstream of the radiation chamber (only required in case of manual shut-off valve) Check the radiation chamber for leakages Connect the mains plug The UV disinfection system is now again ready for operation. ProMinent Page 17 ®...
-
Page 18: Replacement Of The Uv Lamps
Check whether the O-ring is positioned at the bracket of the lamp protection tube in the pertinent groove and is not damaged; replace damaged O-ring Insert the new lamp into the lamp protection tube and let protrude for approx. 100 mm Connect the connector to the lamp Page 18 ProMinent ®... -
Page 19: Calibration Of The Uv C Sensor
After 2 seconds, the system returns to the standard display. The alarm threshold and the safety threshold are now newly set. The operating hours counter as well as the counter of the lamp activations are now reset to zero. The calibration of the UV C sensor is now complete. ProMinent Page 19 ®... -
Page 20: Troubleshooting
UV lamp at the end of the lamp’s service life Remedy Install new UV lamp Possible cause UV lamp faulty Remedy Install new UV lamp Possible cause UV C sensor not calibrated Remedy Calibrate UV C sensor Page 20 ProMinent ®... - Page 21 Acknowledge the error by pressing the ENTER key and interrupt the supply voltage and switch on again. Shut-off valve does not open Possible cause Fusible link blown Remedy Open control (see 5.2.3) and examine fusible link F2 Check the valve before installing a new fusible link (2.5A slow) ProMinent Page 21 ®...
-
Page 22: Dimension Sheet
80 deep LM ±3 G 1/4 Strahlerkabellänge ca. 1 m R (Rp DIN 2999) Radiator cable length 1 m Sensorkabellänge ca. 2 m Sensor cable length 2 m Ø114.3 Dimensions Dulcodes P Typ/ Type (mm) (mm) (mm) (mm) (mm) (mm) 16/11/3/4... - Page 23 Dimension sheet Dimensions Dulcodes 45 D Typ/ Type (mm) (mm) (mm) (mm) (mm) (mm) 45/11/5/4 100 1840 11/4 ProMinent Page 23 ®...
-
Page 24: Terminal Diagram Dulcodes P And 45 D
Terminal diagram Dulcodes P and 45 D EINSPEISUNG POWER SUPPLY 230 V, 50/60 Hz BESTRAHLUNGSKAMMER RADIATION CHAMBER AUSGANG 230 V OUTPUT 230 V MAGNETVENTIL SOLENOID VALVE RELAIS RELAY UV-STRAHLER UV-LAMP UVC-U-SENSOR BETRIEBSMELDUNG OPERATION MESSAGE RELAIS RELAIS RELAY 230 V/2.5 A... -
Page 25: Annex
Annex EU Conformity Declaration ProMinent Page 25 ®... -
Page 26: Operating Journal
Operating journal Page 26 ProMinent ®... - Page 27 ProMinent Page 27 ®...
- Page 28 Page 28 ProMinent ®...
Need help?
Do you have a question about the Dulcodes P and is the answer not in the manual?
Questions and answers