
Subscribe to Our Youtube Channel
Related Manuals for VIDAR DiagnosticPRO Edge

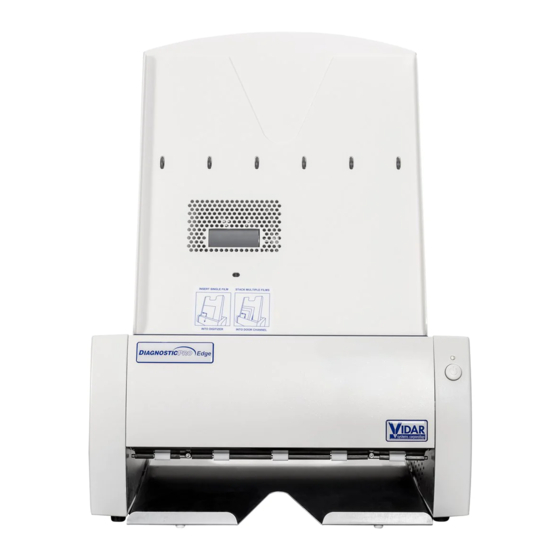
Summary of Contents for VIDAR DiagnosticPRO Edge
- Page 1 Installation guide for DiagnosticPRO™ Edge Multi-film feeder Serial numbers 380,000 to 389,999...
- Page 2 Phone: 1-703-471-7070 Technical Support: Fax: 1-703-471-7665 1-800-471-SCAN or 1-703-471-7070 Internet: www.filmdigitizer.com E-mail: medtech@VIDAR.com Emergo Europe Phone: +31 (0) 70.345.8570 Molenstraat15 Fax: +31 (0) 70.346.7299 2513 BH, The Hague E-mail: service@emergogroup.com The Netherlands 19616-001 Rev. D DiagnosticPRO Edge Film Digitizer Installation Guide...
- Page 3 Product compliance testing was conducted using VIDAR shielded cables. Modifications to the digitizer or the VIDAR shielded cables or the use of cables other than those available from VIDAR could void the user’s authority to operate the equipment.
- Page 4 2.4 sq in (15.5 sq cm). Light from the LED illuminator may be indirectly observed in the digitizer’s film entry and exit areas. 19616-001 Rev. D DiagnosticPRO Edge Film Digitizer Installation Guide...
-
Page 5: Table Of Contents
1. Apply Power to the Digitizer and the PC ............... 21 About the VIDAR Drivers ....................22 2. Install the VIDAR Drivers ....................22 Install Device Drivers for Windows XP ................29 1. Apply Power to the Digitizer and the PC ............... 29 About the VIDAR Drivers .................... -
Page 6: Intended Use
Intended Use The DiagnosticPRO Edge digitizer is used for making digital copies of medical x-ray film, including printed and radiographic film. The target users of these devices are medical professionals or trained staff for use as secondary capture images for consultation, review and final interpretation. -
Page 7: Unpack The Digitizer
Unpack and inspect the digitizer’s parts. Identify the digitizer’s parts. 1. Look for damage. Before unpacking the DiagnosticPRO Edge film digitizer, examine the shipping carton for damage. If the carton is damaged: Notify the shipper immediately. ... -
Page 8: Unpack The Shipping Carton
Failure to properly pack, or failure to use VIDAR authorized shipping materials, will void the product’s warranty, and will likely result in costly repairs. - Page 9 Place the group on one foam end cap. Lift off the upper foam end cap. d. Remove the feeder box from the lower end cap. 19616-001 Rev. D DiagnosticPRO Edge Film Digitizer Installation Guide...
- Page 10 Failure to properly pack, or failure to use VIDAR authorized shipping materials, will void the product’s warranty, and will likely result in costly repairs.
-
Page 11: Identify The Parts
(Note: items are not shown to same scale.) DiagnosticPRO Edge film digitizer Multi-film feed tray Film tray Power Adapter. Contact Service Provider or Vidar Systems Corp for P/N 19616-001 Rev. D DiagnosticPRO Edge Film Digitizer Installation Guide... -
Page 12: Optional Items
USB Cable, VIDAR part number 4618-002 Optional items Description Third-party software instructions (not supplied for the market in China) Lint-free wipes, VIDAR part number 15194 (package of 10) 19616-001 Rev. D DiagnosticPRO Edge Film Digitizer Installation Guide... -
Page 13: Identify Important Features
Rear panel View the digitizer from the rear to identify the USB port and power connector. USB port Power connector 19616-001 Rev. D DiagnosticPRO Edge Film Digitizer Installation Guide... -
Page 14: If Anything Is Missing
Complete the form. e. Mail or fax the form to VIDAR Systems Corp. If your digitizer needs service, this information should be on file at VIDAR. Contact VIDAR Technical Support if you have any questions about installing or using your VIDAR film digitizer: Phone: 1-800-471-SCAN (1-800-471-7226) 1-703-471-7070 outside the U.S. -
Page 15: Assemble The Digitizer
2. Orient the film feeder with the back toward you (multi-film feeder is shown; single- film feeder is similar). You should be able to see the thumbscrew at the bottom rear of the feeder. Thumbscrew 19616-001 Rev. D DiagnosticPRO Edge Film Digitizer Installation Guide... - Page 16 3. Insert the tabs on the bottom of the feeder into the slots on the digitizer base. 19616-001 Rev. D DiagnosticPRO Edge Film Digitizer Installation Guide...
- Page 17 5. Connect the multi-film feeder cable between the feeder and digitizer base as shown below. Multi-film feeder cable 6. Go to “Placing the digitizer on a table,” the next chapter in this manual. 19616-001 Rev. D DiagnosticPRO Edge Film Digitizer Installation Guide...
-
Page 18: Place The Digitizer On A Table
5° tilt. The digitizer must not be placed on the floor. VIDAR Systems Corp. is not liable for any damages or injuries to persons or property associated with improper placement or use of the digitizer. -
Page 19: Final Assembly
Connect the USB cable and power supply CAUTION: Power the digitizer only with the power supply adapter provided by your Service Provider or Vidar Systems Corp. 1. Connect the USB cable to the USB port on the back of the digitizer. Do not connect the USB cable to the PC until instructed later. -
Page 20: Install The Exit Tray
2. When properly positioned, the exit tray will protrude a small distance from the digitizer, and it can’t be pulled out without lifting it off the internal pins. Exit tray in position 19616-001 Rev. D DiagnosticPRO Edge Film Digitizer Installation Guide... -
Page 21: Install Device Drivers For Windows 7
Observe the LED on the front of the digitizer: the LED should flash light blue for a little over 5 minutes. This indicates the digitizer is performing internal tests. d. When the LED stops flashing and remains solid green, proceed to step 2. 19616-001 Rev. D DiagnosticPRO Edge Film Digitizer Installation Guide... -
Page 22: About The Vidar Drivers
About the VIDAR Drivers The VIDAR driver was designed to provide compatibility between VIDAR DiagnosticPRO Edge Digitizers and Windows 7 (both 32-bit and 64-bit). Features of this driver include: Installation/setup wizard for easy and consistent installation. Scanners and Cameras Control Panel (32-bit only), which provides a common ... - Page 23 In the first screen, click Next >. e. In the License Agreement screen, activate I accept the terms of the license agreement, then click Next >. 19616-001 Rev. D DiagnosticPRO Edge Film Digitizer Installation Guide...
- Page 24 In the Ready to Install the Program screen, click Install. g. The Setup Status screen will appear. Wait while the files are installed. 19616-001 Rev. D DiagnosticPRO Edge Film Digitizer Installation Guide...
- Page 25 On a 64-bit system only: When prompted Would you like to install this device software?, click Install. j. InstallShield will indicate that installation is complete. However, the driver installation is not complete. 19616-001 Rev. D DiagnosticPRO Edge Film Digitizer Installation Guide...
- Page 26 1. On the desktop, double-click the DemoscanEx icon. 2. The window shown below will appear. This indicates that the digitizer is communicating with the computer. 3. Press on the keyboard, then press ENTER 19616-001 Rev. D DiagnosticPRO Edge Film Digitizer Installation Guide...
- Page 27 On a 32-bit system: Start > Control Panel > Scanners and Cameras 2. In the device window, right-click VIDAR Film Digitizer, then click Properties in the pop-up menu. 3. In the VIDAR Film Digitizer Properties window, click the VIDAR Properties tab.
- Page 28 64-bit system only: In the Windows 7 Computer Management window, the digitizer is listed under Jungo. 32-bit system only: In the Windows 7 Computer Management window, the digitizer is listed under Imaging devices. 19616-001 Rev. D DiagnosticPRO Edge Film Digitizer Installation Guide...
-
Page 29: Install Device Drivers For Windows Xp
Observe the LED on the front of the digitizer: the LED should flash light blue for a little over 5 minutes. This indicates the digitizer is performing internal tests. d. When the LED stops flashing and remains solid green, proceed to step 2. 19616-001 Rev. D DiagnosticPRO Edge Film Digitizer Installation Guide... -
Page 30: About The Vidar Drivers
About the VIDAR Drivers The VIDAR driver was designed to provide compatibility between VIDAR DiagnosticPRO Edge Digitizers and Windows XP SP3. Features of this driver include: Installation/setup wizard for easy and consistent installation. Scanners and Cameras Control Panel, which provides a common interface for still ... - Page 31 In the first screen, click Next >. e. In the License Agreement screen, activate I accept the terms of the license agreement, then click Next >. 19616-001 Rev. D DiagnosticPRO Edge Film Digitizer Installation Guide...
- Page 32 In the Ready to Install the Program screen, click Install. g. The Setup Status screen will appear. Wait while the files are installed. 19616-001 Rev. D DiagnosticPRO Edge Film Digitizer Installation Guide...
- Page 33 The VIDAR Driver Install window previews the next steps. Click Next >. i. The Digital Signature Not Found window will may appear Each time it appears, click Yes. (Note the screen may look a bit different in Windows VISTA.) j.
- Page 34 USB 2.0 port on the computer. m. The Found New Hardware window will appear, indicating that the digitizer is connected to the computer. n. Select Yes, this time only, then click Next >. 19616-001 Rev. D DiagnosticPRO Edge Film Digitizer Installation Guide...
- Page 35 On the next screen click Install the software automatically (Recommended), then click Next >. p. Wait while the wizard searches for the driver. 19616-001 Rev. D DiagnosticPRO Edge Film Digitizer Installation Guide...
- Page 36 Verify that the digitizer drivers are fully installed by checking the device properties at Start > Control Panel > Scanners and Cameras t. In the device window, right-click VIDAR Film Digitizer, then click Properties in the pop-up menu. 19616-001 Rev. D...
- Page 37 In the VIDAR Film Digitizer Properties window, click the VIDAR Properties tab. If the driver is properly installed, the properties will appear and if the digitizer is ready to digitize its serial number will appear. If Not Ready appears the digitizer is normalizing.
-
Page 38: Appendix: Electromagnetic Guidance
Table 201 The DiagnosticPRO Edge Digitizer is intended for use in the electromagnetic environment specified below. The customer or end user of the DiagnosticPRO Edge Digitizer should assure that it is used in such an environment. Emissions test Compliance... - Page 39 Table 202 The DiagnosticPRO Edge Digitizer is intended for use in the electromagnetic environment specified below. The customer or end user of the DiagnosticPRO Edge Digitizer should assure that it is used in such an environment. IEC 60601 test Immunity test...
- Page 40 Table 204 The DiagnosticPRO Edge Digitizer is intended for use in the electromagnetic environment specified below. The customer or end user of the DiagnosticPRO Edge Digitizer should assure that it is used in such an environment. Immunity test IEC 60601 test level Compliance level Electromagnetic environment - guidance...
- Page 41 DiagnosticPRO Edge Digitizer Table 206 The DiagnosticPRO Edge Digitizer is intended for use in an electromagnetic environment in which radiated RF disturbances are controlled. The customer or the user of the DiagnosticPRO Edge Digitizer can help prevent...
-
Page 42: Appendix: Patient Vicinity
Appendix: Patient Vicinity Note: Dimensions shown are not prescriptive. 19616-001 Rev. D DiagnosticPRO Edge Film Digitizer Installation Guide... -
Page 43: Appendix: Symbols
For more information about where you can dispose of your waste equipment for recycling please contact your local city office, your household waste disposal service or the shop where you purchased the product. 19616-001 Rev. D DiagnosticPRO Edge Film Digitizer Installation Guide... - Page 44 365 Herndon Parkway Herndon, VA 20170 USA Phone: 1-703-471-7070 Main fax: 1-703-471-1165 Web: www.filmdigitizer.com Technical Support: Phone: 1-703-471-7070 1-800-471-7226 Fax: 1-703-471-7665 E-mail: medtech@VIDAR.com...
Need help?
Do you have a question about the DiagnosticPRO Edge and is the answer not in the manual?
Questions and answers