Advertisement
Quick Links
Advertisement

Subscribe to Our Youtube Channel
Related Manuals for Kedacom NVR1827


Summary of Contents for Kedacom NVR1827
- Page 1 NVR1827 快速安装指南 Installation Guide...
- Page 3 本产品系列包含以下型号 NVR1827-04016B/16P NVR1827-04032B/16P 型号 NVR1827-04009B NVR1827-04016B NVR1827-04032B 一 前言 感谢购买本公司产品,如对本公司产品有疑问或需要,请随时和我们联系。我们尽最大努力来保证 本手册信息的正确性,如因升级等原因发生信息修改,恕不另行通知。 此手册适用于NVR1827系列产品,部分型号产品在外观及尺寸上有所差异,本文图示以 NVR1827-04016B/16P为例,仅供参考,请以实物为准。 二 安全说明 此内容(手册)的目的是确保用户正确使用本产品,以避免危险或财产损失。在使用产品之前,请 认真阅读此手册并妥善保存以备日后参考。如果用户因没有按照以下安全说明,致使设备不能正常 使用或损坏等情况,责任由用户承担。 Ÿ 请使用满足安全电压要求的电源。 Ÿ 如果设备工作不正常,请联系厂家或最近的服务中心。不要以任何方式随意拆卸或修改设备。 Ÿ 请不要将较重的物品摆放在NVR上,并防止设备从高处摔落或受强烈敲击。 Ÿ 避免将产品暴露在非用户手册所示的工作环境下使用。 工作环境 工作电源 AC 100~240V,60-50Hz,3.5-1.7A 存储温度:-25℃~+70℃ 温度 工作温度:-10℃~+55℃ 存储湿度:10%~100%(无凝结) 湿度 工作湿度:10%~90%(无凝结) 海拔高度 -60m~+3000m...
- Page 4 Ÿ 使用时不可让任何液体流入NVR。 Ÿ 当运送NVR时,请重新以出厂时的包装进行包装,或使用同等品质的材料包装。 Ÿ 需要替换部件时,请事先与经销商联系,更换指定型号的部件,或与原部件具有相同特性的部件。 擅自使用其它部件进行替换,后果自负。 Ÿ 锂电池安全警告 设备内部使用的是锂电池,使用其他型号的电池可能会有爆炸的危险。 更换电池时,请勿将旧电池掷入火中或与生活垃圾一起处理。 Ÿ 安装设备前,请先检查安装环境的洁净度、防静电、防干扰、防雷击是否符合要求。若不符合,请 不要急于安装设备,以免对设备造成损害。 洁净度 NVR1827系列设备对环境的灰尘含量及粒径要求如下表所示: 最大直径(um) 最大浓度(颗粒数/m³) 1.4x10 7x10 2.4x10 1.3x10 防雷击 在雷击强度超过一定范围时可能对设备造成损害,为了有效防雷,应做到: 保证机箱外壳用接地线接地良好; 保证交流电源插座的中性点接地良好; 为增强电源的防雷击效果,可在电源的输入前端加入电源避雷器。 防静电 当静电超过一定限度时,会对设备产生一定的破坏作用。在与设备连接的通信网中,静电感应主要 来自两方面:一是室外高压输电线、雷电等外界电场,二是室内环境、地板材料、整机结构等内部 系统。因此,为防止静电的破坏,应保持: 设备及地板良好接地; 室内防尘; 温度、湿度条件适宜。...
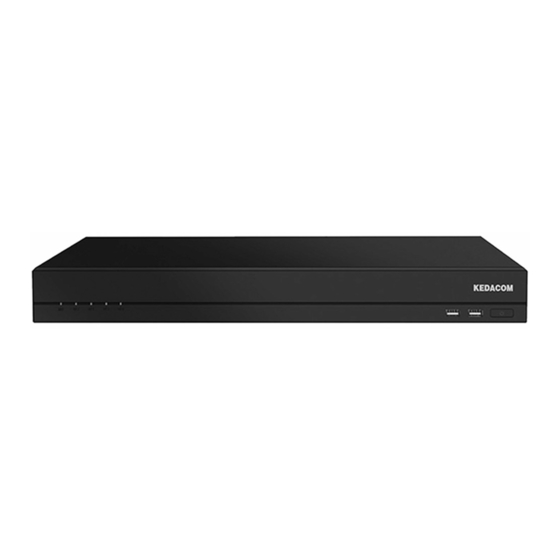
- Page 5 防干扰 设备在使用中可能的干扰源(无论是来自设备,或应用系统的外部与内部)都是以电容耦合、电感 耦合、电磁波辐射、公共阻抗(包括接地系统耦合)的传导方式对设备产生影响。因此,为有效抗 干扰,应做到: 供电系统采取有效的防电网干扰措施; 设备工作地最好不要与电力设备的接地装置或防雷接地装置合用,并尽可能保持远距离; 远离强功率无线电发射台、雷达发射台等高频大电流设备; 必要时采取电池屏蔽的方法。 三 产品外观 前面板 NET HD1 HD3 HD4 USB2.0 NET状态灯 硬盘状态灯 设备开关 设备开关:上电常亮,系统正常运行时慢闪,单色灯,白色 硬盘状态灯:未识别到硬盘相应灯灭,读写时快闪,单色灯,白色 NET状态灯:无物理网络连接灯灭,有物理网络连接常亮,传输媒体数据时快闪,单色灯,绿色...
-
Page 6: Alarm Out
后面板 100M/1000M自适应以太网口 VGA输出接口 告警输入 音频输入 告警输出 接地 电源开关 POE接口 电源 音频输出 RS485串口 HDMI输出接口 【说明】P 接口说明:未激活状态的科达IPC支持即插即用,已激活状态的科达IPC及其它厂商 IPC,须将IP地址设置为自动获取,并且在NVR上进行搜索添加方能使用。 尺寸:444mm x 410mm x 44mm 重量(不含硬盘):5kg 功耗(不含硬盘):15W 【外设接口介绍】 ALARM OUT ALARM IN A1 B1 A2 B2 标识 说明 标识 说明 ALARM IN 1 A1 ALARM OUT 1 ALARM IN 2 B1 ALARM IN 3 A2... - Page 7 四 安装设备 1. 安装前检查 在安装设备前,请先检查包装箱中的设备及组件,确保实际物品与装箱清单相符且物品无损坏现 象,若发现问题,请及时与供应商或客服联系。 2. 安装NVR NVR1827系列产品可以直接平放在工作台上,也可以安装固定在机架上。安装前,请确保环境通 风良好,并安装硬盘,硬盘安装方法见附录部分。 机架安装步骤如下(请以实物为准): 【注意】1)NVR平放在桌面上时需要安装脚垫; 2)NVR安装到机架上,需要有托盘或支架支撑,避免因设备安装不稳固而影响硬盘寿命。 1) 将两个挂耳分别用螺钉固定在设备的两侧,如下图所示。 2) 将设备水平放在托盘上,使两侧挂耳的螺孔与机架上的螺孔重合,然后用螺钉固定。 托盘...
- Page 8 3. 线缆连接 设备摆放好后,按照下图所示进行线缆连接。 网络 网络 100M/1000M自适应以太网口 默认IP:192.168.1.100 显示器 VGA接口 告警输出 POE接口 摄像机 PICKUP 音频输入 电源开关 接地 KEDACOM HDMI接口 音频输出 电源接口 AC 100~240V 告警输入 60-50Hz 3.5-1.7A 高清显示器 串口设备 4. 上电、激活 连接完成后,给设备上电。 首次启动设备,显示器显示设备激活界面,设置admin用户密码及填写邮箱(忘记密码可通过此邮 箱重置设备),然后点击激活并登录按钮激活设备。...
- Page 9 附 硬盘安装方法 将机壳上盖打开,拧开支架两边螺钉,取出硬盘支架,如下图。 将硬盘装在硬盘支架上,硬盘安装数量用户根据需求选择,如下图。 拧紧螺钉,固定硬盘 固定装好硬盘的支架:①将装上硬盘的支架放进机箱对应的位置;②拧紧螺钉,如下图。 ② ① 拧紧支架两边螺钉 按照线序,分别将硬盘电源线和数据线插在硬盘上,并装好机壳上盖。 【说明】NVR1827系列产品最大支持接入四块硬盘,建议使用兼容硬盘列表中推荐的硬盘型号。...
- Page 10 本保修卡适用于您购买的本公司系列产品。 1.免费保修期一年(仅限中国大陆地区,中国大陆以外地区请参考英文说明)。 2.凡保修期内,由于本产品自身引起的故障,请与公司售后服务部联系。 3.保修时我们将使用您的保修卡信息,请认真填写。 4.以下情况,属于有偿保修范围: -人为原因造成的设备故障 -因使用环境不符合本产品要求造成的故障 -因不可抗力造成的产品损坏 -无保修卡 -已过免费保修期 用户名称: 详细地址: 传真: 电话: 邮箱: 邮编: 产品名称: 产品型号: 购买日期:...
- Page 11 Trademarks ™ Kedacom™, TrueSens™ and are registered trademarks of Suzhou Keda Technology Co., Ltd. in China and various other countries. All other trademarks mentioned in this document are the property of their respective holders. Suzhou Keda Technology Co., Ltd. 131 Jinshan Road...
- Page 12 Sub-Models The sub-models of the NVR1827 (hereinafter referred to as the device) are as follows: NVR1827-04016B/16P, able to accommodate 16 PoE cameras NVR1827-04032B/16P, able to accommodate 16 PoE cameras NVR1827-04009B NVR1827-04016B NVR1827-04032B Preparations 1 Unpacking Perform the following steps to unpack the system: 1) Inspect the package to make sure that it has not been damaged.
- Page 13 2.2 EMI To shield electromagnetic interference (EMI), you should observe the following guidelines: Keep the ground system of the device away from that of the power supply system or lightning protection system. Place the device away from high-frequency devices, such as radio or radar stations. When necessary, deploy EMI shielding devices.
- Page 14 3. Wear a grounding wrist strap to replace the old battery with the new one. Replacement During replacement, do not mix up the anode and cathode. Contact the local authorized Kedacom agent if you encounter any problem when replacing the battery. Disposal...
- Page 15 Panel Description 1 Front Panel NET HD1 HD3 HD4 Network status USB 2.0 ports indicator HDD status Device switch and indicator operating status indicator Figure 1 Front panel of the device Table 5 Indicator description Description Indicator State On (White) The device is started.
- Page 16 PoE ports. For cameras from other vendors and activated KEDACOM cameras, they can communicate with the device only when they are located on the same network segment as the device and then are added to the channel list of the device.
- Page 17 Installing the Device 1 Installing an HDD You are advised to install an HDD before using the device. If you do not install an HDD: You cannot use the recording function. When the device starts operating and detects that no HDD is installed, the beeper will go off and an alarm will be generated.
- Page 18 4. Install the disk support back to the device. ② Put the disk support back ① Secure the disk support to the device. to the original position. 5. Connect an HDD power wire and an HDD data wire to the HDD. Repeat this step for all the HDDs you want to install.
- Page 19 After this, the device is powered and switched on. You can connect the device to other devices (for example, a speaker). However, this 【Note】 document does not provide the corresponding details. If you are experiencing trouble connecting the device to other devices, contact the local authorized Kedacom agent.
- Page 20 To power on the device again, press the power switch on its rear panel and connect the power cable back to the device. For details on how to use the device, see the user guide included in the KEDACOM Document and Utility CD.
- Page 21 Activation and Initial Configuration To activate the device through the Internet Explorer: 1. Connect a network cable to the network port on the front panel (default IP of LAN: 192.168.1.100) of the device. 2. Add an IP address from the 192.168.1.X network segment with the subnet mask being 255.255.255.0 to your PC.
- Page 22 Configuring mobile settings. Configure Session Initiation Protocol (SIP) settings for the device to register with a SIP platform (for example, the KEDACOM VMS). For details on how to initially configure the device, see chatper Getting Started of User Manual for Commercial NVRs.
- Page 23 This page is intentionally left blank.
- Page 24 This page is intentionally left blank.
-
Page 25: What Is Not Covered By This Warranty
Kedacom hardware. Manufacturers, suppliers, or publishers, other than Kedacom, may provide their own warranties to you but Kedacom, in so far as permitted by law, provides their products "AS IS". Software distributed by Kedacom with or without the Kedacom brand (including, but not limited to system software) is not covered by this warranty. -
Page 26: How To Obtain Warranty Service
If during the Warranty Period, you submit a valid claim to Kedacom or an authorized Kedacom agent, Kedacom will, at its option, (i) repair the Kedacom Product using new or previously used parts that are equivalent to new in performance and reliability, or (ii) exchange the Kedacom Product for a refund of your purchase price. - Page 28 中国: 江苏省苏州市高新区金山路131号(215011) Tel: +86-512-68418188 Fax: 86-512-68412699 Suzhou Keda Technology Co.,Ltd. Singapore: 627A Aljunied Road, #09-07, BizTech Centre, Singapore 389842 Tel: +65-6842-5700 Fax: +65-6842-5900 05.03.800800 V1 20181205...
Need help?
Do you have a question about the NVR1827 and is the answer not in the manual?
Questions and answers