Table of Contents
Advertisement
Advertisement
Table of Contents

Related Manuals for Panta Rhei Hydro Wizard ECM 63


Summary of Contents for Panta Rhei Hydro Wizard ECM 63
- Page 1 Hydro Wizard ECM 63 ® Operating manual...
- Page 2 PANTA RHEI Natural Aquarium Technology Panta Rhei GmbH Managing Director: Matthias Kählig Langen Hop 5 30900 Wedemark - Brelingen Telephone +49 (0) 5130-60 957 27 Fax +49 (0) 5130-60 957 26 Panta Rhei Galerie Langen Hop 5 30900 Wedemark - Brelingen MAIL: info@panta-rhei-aquatics.com...
- Page 3 Hydro Wizard ® ECM 63...
-
Page 5: Table Of Contents
Operating manual Hydro Wizard ECM 63 ® Content 01) Scope of delivery ..........7 02) Safety guidelines ..........7 a) General safety guidelines ........7 b) Protection against electric shock ......9 03) Safety hints for handling magnets ..10 04) Intended use and scope of application . 10 05) General description ........11 a) Functional description ..........11 06) Commissioning ..........12... - Page 6 Operating manual Hydro Wizard ECM 63 ® 14) Disposal and environmental protection ..38 15) Warranty provisions ........39 a) Extent of warranty ..........39 b) Warranty period ............. 39 c) Warranty exclusions ..........39 16) Technical data ..........40 a) Pump characteristic curve ........40 b) Pump technical data ..........
-
Page 7: Scope Of Delivery
Operating manual Hydro Wizard ECM 63 ® 01) Scope of delivery • Hydro Wizard ECM 63 (1 piece) ® • Controller (1 piece) • Touchscreen pen (1 piece) • Power supply (1 piece) • Power cord (1 piece) • Magnet holder (3 piece) •... - Page 8 Operating manual Hydro Wizard ECM 63 ® event of non-compliance, warranty and liability claims will expire. • This device is not intended to be used by per- sons (including children) with reduced physi- cal, sensory or mental capabilities or a lack of experience and/or knowledge –...
-
Page 9: B) Protection Against Electric Shock
Operating manual Hydro Wizard ECM 63 ® b) Protection against electric shock After setting up the pump, the mains plug must be freely ac- cessible at any time during the operation. Before commissioning your new pump, have an expert che- cked whether the grounding, protective multiple earthing and residual current-operated protective circuit work properly follo-... -
Page 10: Safety Hints For Handling Magnets
Operating manual Hydro Wizard ECM 63 ® 03) Safety hints for handling magnets • The enclosed magnets are much stronger than for example pin board magnets. • Keep the magnets away from objects, which re- act sensitively to magnetism (e.g. credit cards and EC carts, computers). -
Page 11: General Description
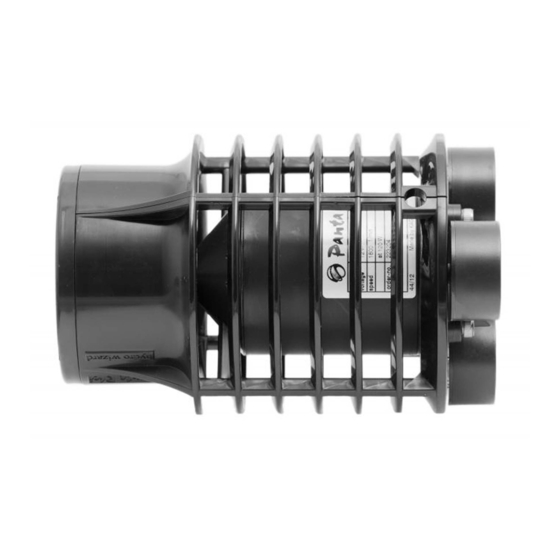
Operating manual Hydro Wizard ECM 63 ® 05) General description Hydro Wizard ® 1. Magnet support 2. Motor 3. Basket 4. Impeller 5. Flow conditioner Controller Power supply a) Functional description By rotation of the impeller, an area of low pressure is generated which sucks in the medium from be- hind through the fi... -
Page 12: Commissioning
Operating manual Hydro Wizard ECM 63 ® 06) Commissioning a) Checks before commissioning • Is there a ground fault circuit interrupter connec- ted upstream of the device? • Are all cables free from damage? Cables must neither be bend nor rolled up! •... -
Page 13: B) Installation Of The Pump
Operating manual Hydro Wizard ECM 63 ® b) Installation of the pump 1. Installation step: • Attach the pump to the inside of the pane – please ex- clusively intended points of attachment of the pump. In order to do so, use either the enclo- sed magnet support or the three threaded holes M5, on which the... - Page 14 In addition, there are the inertia forces of the moving water masses in the tank. If you do not use Panta Rhei equip- ment for mounting, please pay attention that the support, on which the Hydro Wizard ®...
- Page 15 Operating manual Hydro Wizard ECM 63 ® 3. Installation step: • Connect the plug of the pump (right) and the power supply (left) with the controller. • Now connect the power cable with the power supply and subsequently with a socket. Important notes: •...
-
Page 16: Controller Instructions
Operating manual Hydro Wizard ECM 63 ® 07) Controller instructions a) Controlling the Hydro Wizard ® The controller can be programmed with your fi nger, or a non abrasive touch screen pen. All touch surfaces can be easily reached with your fi nger. When activa- ting a fi... -
Page 17: B) The Information Screen
Operating manual Hydro Wizard ECM 63 ® b) The information screen The information screen displays information about the fl ow status of the Hydro Wizard ® The upper part of the screen displays the fl ow mode. The center part of the screen will display the most important data about the fl... -
Page 18: C) The Menu Screen
Operating manual Hydro Wizard ECM 63 ® c) The menu screen The menu screen is used to change and display the settings of the Hydro Wizard ® go back to Display: active menu change to submenu previous menu Selected menu item (in the center) go to info other menu items... -
Page 19: D) The „Make Changes" Screen
Operating manual Hydro Wizard ECM 63 ® d) The „make changes“ screen This screen is used to make changes to most of the settings. increase exit (OK) number display number decrease number Figure 6: make changes screen The left center fi eld displays the fl ow value. Above and below are buttons to increase or decrease the number by the smallest step possible. -
Page 20: E) Menu Structure
Operating manual Hydro Wizard ECM 63 ® e) Menu structure Main menu Mode Settings Depends on mode Pause Start Duration Quick access Cleaning Automatic Duration Manual Network Master Slave Sync Unit Time Date Language Tooltip Dimming Password Active Password Turn Restart Reset Info... - Page 21 Operating manual Hydro Wizard ECM 63 ® Settings Flow Figure 8: settings in fl ow mode Settings Flow A Flow B Time A Time B Time A-B Time B-A Find frequency Phase delay Figure 9: settings in wave mode, enter time Settings New interval Interval 1...
-
Page 22: F) Operation
Operating manual Hydro Wizard ECM 63 ® f) Operation Initial start up After the Hydro Wizard is plugged in for the fi rst time ® you must set the language, time and date. These settings can be changed later in the info menu. Selecting the mode Select the desired mode in the main menu, in the change mode screen. - Page 23 MASTER controller. More information on connection several controller can be found under the chapter: „Connecting to the Panta Rhei CAN-Bus“. To fi nd the ideal frequency in your aquarium select FIND FREQUENCY in the settings menu. Now select...
- Page 24 Operating manual Hydro Wizard ECM 63 ® then be lowered slowly. When the waves have rea- ched an optimal frequency it can be accepted by pus- hing SELECT on the display. Caution: depending on the layout of your aquarium waves can damage the contents, or spill water over the sides.
- Page 25 3. Connect a Terminating resistor to the open so- cket of the fi rst and last controller (red arrows). There are four options for the Panta Rhei CAN-Bus connection: „OFF“, „SYNC“, „SLAVE“ and „MASTER“...
- Page 26 Operating manual Hydro Wizard ECM 63 ® If a controller is set to SLAVE, it will take the settings of the MASTER automatically. The information screen will display SLAVE and the settings transmitted by the MASTER. If the connection is interrupted the control- ler will continue to operate in this mode.
- Page 27 Operating manual Hydro Wizard ECM 63 ® Application example: The following examples are shown with just two pumps to simplify the diagrams, but the same programming applies for any number of connected pumps. Panta Rhei CAN-Bus system makes adding additional con- troller very easy.
- Page 28 Operating manual Hydro Wizard ECM 63 ® Back and forth wave action: In this example two opposing Hydro Wizard ® used to generate a wave. Hydro Wizard A should ® run in the fi rst half of the time segment with 100% power, and Hydro Wizard B in the second segment ®...
- Page 29 Operating manual Hydro Wizard ECM 63 ® Tide Simulation: In this example Hydro Wizard are used to simulate ® the natural fl ow of tides. Hydro Wizard A will run with ® one set of parameters from 00:01 to 6:00 and from 12:01 until 18:00, while Hydro Wizard B will run from ®...
- Page 30 Operating manual Hydro Wizard ECM 63 ® Hydro Wizard A: Connection Master ® Mode Profi le Settings New interval Start 12:01 18:00 Flow 100% Hydro Wizard B: Connection Sync ® Mode Profi le Settings ...
-
Page 31: Cleaning Function
Operating manual Hydro Wizard ECM 63 ® 08) Cleaning function The cleaning function is reached from the main menu. The cleaning function will help to clean off debris (like plants) that has stuck to the intake of the pump. To achieve this, the pump will spin in the opposite di- rection for a short time. -
Page 32: The Pause / Feed Timer
Operating manual Hydro Wizard ECM 63 ® 09) The pause / feed timer The pause / feed timer stops the Hydro Wizard ® automatically resumes the programmed settings after an elapsed time (i.e. during feeding). The feed timer function can be reached from the main menu. -
Page 33: Unit Settings
Operating manual Hydro Wizard ECM 63 ® 10) Unit settings Selecting UNIT in the main menu controls the settings for the display. The menu selection TOOLTIP is used to active the display of other information from a selected menu. The tooltips are displayed at the bottom of the screen. The menu item DIMMING is used to lower the bright- ness of the display when the touchscreen is activated. - Page 34 Operating manual Hydro Wizard ECM 63 ® Rhei CAN-Bus in the power-saving mode to the po- wer consumption, for. lower in emergency / battery operation. Warnings Warnings are displayed on the info screen during operation. To signal the screen fl ashes when there is a warning.
-
Page 35: Cleaning And Maintenance
Operating manual Hydro Wizard ECM 63 ® 11) Cleaning and maintenance The Hydro Wizard operates largely maintenance ® free. Should it increase its energy consumption the cause is usually calcium deposits on the bearings. Depending on the water chemistry this eff ect can vary greatly. -
Page 36: Assembly And Disassembly
Operating manual Hydro Wizard ECM 63 ® 12) Assembly and disassembly When carrying out assembly and disassembly, always dis- connect the mains plug in advance! The fl ow conditioner is attached to the front of the housing with a bayonet lock. To remove it spin it clockwise and pull it forward. -
Page 37: Troubleshooting
® ® outside the water de the water Impeller defect unplug the pump an replace the impeller For any other problems please get in contact with Panta Rhei Service. Repairs can be made only by Panta Rhei or authorized dealers! -
Page 38: Disposal And Environmental Protection
Operating manual Hydro Wizard ECM 63 ® 14) Disposal environmental protection The pump should not be discarded with the regular trash, it should be disposed of ac- cording to local regulations, please check with your local authority. [RICHTLINIE 2002/96/EG]. -
Page 39: Warranty Provisions
15) Warranty provisions a) Extent of warranty This limited warranty is applicable from the date of purchase for all new products from Panta Rhei GmbH purchased for your own normal use and not for reselling. Panta Rhei GmbH guarantees that a product covered by this warranty, apart from the exceptions listed below, is free from ma- terial and manufacturing defects. -
Page 40: Technical Data
Operating manual Hydro Wizard ECM 63 ® 16) Technical data a) Pump characteristic curve... -
Page 41: B) Pump Technical Data
Operating manual Hydro Wizard ECM 63 ® b) Pump technical data Type Hydro Wizard ECM 63 ® Rated input voltage 100-240 V~, 50/60Hz max. power consumption 120 W min. speed 500 rpm max. speed 1,800 rpm max. fl ow rate 51,000 l/h max. -
Page 42: C) Dimensions
Operating manual Hydro Wizard ECM 63 ® c) Dimensions (all dimensions in mm) Controller... -
Page 43: D) Mount Dimensions
Operating manual Hydro Wizard ECM 63 ® d) Mount dimensions Do not cover the holes in the back of the Hydro Wizard ® Use adapter ring 11053221 or the adjustable bracket 429786 from accessories... -
Page 44: Optional Accessories
Operating manual Hydro Wizard ECM 63 ® 17) Optional accessories • Quick Mounting Bracket (Order no. 429821) • Adapter Ring (Order no. 11053221) • Flexible Mount (Order no. 429786) • Flow Conditioner Long (Order no. 428815) • Spacer (Order no. 11054593) •... -
Page 45: Spare Parts
• Impeller (Order no. 428200) • Power Cord EU (Order no. 429642) All Spare Parts for Hydro Wizard are available di- ® rectly from Panta Rhei. For further details please contact our Sales Ma- nagement or get information at: https://www.panta-rhei.shop... - Page 46 Operating manual Hydro Wizard ECM 63 ®...
- Page 47 Operating manual Hydro Wizard ECM 63 ®...
- Page 48 Hydro Wizard ® ECM 63 A product of PANTA RHEI Natural Aquarium Technology www.panta-rhei-aquatics.com...
Need help?
Do you have a question about the Hydro Wizard ECM 63 and is the answer not in the manual?
Questions and answers