Table of Contents
Advertisement
Quick Links
Advertisement
Table of Contents

Subscribe to Our Youtube Channel
Related Manuals for BERG KOMPBERG BSDF 30


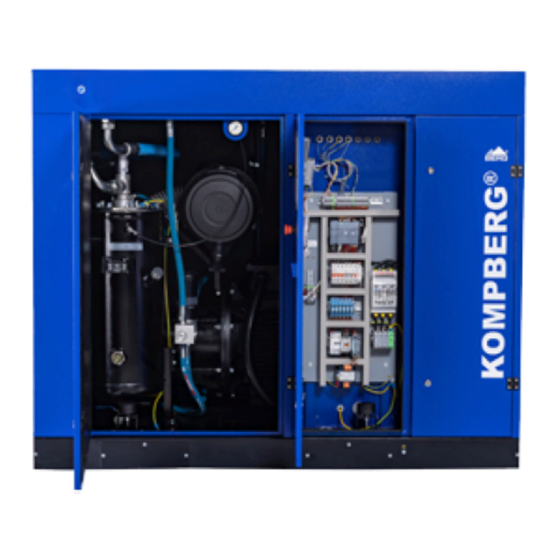
Summary of Contents for BERG KOMPBERG BSDF 30
- Page 1 OPERATING AND MAINTENANCE MANUAL Screw compressors KOMPBERG PART I 09.2019...
- Page 2 Ladies and Gentlemen, We heartily welcome you among our valued Customers and thank you for your trust to purchase the BERG compressor. We are sure you will be fully satisfied with both the choice you have made and the cooperation you started with us. Our compressors are machines of top quality, which is the guarantee for a long years and reliable performance.
-
Page 3: Table Of Contents
1. Information concerning the document ..............5 1.1. Scope and intended use of the manual ............... 5 1.2. Intended use of the compressor and conditions of safe use ........5 1.3. Qualification requirements for operation of the compressor........6 1.4. - Page 4 8.3.9 Pressure switch ..................... 35 8.3.10Oil temperature gauge(where applicable) ............36 8.3.11 Oil cooler / air cooler ..................36 8.3.12. Electric motor ....................36 8.3.13. Safety valve ....................37 8.3.14 Radial / axial fan ................... 39 9. Troubleshooting ..................... 41 10.
-
Page 5: Information Concerning The Document
1. Information concerning the document This operating and maintenance manual is an integral part of the machine. It includes the information necessary to start, operate and maintain the compressor and requirements for its safe operation. Following the manual rules will help you: ... -
Page 6: Qualification Requirements For Operation Of The Compressor
Follow the periodic inspection schedule during both warranty period and after its completion. Regular performance of periodic inspections is necessary to ensure the required reliability and life of the BERG equipment. The inspections performed according the schedule reduce the number of repairs and their cost. -
Page 7: Other Remarks And Instructions
2. Operating safety rules The present rules are valid for BERG screw compressors. In addition to the general health and safety at work and the Office of Technical Inspection (UDT) regulations applicable to compressors, their assemblies and accessories, the safety instructions given below should be followed in particular. -
Page 8: Basic Requirements For Safe Transport And Positioning Of The Screw Compressor
herein. No responsibility is also taken for failure to observe valid safety standards relating to the equipment and qualified staff. 2.1. Basic requirements for safe transport and positioning of the screw compressor In addition to the general health and safety at work and the Office of Technical Inspection (UDT) regulations, the following rules must be observed: Use only the lifting equipment that is compliant with the H&S and UDT regulations to lift the compressor. -
Page 9: Operating Safety Requirements
Fig. 2 Transport of the machine with a crane. 2.2. Operating safety requirements In addition to the requirements contained in the sections: Screw compressor operation description; Start up; Maintenance; the following rules should be observed. The compressor is only designed to compress air. All safety equipment must be in place while operating the machine. -
Page 10: Meaning Of Pictograms
Unit Residual risk Action Precautions Air cooler, guard, Avoid touching, wear Minor cuts Touching frame protective gloves Inserting sharp Do not insert any objects objects through the Fan guard and fan through the protection Injuries protection mesh mesh and do not put any when the fan is objects on it running. -
Page 11: Setting
To improve ventilation in the compressor room, the machine can be connected to the discharge air duct; in such case, please contact BERG. The suitable ventilation in a room will prevent the possibility of negative pressure generation or undesired temperature increase. - Page 12 The compressor must be supplied from the distribution board equipped with a slow blow fuse and circuit-breaker that enables the compressor power supply to be completely disconnected. Electrical connection of the compressor should be performed in accordance with the attached electrical diagram. Only authorised personnel or qualified electrician is allowed to perform electrical connections.
-
Page 13: Compressed Air Connection
Each BERG compressor should be connected to the compressed air network by using a flexible conduit or flexible connector (axial expansion joint) and shut-off valve. -
Page 14: Operation Description Of The Screw Compressor
5. Operation description of the screw compressor 5.1. Operation description of the screw compressors with microprocessor controller The compressor is started by pressing the START button on the controller. When the button is pressed, the compressor drive is started (the start can be delayed). During the initial start-up phase, the motor operates in the star configuration. -
Page 15: Operation Description Of The Screw Compressors With Inverter
5.2. Operation description of the screw compressors with inverter The compressor is started by pressing the START button on the controller - it is not necessary to start the inverter separately. When the button is pressed, the compressor drive is started. After a few seconds delay, the solenoid valve which controls the suction regulator is energized, and compressed air is supplied to the suction regulator actuator. -
Page 16: Ultra Speed Function - In Screw Compressors With Motor Power Of 5.5 Kw - 90 Kw And Frequency Converter
5.3. ULTRA SPEED function – in screw compressors with motor power of 5.5 kW - 90 kW and frequency converter This function regulate the speed so that the power currently consumed is close to the nominal power of the engine. This results in rotation speed increase and thus capacity increase at operating pressure lower then nominal pressure. - Page 17 dew point never decreases below 0 °C in order to prevent the condensate from freezing inside the evaporator. The dryer runs completely automatically. 1) REFRIGERANT COMPRESSOR 6) HOT GAS BYPASS VALVE 2) CONDENSER 7) REFRIGERANT FILTER 3) MOTOR FAN 8) EXPANSION CAPILLARY TUBE 4) EVAPORATOR 9) PRESSURE SWITCH 5) CONDENSATE DRAIN...
-
Page 18: Description Of The Dryer Maintenance
Fig. 8 Condensate drain in the compressor with dryer Fig. 7 Condensate drain in the compressor The condensate removed from the machine must be directed to the appropriate tank and then disposed in accordance with the applicable environmental protection regulations. Electrical system The dryer is connected directly to the compressor terminal block. -
Page 19: Op 65 - Op180 Dryers
5.6.1 OP 65 - OP180 dryers Clean the condensate drain filter and condenser every 1000 operating hours or once a year. Fig. 9 Refrigerant dryer. A) Cleaning the automatic condensate drain filter: Switch off the compressor by pressing the "STOP" button, ... - Page 20 OP180). 5.6.3 Troubleshooting and emergency repairs The operations marked with the symbol must be carried out by the BERG qualified service personnel or the service personnel authorised by BERG. Operating and Maintenance Manual 09/2019 – part I Screw compressors...
- Page 21 OP65-OP90 Possible basic DISPLAY FLASHING WARNING NOTES Explanations causes Dryer is working correctly Not applied Not applied The warning icon is NOT flashing, P1 symbol is Fan control sensor failure Replace the sensor flashing The warning icon is NOT PDP temperature sensor flashing, P2 symbol is Replace the sensor failure...
- Page 22 The error can be reset by pressing one of the four buttons of the controller. The controller must be replaced. When the “EE” alarm occurs, please contact the BERG service department. “SE” alarm When 2000 hours elapses, the controller will generate the “SE”...
-
Page 23: Start-Up
6. Start-up 6.1. Start-up preparation Each compressor unit is tested in the factory and carefully inspected to ensure proper machine performance and meeting the specifications declared. Strictly obey the following rules before starting the machine for the first time: Get thoroughly familiar with the compressor Operating and Maintenance Manual and the Warranty Book. -
Page 24: Restart (After Longer Downtime)
Connect the compressor to the compressed air system with a flexible conduit. A compressed air receiver tank is necessary for proper compressor operation. When the compressed air receiver tank is located outside the compressor room, install the pressure gauge, connected to the tank or pressure conduit supplying the tank, in a visible location. -
Page 25: Procedure In Case Of Compressor Self-Deactivation Or Shut Down By Using The Emergancy Stop
7. Procedure in case of compressor self-deactivation or shut down by using the emergancy stop. 7.1.Self-deactivation Read the information displayed on the controller and then follow the instructions in the user's manual. If the compressor has turned itself off and there are no messages on the controller: 1. -
Page 26: Maintenance And Inspections
Upon finishing the maintenance work, make sure no tools or other objects are left on or inside the compressor. Before restarting the machine after maintenance, check operating pressures, temperatures, time settings, and test the switching and control equipment for proper functioning. -
Page 27: Warranty And Post-Warranty Inspections
8.2.4 Warranty and post-warranty inspections Replace: • filter mat at the cooling air inlet, • air filter cartridge, • compressed air filter cartridges, • oil filter, • oil. Check: • the alignment of the pulleys, the condition and tension of the V-belts (where applicable) and tension them if necessary, •... -
Page 28: General Remarks
Every 12000 hours Carry out the same operations as in the inspection of operation or after 4 years from the every 6000 hours and additionally the following: purchase date (if the compressor Replace • has not operated contactors in electric installation. 12000 hours during 4 years) Every 15000 hours... -
Page 29: Basic Components Requiring Maintenance And Descriptions Of Maintenance Operations
8.3 Basic components requiring maintenance and descriptions of maintenance operations. 8.3.1. Air filter cartridge The cartridge is located in the complete air filter assembly mounted on the suction side of the screw block. Do not soak the filter cartridge in oil or other liquids. Maintenance procedure: Stop the compressor and close the pressure conduit valve. -
Page 30: Filter Mat
Cover Body Filtercartridge Fig.14 Replacement of the air filter cartridge in the compressors with motor power from 30 – 55kW. Cover Body Filter cartridge Fig. 15 Replacement of the air filter cartridge in the compressors with motor power from 75 kW to 315 kW. -
Page 31: Oil Filter
The need for an earlier replacement is indicated by the motor overload, too high oil temperature and, in extreme cases, activation of the safety valve. In the above cases, please consult the BERG service or authorised service centre listed in the Warranty Book. - Page 32 When the pressure difference between the compressed air and oil is above 0.1 MPa, change the separator, irrespective of the number of hours of operation. In the BERG screw compressors there are used two types of oil separators: internal one (fig. 16). External oil separator maintenance procedure: Stop the compressor and close the pressure conduit valve.
-
Page 33: Oil Level
Cover Seal Seal Fig. 18 Internal separator. 8.3.5. Oil level The proper oil level in the oil tank or screw block is of critical importance for reliable and correct operation of the compressor. Oil level indicator Fig. 19 Oil level in the compressors. Maintenance procedure: Stop the compressor and close the pressure conduit valve. -
Page 34: Water Condensate Draining
The oil level should be checked when the compressor is switched off and pressure has dropped to ambient pressure. 8.3.6. Water condensate draining The presence of water condensate in oil has a significantly unfavourable effect on the operating safety and life of the screw compressor. Warranty claims shall be excluded if excessive wear or damage of the bearings caused by water contained in oil is found. -
Page 35: Handling Wastes Produced While Operating The Compressors
Always use the same brand and type of oil for topping up. RECOMMENDATIONS CONCERNING OIL BERG KOMPRESSOREN GmbH recommends to use only the PNEUMOIL ST68 synthetic oil. As the compressor manufacturer we have selected the oil with optimal properties to ensure the proper protection of the compressors, maintain technical parameters and prolong their life. -
Page 36: 10Oil Temperature Gauge(Where Applicable)
8.3.10 Oil temperature gauge(where applicable) The oil temperature gauge is installed on the control panel. It monitors the permissible compressor oil operating temperature that is factory set to 110°C (red mark). When that temperature is reached, the compressor power supply circuit is interrupted. The system switches off automatically. -
Page 37: Safety Valve
Periodic motor inspections: The motor inspection should be performed at least once per 2 years. The inspection should be performed by the in-house personnel or properly qualified personnel from specialized companies. Any repairs or special inspections should be performed by the specialised workshop or the manufacturer service. - Page 38 Fig. 20 Direction of releasing the safety valve. Valve lever Safety valve Fig. 21 Direction of releasing the safety valve. During the safety valve operation (when the compressed air is blown out through it) loud noise is generated. When any maintenance operations are carried out, you must wear hearing protection and safety clothes protecting against air stream.
-
Page 39: Radial / Axial Fan
The safety valves are only intended for protection of: pressure tanks, compressed air conduits or other neutral gases, sources of compressed air from an excessive increase in pressure (above the limit for that type of equipment). The safety valves must not be used as relief devices for pressure adjustment. - Page 40 Hours of operation until the performance of service operations Motor power Bearing type Hours of operation Operations 0.75 kW Maintenance-free 40000 h Replacement 1.5 kW Maintenance-free 40000 h Replacement 4 kW Maintenance-free 40000 h Replacement 5.5 kW Maintenance-free 40000 h Replacement 7.5 kW Maintenance-free...
-
Page 41: Troubleshooting
Activation of the main protection Check the protection, replace it with the new one when it is faulty. In other case, contact the BERG service or authorised service centre listed in the Warranty Book. Incorrect phase sequence... - Page 42 Replace with the new one (during the Too low delivery warranty period, any defects/ pressure replacement needs must be reported to the BERG service or authorised service centre listed in the Warranty Book). Dirty air filter Clean or replace the air filter cartridge, if necessary.
- Page 43 Troubleshooting is included in the attached operating manual of the Malfunction of inverter. In case of any malfunctions, contact the BERG service or the inverter authorised service centre listed in the Warranty Book. Operating and Maintenance Manual 09/2019 – part I...
-
Page 44: Appendices
10. Appendices 10.1. Compressor with the heating system–guidelines concerning operation This appendix is the addition to the Operating and Maintenance Manual of the BERG series screw compressor and the requirements, specified in it, are only completion to the requirements given in the Operating and Maintenance Manual. -
Page 45: Compressor With Additional Water Cooling
10.2. Compressor with additional water cooling 10.2.1. Water connection When the compressor is positioned at the operation location, connect the cooling water tubes to the appropriately marked ports in the compressor wall or frame. To adjust flow, install the ball valve on the outlet port. The required water temperature at the inlet is 20±5ºC. -
Page 46: Condensate Drains
11. Condensate drains Condensate drains in the compressors on the air receiver models It is possible to use the automatic condensate drain in the compressors installed on the air receiver. There are installed the timer controlled condensate drains with the possibility of setting the condensate drain frequency and time and electronic condensate drains. - Page 47 PART II Technical data Construction of the screw compressor Consumables Electric diagram Operating manual of the controller Operating and Maintenance Manual 09/2019 – part I Screw compressors...
Need help?
Do you have a question about the KOMPBERG BSDF 30 and is the answer not in the manual?
Questions and answers