Sofar solar ME 3000SP User Manual
Energy storage inverter
Hide thumbs
Also See for ME 3000SP:
- User manual (25 pages) ,
- User manual (64 pages) ,
- User manual (41 pages)

Related Manuals for Sofar solar ME 3000SP


Summary of Contents for Sofar solar ME 3000SP
- Page 1 User manual Energy Storage Inverter Product Model: ME 3000SP S h e n z h e n S O FA R S O L A R C o . , L t d .
-
Page 2: Table Of Contents
ME 3000SP User manual Contents Preface....................... II 1. ME 3000SP Introduction................- 1 - 2. Safety Notes....................- 2 - 2.1. Safety Notes..................- 2 - 2.2. Installation and Maintenance Notes..........- 2 - 2.3. Signs on the inverter............... - 3 - 3. Installation....................- 5 - 3.1. - Page 3 ME 3000SP User manual Notice This manual contains important safety instructions that must be followed during installation and maintenance of the equipment. Save these instructions! This manual must be considered as an integral part of the equipment.The manual must always accompany the equipment,even when it is transferred to another user or field.
-
Page 4: Preface
Scope This product manual describes the installation,electrical connections,commissioning,maintenance and troubleshooting of ME 3000SP inverters. Keep this manual where it will be accessible at all times. Target Group This manual is intended for qualified electrical technical personnel who are responsible for inverter installation and commissioning in the PV power system and PV plant operator. - Page 5 ME 3000SP User manual Danger indicates a hazardous situation which,if not avoided,will result in death or serious injury. Danger Warning indicates a hazardous situation which,if not avoided,could result in death or serious injury. Warning Caution indicates a hazardous situation which,if not avoided,could result in minor or moderate injury.
-
Page 6: Me 3000Sp Introduction
1. ME 3000SP Introduction ME 3000 SP is an AC coupled bi-directional battery converter.Customers can purchase batteries&ME 3000SP as an energy storage add-on to his/her existing renewable energy system.ME3000SP helps to achieve optimal usage of renewable energy.ME 3000SP controls bi-directional flow of electric power,work under auto or time-of-use(TOU)modes,charge/discharge the battery when needed. -
Page 7: Safety Notes
ME 3000SP to cool down before maintenance. Keep children away from batteries&ME 3000SP. It’ s not allowed to open the front cover of ME 3000SP.This will void the product warranty. ME 3000SP damaged by improper installation/operation is not covered ... -
Page 8: Signs On The Inverter
ME 3000SP User manual ME3000SP/batteries shall be placed in a well-ventilated place.Do not put the ME3000SP/batteries in an airtight or badly ventilated place or cabinet.This can be very harmful to system performance&system service life. Keep ME3000SP/batteries away from direct sunshine.Don ’ t put ... - Page 9 ME 3000SP User manual read and understand the content of the symbols before system installation. This symbol indicates a hazardous situation which could result in injuries,if not avoided. Risk of Electric Shock and wait at least 5 mins after switching OFF inverter.
-
Page 10: Installation
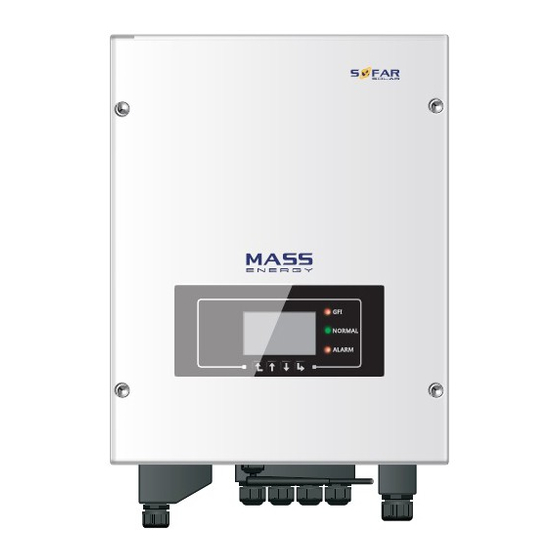
ME 3000SP User manual 3. Installation 3.1. Product Overview ME 3000SP is 100%strictly inspected before package and delivery.It is forbidden to put ME 3000SP upside down during delivery. Please check the product package and fittings carefully before installation. CAUTION Please check the product package and fittings carefully before installation. -
Page 11: Packing List
ME 3000SP User manual 3.2. Packing List Inspect the package and fittings carefully before installation.You should have the following fittings: Table3-1 Components and mechanical parts that should be delivered Picture Description Quantity Inverter 1pcs Mounting Bracket 1pcs AC terminal 6pcs... - Page 12 ME 3000SP User manual M6 flat washer 8pcs Expansion Bolts 8pcs Terminal cap 4pcs CT terminal 2pcs 2pcs Communication cable 1pcs User Manual 2pcs Warranty card 1pcs Quality Certificate 1pcs - 7 - Copyright © Shenzhen SOFARSOLAR Co., Ltd...
-
Page 13: Installation Environment
ME 3000SP User manual 3.3. Installation Environment Choose a dry,clean,and tidy place,convenient for installation Ambient temperature range:-25℃~60℃ Relative humidity:0~100%(non-condensed) Inverter shall be installed in a well-ventilated place No flammable or explosive materials close to inverter ... -
Page 14: Installation Position
Operators wear respirator 3.5. Installation Position ME 3000SP inverter should be vertically mounted(to ensure fast heat dissipation),please choose a position without direct sunlight/snow accumulation to install ME 3000SP inverter.Please the installation position is well-ventilated. Fig.3-2 Installation Position of ME 3000SP inverter - 9 - Copyright ©... -
Page 15: Mount Me 3000Sp
ME 3000SP User manual 3.6. Mount ME 3000SP Fig.3-3 Mount ME 3000SP Step 1:Put the mounting bracket properly on the wall,mark these 8 drill holes using a marker pen.Drill 8 holes(drill bit 6mm)on the wall. Step 2:Insert the expansion screw vertically into the hole,note the insertion depth.(not too shallow or too deep) - Page 16 ME 3000SP User manual Step 4:Put ME 3000SP inverter on the mounting bracket. Step 5:Earth ME 3000SP inverter using the grounding hole on the heat sink. Step 6:OPTIONAL:you can lock ME 3000SP inverter to the mounting bracket. - 11 -...
-
Page 17: Electrical Connection
ME 3000SP User manual 4. Electrical Connection Be aware of electric shock and chemical hazards! WARNING Use a multi-meter to check the DC polarity before connecting the DC power cable between battery&ME3000SP. It’s recommended to install a rotary DC isolator(100A)between ... -
Page 18: Battery Connection
ME 3000SP User manual 4.1. Battery Connection Fig.4-2 Battery connection(Measure battery wires polarity/voltage before connection) Step 1:Loosen 4 screws(A)using a screwdriver(Fig.4-2); Step 2:Remove the waterproof cover(B),loosen the cable gland(C),and then remove the stopper(G); Step 3:Route the battery wires(F)through the cable gland,then connect battery wires using OT terminal(E);... - Page 19 ME 3000SP User manual ① ② 1.White and orange 2.Orange 3.White and green 4.Blue 5.White and blue 6.Green 7.White and brown 8.Brown ③ ④ The logic interface pin definitions and circuit connections are as follows: Logic interface pin are defined according to different standard requirements (a)Logic interface for AS/NZS 4777.2:2015,also known as inverter demand...
- Page 20 ME 3000SP User manual limit the inverter’s output power. The inverter can be connected to a RRCR(Radio Ripple Control Receiver)in order to dynamically limit the output power of all the inverters in the installation. Fig.4-4 Inverter–RRCR Connection Table 4-2 Function description of the terminal Pin NO.
-
Page 21: Ct/Rs485/Ntc Connection
4.3. CT/RS485/NTC connection CT(Current transformer)can measure the value and direction of AC current.Refer to Fig.4-7 for the correct connection of CTa. Fig.4-6 Schematic Diagram(ME 3000SP:energy storage add-on to existing renewable system) - 16 - Copyright © Shenzhen SOFARSOLAR Co., Ltd... - Page 22 ME 3000SP User manual Step 1:Location of CTa:L wire of incoming mains.Location of CTpv:L wire of PV inverter’s output. Step 2:Use network cable&terminal caps to extend CT wires. CT wire Extension cable(network cable) ME 3000SP Orange/white orange/brown/white brown Black Green/white green/blue/white blue Fig.4-7 CT/RS485/NTC connection...
- Page 23 ME 3000SP User manual CT wire extension① ② ③ ④ Step 3:Loosen 4 screws(part A)using a screwdriver(fig.4-7②) Step 4:Remove the waterproof cover(part B),loosen the cable gland(part C),then remove the stopper(part G) Step 5:Route CT cable through the cable gland,connect CT cable to CT terminal,then insert CT terminal into corresponding ports.
-
Page 24: Grid Connection
ME 3000SP User manual PYLONTECH US2000 PLUS/US2000B CAN port Note:Please confirm with representative of PYLONTECH that your battery is compatible with ME3000SP. Step 7:Connect NTC for lead acid batteries only: Fig.4-8 NTC connection Step 8:Fasten the waterproof cover using 4 screws. -
Page 25: Critical Load Connection(Eps Function)
③ ④ 4.5. Critical Load Connection(EPS function) Critical load:in case of grid outage,if EPS function is enabled,ME 3000SP will work in EPS(Emergency Power Supply)mode,discharge the battery&supply power to critical load via LOAD port. LOAD port is only for critical load connection.Please make sure you’ve purchased the AC contactor from Shenzhen SOFARSOLAR Co.,Ltd. - Page 26 ME 3000SP User manual ① ② AC contactor front view,top view,and connection③ Critical load connection(AC contactor:2 NC,2 NO)④ - 21 - Copyright © Shenzhen SOFARSOLAR Co., Ltd...
- Page 27 ME 3000SP User manual 4.6. WiFi/GPRS/Ethernet module installation procedure NOTE:GPRS and Ethernet is optional and is not suitable for all countries. Step1:Remove WiFi/GPRS/Ethernet waterproof cover using screw driver. Step2:Install WiFi/GPRS/Ethernet module. Stpe3:Fasten WiFi/GPRS/Ethernet module using screws. Fig.4-11 WiFi/GPRS/Ethernet module installation...
-
Page 28: Buttons And Indicator Lights
ME 3000SP User manual 5. Buttons and indicator lights Fig 5-1.Buttons and indicator lights 5.1. Buttons press“Back”to the previous screen or enter the main interface. press“Up”to the upper menu option or value plus 1. press“Down”to the lower menu option or value minus 1. -
Page 29: Status Of Me3000Sp
ME 3000SP User manual 5.3. Status of ME3000SP Discharging Charging Alarm Red Status of ME3000SP Green light Green light light Discharge Check discharge Flashing Charge Check charge Flashing Standby Flashing Flashing EPS state Some events in current event list - 24 -... -
Page 30: Operation
ME 3000SP User manual 6. Operation 6.1. Double Check Please double check the following before operation. ME3000SP is firmly fastened to the mounting bracket on the wall; The polarity of battery wires is correct,battery wires are firmly connected; DC isolator is correctly connected between battery&ME3000SP,DC isolator:OFF;... - Page 31 ME 3000SP User manual 2)Set country 9)*Set max discharge current 3)Select battery type 10)*Set min protect voltage 4)*Set battery capacity 11)*Set discharge depth 5)*Set max charge voltage 12)*Set empty discharge voltage 6)*Set max charge current 13)*Set full charge voltage 7)*Set max protect voltage Note:4)*to 13)*settings are only for DEFAULT battery type.
- Page 32 ME 3000SP User manual Please consult qualified electrical engineer or personnel from electrical safety authorities about this. Shenzhen SOFARSOLAR Co.,Ltd.is not responsible for any consequences arising out of incorrect country code selection. 3)Select battery type Press“Up”or“Down”to select your battery type,then press“Ok”to complete the battery type setting.
-
Page 33: Commissioning
ME 3000SP User manual digit.After changing protect voltage your battery specification,press“Ok”,then“Set min discharge voltage”will pop up. 8)*Set min discharge voltage(only for DEFAULT battery type) Press“Up”or“Down”to change the 1 digit,press“OK”to switch to next digit.After changing discharge voltage your battery specification,press“Ok”,then“Set max discharge current”will pop up. -
Page 34: Menu
ME 3000SP User manual If you didn’ t change the work mode of ME3000SP,which means ME3000SP is working in“Auto Mode”: While“PV Production”>“Home Consumption”(fig 6-1) If the battery is not full.ME3000SP will charge the battery. While“PV Production”<“Home Consumption”(fig 6-1) If the battery is not flat.ME3000SP will discharge the battery. - Page 35 ME 3000SP User manual 6.4.1. Enter setting 1.Enter Setting Press“OK” 1.Battery Parameter 9.Set EPS Mode 2.Clear Energy Data 10.Logic interface “Up”↑ 3.Clear Events 11.Auto Test(For Italian Market Only) 4.Set Country 12.Work Mode Set “Down”↓ 5.Set Communication 13.CTpv Scale Factor 6.Function to Set Country 14.CT Direction...
- Page 36 ME 3000SP User manual Discharge Depth EPS Discharge Depth Press“up”or“down”to change the 1 digit,press“ok”to switch to next digit.Input the value of Discharge Depth&EPS Discharge Depth per battery specification.Press“OK”. For example:if Discharge Depth=50%&EPS Discharge Depth=80%. While electric grid is connected:ME3000SP won’t discharge the battery when its SOC is less than 50%.
- Page 37 ME 3000SP User manual Select“6.Min.Discharge(V)”and press“OK”.Press“up”or“down”to change the 1st digit,press“ok”to switch to next digit.Input the value of Min.Discharge(V)per battery specification.Press“OK”. 10) *Empty Discharged(V)(only for DEFAULT battery type) Select“10.Empty Discharged(V)”and press“OK”.Press“up”or“down”to change the 1st digit,press“ok”to switch to next digit.Input the value of Empty Discharged Voltage per battery specification.Press“OK”.
- Page 38 ME 3000SP User manual Select“1.Communication Addr.”,then press“OK”to Set Communication Addr.,press“Up”or“Down”to change the 1st digit,press“OK”to switch to next digit,and press“OK”. (2) Baudrate Select“2.Baudrate”,then press“OK”to Set Baudrate,press“Up”or“Down”to change Baudrate and press“OK”. (3) Databits Select“3.Databits”,then press“OK”to Databits,press“Up”or“Down”to change Databits and press“OK”. (4) Parity Select“4.Parity”,then press“OK”to set Parity,press“Up”or“Down”to select...
- Page 39 ME 3000SP User manual password“0001”,press“Up”or“Down”to change the 1 digit,press“OK”to switch to next digit,when“0001”is shown screen,press“OK”.Then press“up”or“down”to select“1.Enable”or“2.Disable”,press“OK”. 11. Auto Test(ONLY for Italian Market) Select“11.Auto Test”,press“OK”to enter autotest interface. 11.Auto Test Press“OK” 1.Autotest Fast 2.Autotest STD “Up”↑ 3.QF Time Setting 4.QV Time Setting “Down”↓...
- Page 40 ME 3000SP User manual ↓ Wait Test 81<S1 OK! ↓ Wait Testing 81<S2... ↓ Wait Test 81<S2 OK! ↓ Press“Ok” Auto Test OK! ↓ Press“Down” 59.S1 threshold 253V 900ms ↓ Press“Down” 59.S1:228V 902ms ↓ Press“Down” 59.S2 threshold 264.5V 200ms ↓...
- Page 41 ME 3000SP User manual 81<.S2 50.1Hz 107ms Autotest STD Select“2.Autotest STD”,then press“OK”to start Auto test STD. The test procedure is same as Autotest Fast,but it’s much more time consuming. PF Time Setting Select“3.PF Time Setting”,then press“OK”.The following will be shown on the display: Set:*.***s...
- Page 42 ME 3000SP User manual generation~=LOAD generation>LOAD consumption(ΔP<100W),ME3000SP will consumption,the surplus power will be stay in Standby state. stored in the battery. When the battery is full(or already at generation<LOAD Max Charge Power),excess power will be consumption,ME3000SP will discharge the exported to the grid.
- Page 43 ME 3000SP User manual mode interface. Set Time-of-use Mode Rules.0:Enabled From To SOC Charge 02h00m-04h00m 070%1000W Effective date Dec.22-Mar.21 Weekday select Mon.Tue.Wed.Thu.Fri.Sat.Sun. If electricity is more expensive in high demand time(peak rate)&electricity is much cheaper in low demand time(off-peak rate).
- Page 44 ME 3000SP User manual Charge Start 22 h 00 m Charge End 05 h 00 m Charge Power 2000 W DisCharge Start 14 h 00m DisCharge End 16 h 00m DisCharge Power 2500 W 4) Set Passive Mode Select“4.Set Passive Mode”,and then press“OK”.
- Page 45 6.4.2. Event List 2.Event List Press “OK” 1.Current Event List 2.History Event List Event list of ME 3000SP,including current event list and history event list. 1) Current Event List Select“1.Current Event List”,press“OK”to check the current events. 2) History Event List Select“2.History Event List”,press“OK”to...
- Page 46 Select“4.Software Update”,press“OK”,“input password”is shown.Input the password(”0715”),press“Up”or“Down”to change the 1 digit,press“OK”to switch to next digit,when“0715”is shown on the screen,press“OK”.ME 3000SP will start to upgrade the software automatically. Detailed Firmware Upgrade Procedure: Step 1 Turn off AC circuit breaker(grid)and DC isolator(battery),then remove - 41 - Copyright ©...
- Page 47 Step 7 After finishing firmware upgrade,turn off AC circuit breaker(grid)and DC isolator(battery),lock the communication waterproof cover with four screws,then turn on DC isolator(battery),wait 5 seconds,turn on AC circuit breaker(grid),ME 3000SP will start to operate automatically. NOTE:If“DSP communicate fail”,“Update DSP1 Fail”of“Update DSP2 Fail”is...
- Page 48 ME 3000SP User manual unsuccessful,please turn off AC circuit breaker(grid)and DC isolator(battery),wait 5 minutes,then start again from“Step 5”. 6.4.5. Energy Statistic 5.Energy Statistics Today/Week/Month/Year/Lifetime Renewable **.**KWh Self-Use **.**KWh **.*% Export **.**KWh Load **.**KWh Self-Use **.**KWh **.*% IMport **.**KWh Select“5.Energy Statistic”,press“OK”to enter Energy Statistic interface,it shows the energy generation and consumption within a certain range of time.Press“Up”or“Down”to check the daily/weekly/monthly/yearly/lifetime energy...
-
Page 49: Troubleshooting
ME 3000SP User manual 7. Troubleshooting This section contains information and procedures for solving possible problems with the inverter. This section help users to identify the inverter fault.Please read the following procedures carefully: Check the warning,fault messages or fault codes shown on the ... - Page 50 ME 3000SP User manual Code Name description solution The power grid voltage is If the alarm occurs occasionally,the possible ID01 GridOVP too high cause is that the electric grid is abnormal occasionally.ME3000SP automatically The power grid voltage is ID02 GridUVP...
- Page 51 ME 3000SP User manual hardware protection circuit breaker,wait for 5 minutes,then turn ON the DC isolator and turn ON the AC Boost voltage is too high HW_Boost circuit breaker.Check whether the problem is ID10 triggered _OVP solved.If no,please contact SOFAR technical hardware protection support.
- Page 52 ME 3000SP User manual the master DSP and slave support. DSP is not consistent The Dci sampling value ConsistentF between the master DSP ID51 ault_DCI and slave DSP is not consistent ME3000SP can’t communicate with Lithium battery BMS correctly. Make sure the battery you’re using is compatible with ME3000SP.
- Page 53 ME 3000SP User manual unrecoverR Relay happen ID77 elayFail permanent fault Please make sure ME3000SP is installed place without direct sunlight/other heat source. Please make sure ME3000SP is Over Internal temperature is ID81 installed in a well-ventilated place. temperature too high.
- Page 54 ME 3000SP User manual ID99 Wifi fault The Wifi is error Just for alarm in factory. Battery over current ID100 BatOCD discharging protect ID100-ID103 is battery fault.If this fault Discharging short circuit ID101 BatSCD occurs occasionally,wait few minutes to see protect whether the problem is solved.
- Page 55 ME 3000SP User manual - 50 - Copyright © Shenzhen SOFARSOLAR Co., Ltd...
-
Page 56: Technical Data
ME 3000SP User manual 8. Technical Data Model ME3000SP Battery Parameters Battery Type Lead-acid,Lithium-ion Nominal battery voltage Battery voltage range 42-58V Recommended battery capacity 200Ah(100–500 Ah optional) Recommended storage capacity 9.6 kWh Max charge current Charge current range 0–60A programmable... - Page 57 ME 3000SP User manual Current transformer connection Hard wired General data Noise <25dB Weight 16kg Cooling Natural convection Dimensions(W*H*D) 532 x 360 x 173 mm Display LCD display Warranty 5 years EPS(Emergency Power Supply)data EPS rated power 3000VA EPS nominal voltage/frequency...
-
Page 58: Quality Assurance
ME 3000SP User manual 9. Quality Assurance Standard warranty period The standard warranty period of inverter is 60 months(5 years).There are two calculation methods for the warranty period: 1. Purchase invoice provided by the customer:the first flight provides a standard warranty period of 60 months(5 years)from the invoice date;... - Page 59 ME 3000SP User manual The"warranty card"has not been sent to the distributor or our company; Without the consent of our company to change equipment or replace parts; Use unqualified materials to support our company's products,resulting in product failure; Technicians of non-company modify or attempt to repair and erase the product serial number or silk screen;...
- Page 60 ADD: 401, Building 4, AnTongDa Industrial Park, District 68,XingDong Community, XinAn Street, BaoAn District, Shenzhen, GuangDong.P.R. China Email: service@sofarsolar.com Tel: 0510-6690 2300 Web: www.sofarsolar.com...
Need help?
Do you have a question about the ME 3000SP and is the answer not in the manual?
Questions and answers
Solar inverter no work fault 17 so
K solar inverter