
Related Manuals for Sofar solar SOFAR 75KTL


Summary of Contents for Sofar solar SOFAR 75KTL
- Page 1 User manual Solar Grid-tied Inverter Product Model: SOFAR 75K~136KTL S h e n z h e n S O FA R S O L A R C o . , L t d .
-
Page 2: Table Of Contents
75-136KTL User Manual Preface ................................II 1. Basic Safety Information........................- 1 - 1.1. Requirement for Installation and Maintenance............- 1 - 1.2. Symbols and signs ....................- 4 - 2. Product Characteristics......................... - 7 - 2.1. Intended Use ......................- 7 - 2.2. -
Page 3: Preface
75-136KTL User Manual Preface Notice The products, services or features you purchased shall be subject to the company's commercial contracts and terms. All or part of the products and services described in this document may not within the scope of your purchase. Unless additional terms and conditions in your contract, the company does not make any statement or guarantee on the contents of this document. - Page 4 This manual is an integral part of SOFARSOLAR 75KTL to 136KTL. It describes the assembly, installation, commissioning ,maintenance and failure of the product. Please read it carefully before operating. Scope of Validity This manual contains important instructions for: SOFAR 75KTL SOFAR 80KTL SOFAR 100KTL SOFAR 110KTL SOFAR 100KTL-HV SOFAR 125KTL-HV...
-
Page 5: Basic Safety Information
75-136KTL User manual 1.Basic Safety Information Outlines of this Chapter Please read the instruction carefully. Faulty operation may cause serious injury or death . If you have any question or problem when you read the following information, please contact Shenzhen SOFARSOLAR CO., Ltd. - Page 6 75-136KTL User manual Qualified Person When inverter is working, it contains lethal voltages and went hot in some area. Improper installation or misoperation could cause serial damage and injury. To reduce the risk of personal injury and to ensure the safe installation and operation of the product, only a qualified electrician is allowed to execute transportation, installation, commissioning and maintenance.
- Page 7 75-136KTL User manual Transportation Requirement Inverter is in the good electrical and physical condition when it ship out from factory. During transport, inverter must be placed in its original package or other proper package. Transportation company should responsible for any damage during transport period.
-
Page 8: Symbols And Signs
75-136KTL User manual Maintenance and repair Before any repair work, turn OFF the AC circuit breaker between the inverter and electrical grid first, then turn OFF the DC switch. After turning OFF the AC circuit breaker and DC switch wait for at Danger least 5 minutes before carry any maintenance or repair work. - Page 9 75-136KTL User manual PV array should be grounded in accordance to the requirements of the local electrical grid company Attention Ensure the maximum DC voltage input is less than the maximum inverter DC voltage (including in low temperature condition). Any damage cause by overvoltage, SOFARSOLAR will not take the Warning responsibility including warranty...
- Page 10 75-136KTL User manual Read all documentation supplied with Observe the documentation the product before install Positive pole and negative Positive pole and negative pole of the pole input voltage (DC) Indicated the temperature allowance Temperature range RCM (Regulatory Compliance Mark) The product complies with the RCM logo requirements of the applicable...
-
Page 11: Product Characteristics
75-136KTL User manual 2.Product Characteristics Outlines of this Chapter Product Dimensions Introduce the filed of use and the dimensions of the product Function Description Introduce working principle and internal components Efficiency Curves Introduce the efficiency curves of the product 2.1. Intended Use SOFAR 75~136KTL is a transformerless on grid PV inverter, that converters the direct current of the PV array to the grid-compliant, three-phase current and feeds into the utility grid. - Page 12 75-136KTL User manual Supported grid types - 8 - Copyright © Shenzhen SOFARSOLAR Co., Ltd...
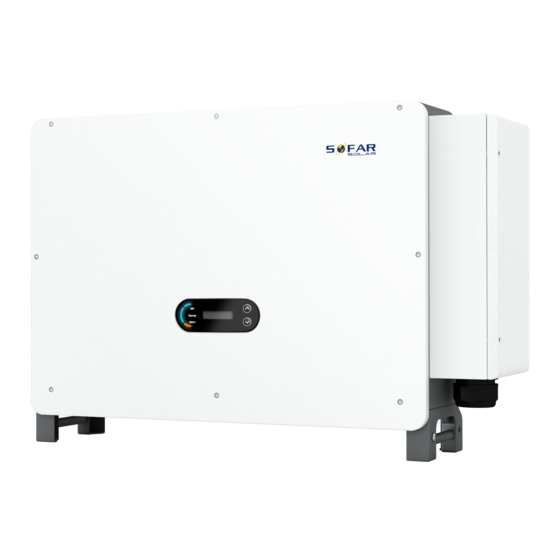
- Page 13 75-136KTL User manual Product Dimensions The choice of optional parts of inverter should be made by a qualified technician who knows the installation conditions clearly. Dimensions Description SOFAR 75~136KTL L×W×H=995.5*663.5*368mm Figure 2-2 Product front view and left view dimensions - 9 - Copyright ©...
-
Page 14: Function Description
75-136KTL User manual Figure 2-3 Product back view and bracket dimensions Labels on the equipment Note: label must NOT be hidden with objects and extraneous parts (rags, boxes, equipment, etc.,); they must be cleaned regularly and kept visible at all times. Figure 2-4 Product label 2.2. - Page 15 75-136KTL User manual Board. AC power is filtered through Output Board then AC power is fed into the grid. Output Board also offer functions such as grid voltage/ output current detection, GFCI and output isolation relay. Control Board provides the auxiliary power, controls the operation state of inverter and shows the operation status by Display Board.
-
Page 16: Electrical Block Diagram
PV array to grid-compliant, three phase current and feeds in into the utility grid. Both DC and AC side has Surge Protection Device (SPD). Figure 2-4 Schematic diaram For SOFAR 75KTL/SOFAR 80KTL/SOFAR 100KTL/SOFAR 110KTL - 12 - Copyright © Shenzhen SOFARSOLAR Co., Ltd... -
Page 17: Efficiency And Derating Curve
75-136KTL User manual Figure 2-5 Schematic diaram (without N line) For SOFAR 100KTL-HV SOFAR 125KTL-HV SOFAR 136KTL-HV 2.4. Efficiency and derating curve - 13 - Copyright © Shenzhen SOFARSOLAR Co., Ltd... -
Page 18: Others
75-136KTL User manual 2.5. Others ● Initial short-circuit AC current is 756.7A-peak - 14 - Copyright © Shenzhen SOFARSOLAR Co., Ltd... - Page 19 75-136KTL User manual ● As indicated in VDE-AR-N 4105:2018-11, section 6 (Construction of the power generation system/network and system protection (NS protection), the requirements for the network and system protection differ depending on the maximum apparent power(SAmax ) of the generating and storage units connected to the same ∑SAmax network connection point.
-
Page 20: Inverter Storage
75-136KTL User manual 3.Inverter Storage If inverter is not installing immediately, storage condition need meet below requirements: Place inverter into the original package and leave desiccant inside, sealed tight with taps. Keep the storage temperature around -40℃~70℃, Relative humidity 0~95%, ... -
Page 21: Installation
75-136KTL User manual 4.Installation Outlines of this Chapter This topic describes how to install this product, please read carefully before install. Do NOT install the product on flammable material. Do NOT store this product in potentially explosive atmospheres. Dangers The enclosure and heat sink will get hot during operation, please do not mount the product at a easy to reach location. - Page 22 75-136KTL User manual After unpacking, please check according to following table, to see whether all the parts were included in the packing, please contact your distributor immediately if anything missing or damage. Figure 4-1Components and mechanical parts that inside the package Pictures Description Quantity...
-
Page 23: Tools
75-136KTL User manual M10*90Hexagon 4 pcs screws M6*30 Hexagon 2 pcs screws Manual 1 pcs Warranty Card 1 pcs Outgoing inspection 1 pcs report Quality Certificate 1 pcs COM 16pin connector 1 pcs 4.3. Tools Prepare tools required for installation and electrical connection as following table: - 19 - Copyright ©... - Page 24 75-136KTL User manual Figure 4-2 Installation tools Tool Description Function Hammer Drill Recommend Used to drill holes on the wall drill @ 10mm Use to tighten and loosen screws when installing AC Screwdriver power cable Use to remove AC connectors from the product Removal Tool Remove PV Connector...
- Page 25 75-136KTL User manual M6 use to uninstall and install the front top cover and down cover Connect AC connector Torque wrench Use to crimp cable on grid Crimping Tool side, load side extensive cable Check grounding cable, PV Multimeter positive and negative pole Marker Mark signs Measuring...
-
Page 26: Determining The Installation Position
75-136KTL User manual Installer wear when installing Safety goggles product Installer wear when installing Mask product 4.4. Determining the Installation Position Select a appropriate location to install the product to make sure the inverter can work in a high efficiency condition. When selecting a location for the inverter, consider the following: Note: Install vertical or backward tilt within 0-75°, Do not install forward or upside down! - Page 27 75-136KTL User manual Figure 4-2 Clearance for single inverter Note: Other requirement for install position: Install position should obstruct the disconnect of power Place inverter in an appropriate bearing capacity objects Location should be avoid touch by children - 23 - Copyright ©...
- Page 28 75-136KTL User manual Figure 4-3 Clearance for multiple inverters - 24 - Copyright © Shenzhen SOFARSOLAR Co., Ltd...
-
Page 29: Moving Of Inverter
75-136KTL User manual 4.5. Moving of inverter 4.5.1 Manual handling Unload the inverter from package, horizontally move to the install position. When open the package, at least two operator insert the hands into the slots on both side of the inverter and hold the handles. Figure 4-4 Move inverter from package Keep the balance when lift the inverter. - Page 30 75-136KTL User manual Figure 4-5 auxiliary handle position 4.5.2 Lifting Equipment Tighten the screws of two M12 rings into the inverter sides according to the instruction diagram below (Note: M12 rings need self-preparation). Figure 4-6 Installation of Rings Fastened and tied the rope through two rings. Lifting inverter 50mm above ground by using lifting equipment, check the tightening device of the hoisting ring and rope.
-
Page 31: Installation
75-136KTL User manual Keep balance when lifting the inverter, avoid to crash on wall or other objective Stop working in bad weather condition such as raining, heavy fog, winding Attention 4.6. Installation 4.6.1 Installed on wall: Step 1: Placed the rear panel on the mounting wall, determine the mounting height of the bracket and mark the mounting poles accordingly. - Page 32 75-136KTL User manual Figure 4-8 Drilling holes on the mounting wall Step 2: Insert the expansion bolt vertically into the hole; Figure 4-9 Screws into the holes Step 3: Align the rear panel with the hole positions, fix the rear panels on the wall by tightening the expansion bolt with the nuts Figure 4-10 Install rear panel Step 4: Lift the inverter and hang it on the rear panel,and fixing both side of...
- Page 33 75-136KTL User manual Figure 4-11 Fix inverter 4.6.2 Bracket Installation: Step 1: Use wall mount bracket, ensure the pole position are in same level by using level rule and take a mark with maker. - 29 - Copyright © Shenzhen SOFARSOLAR Co., Ltd...
- Page 34 75-136KTL User manual Figure 4-12 Ensure hole position Step 2: Drilling hole by using Hammer Drill, recommend to do a stain proofing Figure 4-13 Drilling holes Step 3: Use M10 screw and M10 flat washer to secure the wall bracket(Note: M10*50 screw and M10 flat washer need self-preparation)...
- Page 35 75-136KTL User manual Note: If height between ground and bracket is less than 1.3m, use auxiliary handle for installation. Otherwise, use lifting equipment. Figure 4-15 Installation position of auxiliary handle - 31 - Copyright © Shenzhen SOFARSOLAR Co., Ltd...
-
Page 36: Electrical Connection
75-136KTL User manual 5.Electrical Connection Outlines of this Chapter This section introduces the electrical connection for the product. Please read the information carefully, it may helpful to understand the grounding wiring, DC input connection, AC output connection and communication connection. Caution: Before performing electrical connections, ensure the DC switch is OFF and AC circuit breaker is OFF. -
Page 37: Terminal Connector
75-136KTL User manual 5.6 Communication Connection Introduce the propose WIFI/USB, COM and how to connect WIFI/USB port. 5.7 Safety check Before operate inverter, check the PV array, inverter DC side safety connection and AC side safety connection. 5.1. Electrical Connection Figure 5-1flowchart for connecting cables to the inverter 5.2. -
Page 38: Grounding Connection (Pe)
75-136KTL User manual RS485 RS485 Communication RS485/DRMs Modbus/DRMs port/DRMs port AC output AC output terminal terminals Connecting terminal of the Grounding ground, choose at least one for grounding connection 5.3. Grounding Connection (PE) Connect the inverter to the grounding electrode using ground cable. SOFAR 75-136kW is a transformerless inverter which requires the positive pole and negative pole of the PV array are NOT grounded. -
Page 39: Connect Grid Side Of Inverter(Ac-Output)
75-136KTL User manual Figure 5-3 Grounding connection instruction(2) Note 1: L3 is the length between the insulation layer of the ground cable and crimped part. L4 is the distance between the crimped part and core wires protruding from the crimped part. Note 2: The cavity formed after crimping the conductor crimp strip shall wrap the core wires completely. - Page 40 75-136KTL User manual 00515.pdf Inverter has a standard and integrated residual current monitoring unit (RCMU), when inverter detected leakage current excess 300mA, it will cut off with utility grid for protection. For external Residual Current Device (RCD), the rated residual current shall be 300mA or higher.
- Page 41 75-136KTL User manual 5.4.2 Wiring Terminal and Precautions Note: Before connect to grid, please ensure the grid voltage and frequency of local grid meet the requirement of inverter , any question please seek local grid company for help. Inverter can only connect to grid after get the permission from local grid ...
- Page 42 75-136KTL User manual Figure 5-7 AC Terminal size 5.4.4 Wring Procedure The section will use a five core wire as a sample, four core wire has same connection process Figure 5-1 Recommend AC cable size Name Type Area(mm²) Recommended:Outdoor Copper Wire: 95~185; AC Cables Aluminum Wire: 120~240;...
- Page 43 75-136KTL User manual Step 5:Crimp the Terminal. Step 6:Depending on the grid configuration, connect L1, L2, L3 and N to the terminals according to the label and tighten the screw on the terminal using a screwdriver. - 39 - Copyright © Shenzhen SOFARSOLAR Co., Ltd...
- Page 44 75-136KTL User manual Note: Phase lines use M12 terminal connector, PE line use M8 terminal connector. The position of“PE”Line and “N”Line should not be opposite. Opposite position may cause inverter permanently faulty. As shown in the figure below ,for HV model ,the N-wire does not need to be ...
-
Page 45: Connect Pv Side Of Inverter(Dc-Input
75-136KTL User manual 5.5. Connect PV side of inverter(DC-Input) Note: Connecting PV strings into inverter must following the below procedure. Otherwise, any faulty cause by inappropriate operation will be including in the warranty case. Ensure the maximum short circuit current of PV strings should less than the ... - Page 46 75-136KTL User manual Figure 5-8 DC cable connection(1) Step 2: Crimp the PV metal contact pin to the striped cable using a proper crimping pliers; Step 3: Insert wire into the connector cap nut and assemble into the back of male or female plug, When you heard a “click”, the pin tact assembly is seated correctly.
- Page 47 75-136KTL User manual Figure 5-9DC cable connection Note : Please use multimeter to make sure the PV array positive pole and negative pole! Dealing : If need to remove the PV connector from inverter side, please use the Removal Tool as below diagram, move the connector gently. Before, moving the positive and negative connector, please make sure “DC Switch”...
-
Page 48: Communication Connection
75-136KTL User manual 5.6. Communication Connection Note:When layout the wiring diagram, please separate the communication wiring and power wiring in case the signal be affected. 5.6.1 USB/WIFI Port Port Description: updating USB:USB PORT software USB/WIFI port connect WIFI:WIFI PORT Wi-Fi/GPRS/Ethernet for data transmission Procedure:... - Page 49 75-136KTL User manual SOFAR 75-136KTL at its relevant website or APP according to monitoring device Figure 4-20 Connect one USB acquisition stick (WIFI version) to wireless router 5.6.2 COM—Multi function communication port Figure 5-3 Recommend com cable size Outer Name Type Area(mm²) diameter(mm)
- Page 50 75-136KTL User manual Ground 14-16 Blank PIN Procedure: ① ③ ② ④ ⑤ Communications Port Description Logic interface (a) Logic interface for AS/NZS 4777.2:2020, also known as inverter demand response modes (DRMs). The inverter will detect and initiate a response to all supported demand response commands within 2 s.
- Page 51 75-136KTL User manual DRM0 NOTE: Supported DRM command: DRM0, DRM5, DRM6, DRM7, DRM8. (b) Logic interface for VDE-AR-N 4105:2018-11, is in order to control and/or limit the inverter's output power. The inverter can be connected to a RRCR (Radio Ripple Control Receiver) in order to dynamically limit the output power of all the inverters in the installation.
- Page 52 75-136KTL User manual Logic interface for EN50549-1:2019, is in order to cease active power output within five seconds following an instruction being received at the input interface. Figure 4-15 Inverter – RRCR Connection RRCR Table 4-6 Function description of the terminal Pin NO.
- Page 53 75-136KTL User manual Figure 5-11 Picture of the RS485/USB converter and PC terminal If only one SOFAR 75-136KTL is used, use a communication cable, refer to section 5.6.2 for COM pin definition, and choose either of the two RS485 ports. Figure 5-12 A single SOFAR 75-136KTL connecting communications The length of the RS485 communication cable should be less ...
-
Page 54: Commissioning Of Inverter
75-136KTL User manual 6.Commissioning of inverter Outlines this Chapter Introduce SOFAR 75-136KTL safety inspection and start processing 6.1. Cable Connection Inspection For first time operation, check the AC voltage and DC voltage are within the acceptable range Attention AC grid connection Use multimeter to confirm that three lines and PE line are connect correctly. - Page 55 75-136KTL User manual out of incorrect country code selection. If the inverter indicates any fault, please refer to Section 8.1 of this manual —— trouble shooting for help. - 51 - Copyright © Shenzhen SOFARSOLAR Co., Ltd...
-
Page 56: Operation Interface
75-136KTL User manual 7.Operation interface Outlines of this chapter This section introduces the display, operation, buttons and LED indicator lights of SOFAR 75~136KTL Inverter. 7.1. Operation and Display Panel Buttons and Indicator lights Button: “ ” Short press UP button = go up “... -
Page 57: Standard Interface
75-136KTL User manual 7.2. Standard Interface LCD interface indicated inverter status, alarm information, communication connection, PV input current and voltage, grid voltage,current and frequency, today generation, total generation. Inverter working status, PV 1 -12 PV input voltage and current Inverter working status, PV generated power Inverter working status, today generated electricity Inverter working status, total generated electricity Inverter working status, grid voltage and current... - Page 58 75-136KTL User manual Inverter working status, grid voltage and frequency Inverter working status, Wi-Fi/ RS485 status Inverter faulty alarm When power turn on, LCD interface displays INITIALIZING, refer below picture. When control board successfully connected with communication board, the LCD display the current state of the inverter,display as shown in the figure below.
- Page 59 75-136KTL User manual Inverter states includes: wait, check, normal, fault and permanent Wait:Inverter is waiting to Check State when reconnect the system. In this state, grid voltage value is between the max and min limits and so on; If not, Inverter will go to Fault State or Permanent State.
-
Page 60: Main Interface
75-136KTL User manual 7.3. Main Interface Long press the down button under standard interface to enter into main interface, Main interface including below information: Normal ---------Long press DOWN button 1.Enter Setting 2.Event List 3.SystemInfo 4.Display Time 5.Software Update (A)Enter setting Interface as below: 1.Enter Setting --------Long press DOWN button 1.Set time... - Page 61 75-136KTL User manual Clean up the historical events recorded in the inverter. 4. Country Country Long press button, enter interface, save the specific file into USB and insert USB into inverter communication port. 5. On-Off Control Inverter on-off local control. 6.
- Page 62 75-136KTL User manual Shadow scanning, when the component is blocked or abnormal, causing multiple power peaks, by enabling this function, the peak point of maximum power can be tracked. 13. PID Enable or disable PID function. When the PID module is enabled(enter the default password: 0001),it will work between 0 a.m.
-
Page 63: Updating Inverter Software
75-136KTL User manual current system time. (C) Software Update User can update software by USB flash drive , SOFARSOLAR will provide the new update software called firmware for userif it is necessary,The user needs to copy the upgrade file to the USB flash drive. 7.4. - Page 64 75-136KTL User manual Step 6: Input the password,if password is correct,and then begin the update process,the original password is 0715. Step 7: System update main DSP, slave DSP and ARM in turns.If main DSP update success,the LCD will display"Update DSP1 Success", otherwise display "Update DSP1 Fail";If slave DSP update success,the LCD will display"Update DSP2 Success",otherwise display "UpdateDSP2 Fail".
-
Page 65: Trouble Shooting And Maintenance
75-136KTL User manual 8.Trouble shooting and maintenance 8.1. Troubleshooting This section describes the potential errors for this product. Please read carefully for the following tips when doing the troubleshooting: 1) Check the warning message or faulty codes on the inverter information panel 2) If not any error code display on the panel, please check the following lists: —... - Page 66 75-136KTL User manual after obtaining approval from the local electrical grid operator. Charge Leakage ID005 GFCI Check for inverter and wiring. Fault OVRT function is ID006 OVRT If the alarm occurs occasionally, the possible faulty cause is that the electric grid is abnormal occasionally.
- Page 67 75-136KTL User manual consistency error ConsistentDC DCI consistency ID031 error SpiCommFau SPI communication ID033 lt(DC) error (DC) SpiCommFau SPI communication ID034 lt(AC) error (AC) ID035 SChip_Fault Chip error (DC) ID036 MChip_Fault Chip error (AC) HwAuxPowe Auxiliary power ID037 rFault error Relay detection ID041 RelayFail...
- Page 68 75-136KTL User manual Module 1 ID059 TempErrInv1 temperature protection Module 2 ID060 TempErrInv2 temperature protection Module 3 ID061 TempErrInv3 temperature protection Inverter Module TempDiffErrI Temperature ID062 Difference is too large BusRmsUnba Unbalanced bus ID065 lance voltage RMS Internal faults of inverter, switch OFF inverter, The transient value wait for 5 minutes, then switch ON inverter.
- Page 69 75-136KTL User manual tant software protection PV flows in uneven ID087 IpvUnbalance parallel Unbalanced output ID088 IacUnbalance current SwAcCBCFa Software AC Over ID091 Current Protection Inverter bus ID098 HwBusOVP hardware overvoltage HwBuckBoos BuckBoosthardware ID099 tOCP overflows PV hardware ID102 HwPVOCP overflows Ac output hardware ID103...
- Page 70 75-136KTL User manual permanent failure Permanent failure PermIacUnba ID135 of unbalanced lance output current Input mode setting PermInCfgEr ID137 error permanent Check the PV input mode (parallel/independent failure mode) Settings for the inverter. If not, change the PV input mode. PermDCOCP Input overcurrent ID138...
- Page 71 75-136KTL User manual Drms0Shutdo The inverter is performed with a Drms0 ID163 Drms0 shutdown shutdown. RemoteDerati The inverter is performed for remote load ID165 Remote derating reduction. LogicIfDerati Logic interface The inverter is loaded by the execution logic ID166 derating interface.
-
Page 72: Anti-Pid
75-136KTL User manual Cleaning. Inverter cleaning Please clean the inverter with an air blower, a dry & soft cloth or a soft bristle brush. Do NOT clean the inverter with water, corrosive chemicals, detergent, etc. Heat sink cleaning For the long-term proper operation of inverters, ensure there is enough space around the heat sink for ventilation, check the heat sink for blockage (dust, snow, etc.) and clean them if they exist. - Page 73 75-136KTL User manual When the inverter is not running, the PID module will apply reverse voltage to the photovoltaic module to restore the degraded module. If the PID recovery function is enabled, the PID works only at night. After the PID recovery function is enabled, the PV series voltage to ground is 500Vdc by default.
-
Page 74: Technical Data
75-136KTL User manual 9.Technical Data Outlines of this Chapter This topic lists the technical specifications for SORFAR 80-136KTL inverter 9.1. Input parameters (DC) SOFAR SOFAR SOFAR SOFAR SOFAR SOFAR SOFAR Parameter 100KTL 125KTL 136KTL 75KTL 80KTL 100KTL 110KTL Max input 26A*8 26A*10 26A*12... -
Page 75: Output Parameter (Ac)
75-136KTL User manual 9.2. Output Parameter (AC) SOFAR SOFAR SOFAR SOFAR SOFAR SOFAR SOFAR Parameter 100KTL 125KTL 136KTL 75KTL 80KTL 100KTL 110KTL Rated Power 75KW 80KW 100KW 110KW 100KW 125KW 136KW Max AC power 75KVA 88KVA 110KVA 121KVA 110KVA 137KVA 150KVA Rated output 108A... -
Page 76: Performance Parameter
75-136KTL User manual 9.3. Performance Parameter SOFAR SOFAR SOFAR SOFAR SOFAR SOFAR SOFAR Parameter 100KTL 125KTL 136KTL 75KTL 80KTL 100KTL 110KTL 98.60% 98.60% 98.70% 98.75% 98.80% 99.00% 99.00% efficiency European Weighted 98.20% 98.20% 98.30% 98.30% 98.50% 98.50% 98.51% efficiency MPPT >99.9% efficiency Safety... -
Page 77: General Data
75-136KTL User manual 9.4. General Data SOFAR SOFAR SOFAR SOFAR SOFAR SOFAR SOFAR 100KTL 125KTL 136KTL- Parameter 75KTL 80KTL 100KTL 110KTL Topology Transformless Operation -30~60℃ Temperature Relative 0%~100% humidity DC Switch Cooling Smart forced air cooling Altitude 2000m Dimension 995.5*663.5*368mm Display LCD+ Bluetooth +APP Mounting... -
Page 78: Quality Assurance
75-136KTL User manual 10. Quality Assurance Standard warranty period The standard warranty period of inverter is 60 months (5 years).There are two calculation methods for the warranty period: Purchase invoice provided by the customer: the first flight provides a standard warranty period of 60 months (5 years) from the invoice date;... - Page 79 75-136KTL User manual extended warranty card to the customer to confirm the extended warranty period. Invalid warranty clause Equipment failure caused by the following reasons is not covered by the warranty: 1) The "warranty card" has not been sent to the distributor or our company; 2) Without the consent of our company to change equipment or replace parts;...
- Page 80 ADD:11/F., Gaoxinqi Technology Building, No.67 Area, Xingdong Community, Xin’an Sub- district, Bao’an District, Shenzhen City,China Email: service@sofarsolar.com Tel: 0510-6690 2300 Web: www.sofarsolar.com...
Need help?
Do you have a question about the SOFAR 75KTL and is the answer not in the manual?
Questions and answers