Table of Contents
Advertisement
Quick Links
Advertisement
Table of Contents

Subscribe to Our Youtube Channel
Related Manuals for Agreto AgriCounter Drive


Summary of Contents for Agreto AgriCounter Drive
- Page 1 User Manual Acre meter AGRETO AgriCounter Drive © AGRETO electronics GmbH...
-
Page 2: Table Of Contents
AGRETO AgriCounter Drive Content Introduction ......................3 Scope of delivery ....................3 Intended use ......................3 Security ......................... 4 Safety instructions for the buyer ..................4 Safety instructions for the operator ................. 4 Personal protective equipment ..................4 Residual risks ........................5 Technical specifications .................. -
Page 3: Introduction
AGRETO AgriCounter Drive 1 Introduction Thank you for choosing an AGRETO AgriCounter Drive. You have acquired a robust tool for daily use. Please read this manual carefully before using the equipment. 2 Scope of delivery 1 Display unit 1 Mounting plate ... -
Page 4: Security
AGRETO AgriCounter, has read and understood this manual. Safety instructions for the operator DANGER! The AGRETO AgriCounter may only be operated by persons who are familiar with the operation of the device. CAUTION! Keep the work area clean! Soiled areas contributes to accidents. -
Page 5: Residual Risks
When using the device residual hazards for persons and objects may occur that can‘t be prevented by design or technical protection measures. WARNING! The AGRETO AgriCounter must not be operated in explosive areas. 5 Technical specifications Packaging dimensions: 220x160x50 mm (LxWxH) ... -
Page 6: Configuration
AGRETO AgriCounter Drive 6 Configuration Selection of the operating mode The AGRETO AgriCounter Drive has 7 operating modes, in which various data can be recorded. First, decide which operating mode is suitable to your application, set the required settings if necessary, and then mount the counter on your machine! Operating mode 2A –... - Page 7 AGRETO AgriCounter Drive Operating mode 2E – Revolutions In this mode, the counter registers the number of revolutions around its own axis, the total is displayed. The counter can be mounted on any rotating part. Operating mode 2F – Revolutions and hours In this mode, the revolutions are counted as in 2E.
-
Page 8: Operating Keys
AGRETO AgriCounter Drive Operating Keys The control buttons are located inside the device and accessible from the back with the mounting plate removed. To change settings, look at the buttons and then turn the device with the display to the front to read the display. - Page 9 AGRETO AgriCounter Drive To determine the area, the parameter WidE - working width must be set. The parameters SENS and hoLd are only relevant for the hour counting; the default settings should be suitable for most applications. To open the parameter menu, briefly press the "M" key. The first parameter that is relevant for the set operating mode appears on the display.
- Page 10 AGRETO AgriCounter Drive 4 = default 10 = lowest sensitivity (only counts for extreme movements) The parameter SENS is related to the parameter hoLd, since a movement must always have a certain intensity and must be present for a certain period of time in order to trigger the summation.
-
Page 11: Zeroing The Counter
"Configuration" before. Positioning of the meter Fort he accurate counting process the AgriCounter Drive must rotate depending to the path. It must be mounted directly on the rim of a wheel or on another path-dependent rotating part. The number of revolutions should be between 5 and 200 per minute during operation. -
Page 12: Fixing The Mounting Plate
AGRETO AgriCounter Drive Mounting examples: Fixing the mounting plate On delivery, the meter is mounted on the mounting plate. Disassemble the meter from the mounting plate. Hold the mounting plate in the desired position to the desired mounting position. -
Page 13: Fastening The Counter
AGRETO AgriCounter Drive Fastening the counter Place the counter on the base plate. Use the 4 allen screws M5x8. Two of them have a small hole for the seal wire, use these two on the side where you want to attach the seal. -
Page 14: Working With The Device
AGRETO AgriCounter Drive 8 Working with the device The AgriCounter Drive permanently shows the results of the summation or calculation depending on the mode, operation for reading is not provided. The display is updated approximately every 5 seconds. Reading the area (mode 2A, 2B) -
Page 15: Reading The Hours (Mode 2B, 2D, 2F)
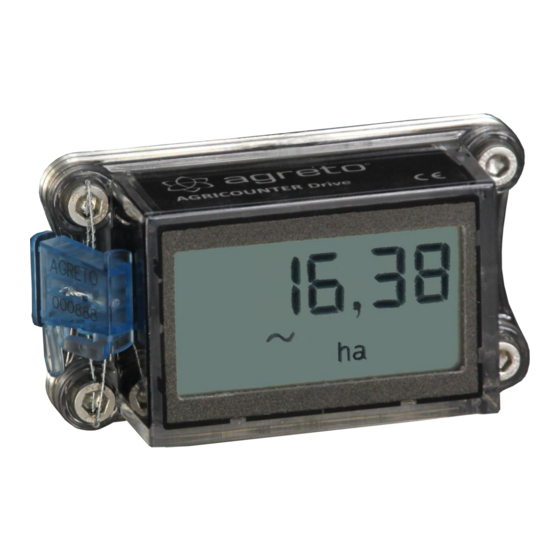
AGRETO AgriCounter Drive Reading the hours (mode 2B, 2D, 2F) In these operating modes, the sum of the area (or distance or revolutions) and the sum of the hours counted are displayed alternately every approx. 5 seconds. The symbol h indicates that the number displayed is the sum of the hours. - Page 16 AGRETO AgriCounter Drive The display ha means that the number displayed is the sum of the hectares. The s lights up in the setting mode when a parameter value is expected in seconds. The m lights up in setting mode when a parameter value in meters is expected.
-
Page 17: Maintenance And Cleaning
AGRETO AgriCounter Drive 9 Maintenance and cleaning The AgriCounter basically does not require ongoing maintenance. If the display is dirty, clean it for reading. If the battery symbol is lit, replace the batteries. 10 Troubleshooting 10.1 The battery symbol lights up The batteries need to be replaced, follow these steps: Remove the seal and the seal wire. -
Page 18: Operating Hours Are Not Counted Completely
AGRETO AgriCounter Drive 10.5 Operating hours are not counted completely The movements or vibrations on the machine are probably relatively low, so that the necessary intensity for the count is not reached. Set the parameter SENS down so that the counter triggers even with minor ... -
Page 19: Warranty
AGRETO AgriCounter Drive 11 Warranty Over and above statutory warranty for AGRETO AgriCounter Drive following warranty provisions apply : The AGRETO electronics GmbH guarantees the function and repairs or replaces all the parts that have a material or manufacturing damage within the warranty period. -
Page 20: Imprint
All information, specifications and illustrations are as of 2020, subject to technical changes or design changes. All information in this manual are supplied without liability despite careful preparation. A liability by the author is excluded. Copyright © 2020, AGRETO electronics GmbH AGRETO electronics GmbH Pommersdorf 11 A-3820 Raabs Tel.: +43 2846 620...
Need help?
Do you have a question about the AgriCounter Drive and is the answer not in the manual?
Questions and answers